Emperor's Children Horus Heresy : Step-by-Step Painting Guide
Paint rich third Legion purple from an Imperial Purple spray foundation, with controlled purple highlights, brush-painted metallics and a Marine Juice finish. No airbrush required.

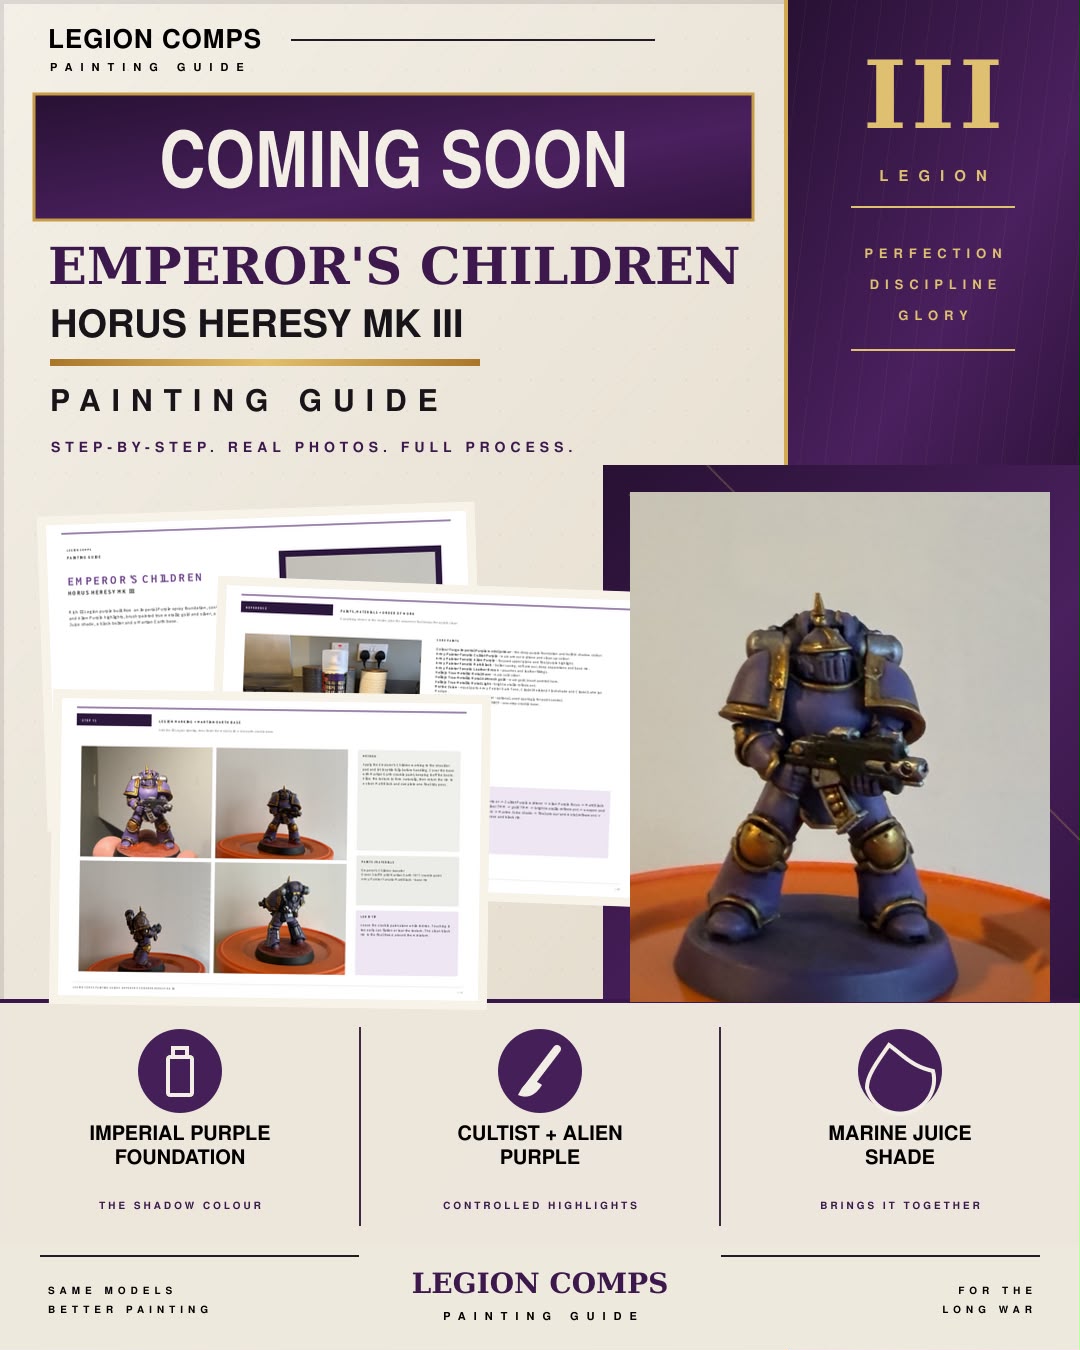
Rich third Legion purple built from an Imperial Purple spray foundation, controlled Cultist Purple and Alien Purple highlights, brush-painted true metallic gold and silver, a unifying Marine Juice shade, a black bolter and a Martian Earth base.
Before you start
This is a no-airbrush armour recipe. The primer supplies the shadow colour. Lighter purples are added only where the armour catches the light, then Marine Juice ties the finished block-in together before the final highlights are restored.
Follow the stages in order:
Clean build → Imperial Purple primer → Cultist Purple midtone → Alien Purple focus → Matt Black structure → Leather Brown → silver TMM → gold TMM → bright metallic refinement → weapon and small details → full block-in check → Marine Juice shade → final armour and metal refinement → Legion marking, Martian Earth base and black rim.
Step 1: Clean build
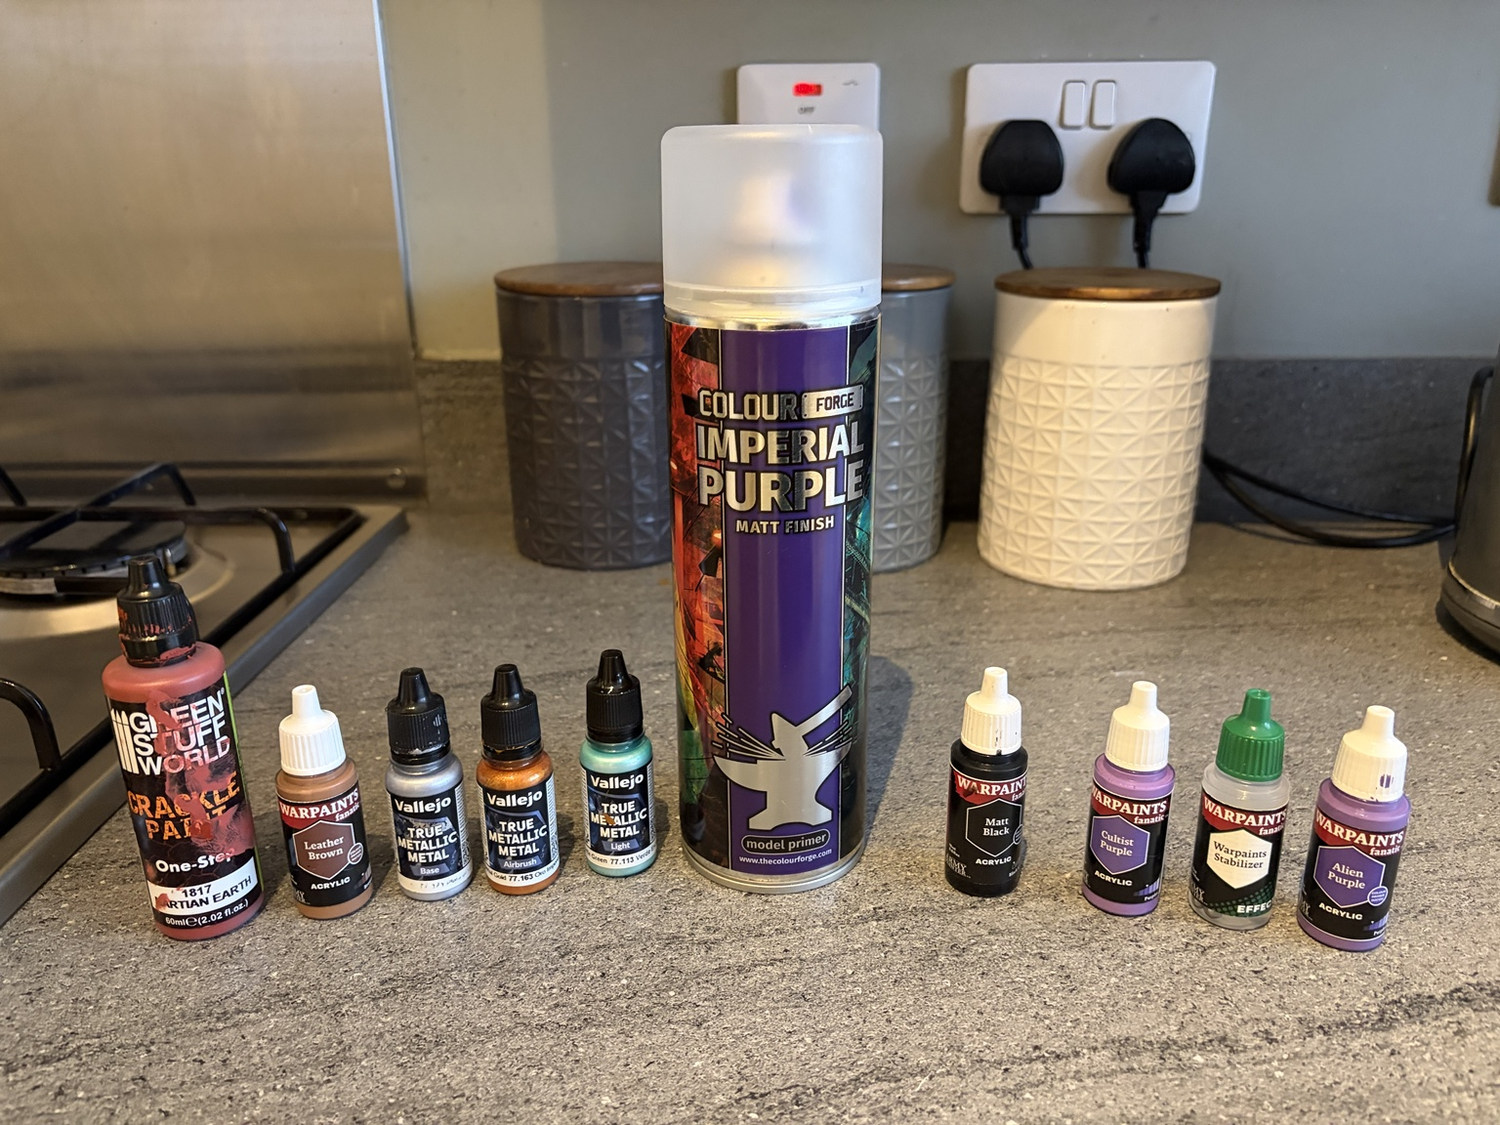
Bare Mk III reference views before any paint.
Paints and materials
- Built Mk III miniature
- Hobby knife / file as required
Method
Clean the miniature, remove obvious mould lines and check every join. Make sure the shoulder trim, helmet crest, bolter, backpack and pouches remain reachable. The later colour separation depends on these plate edges being clean.
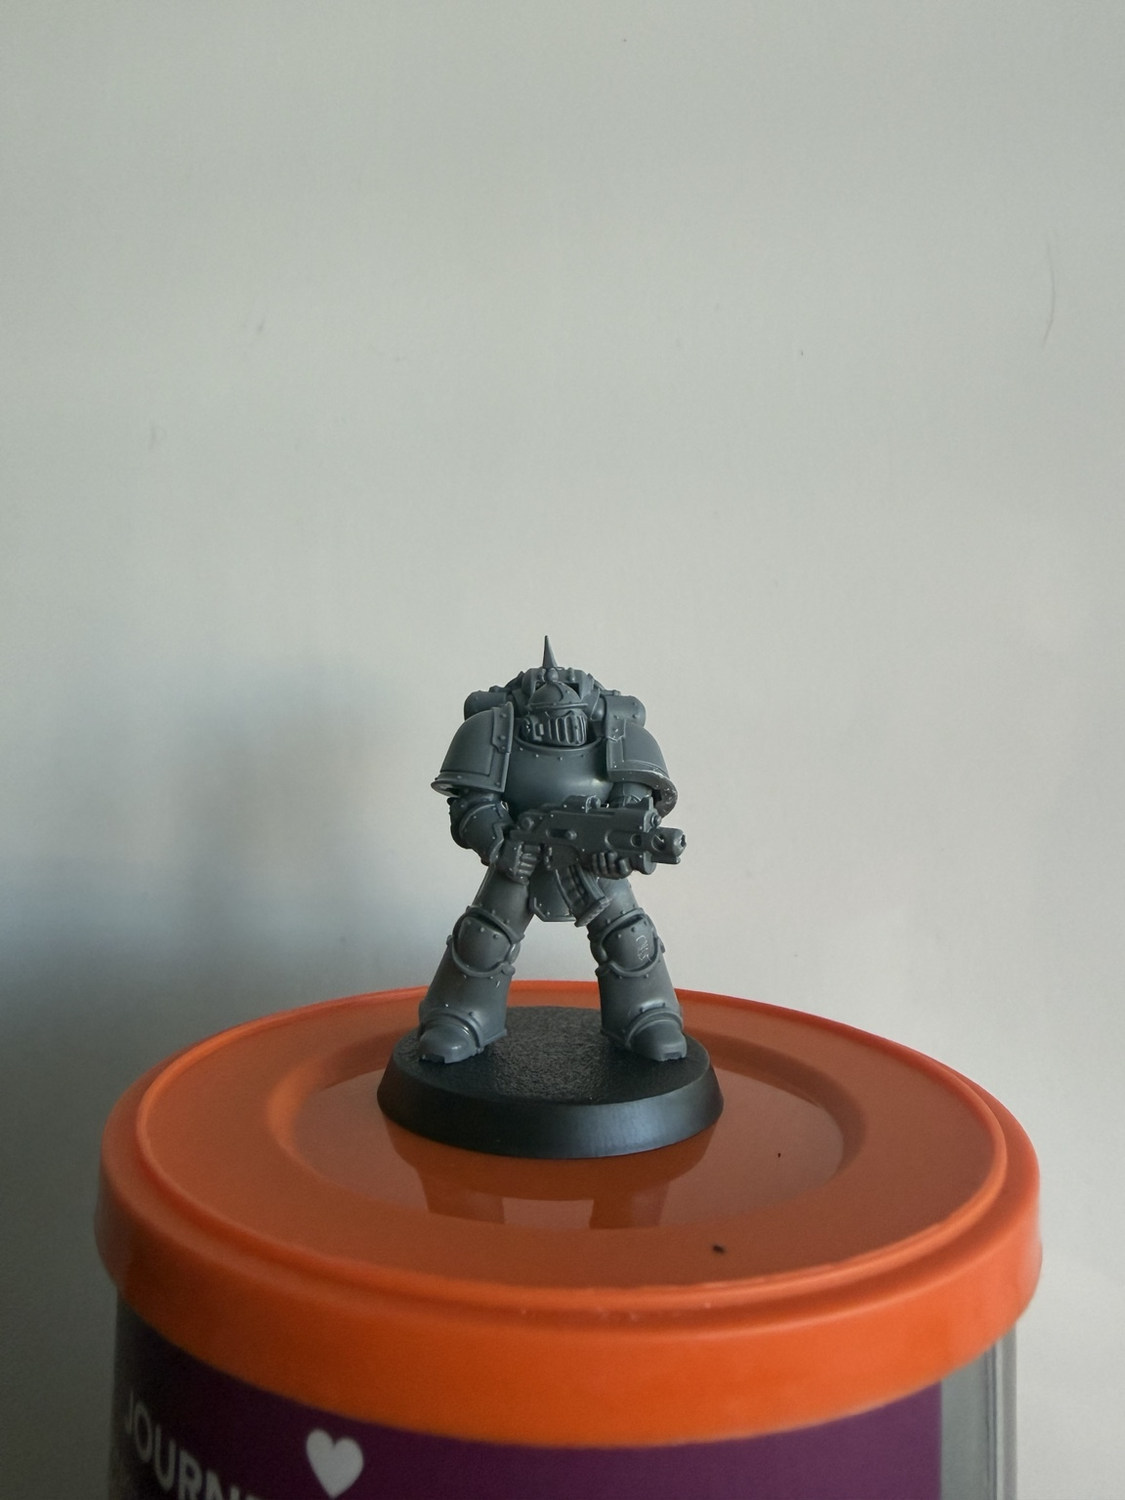
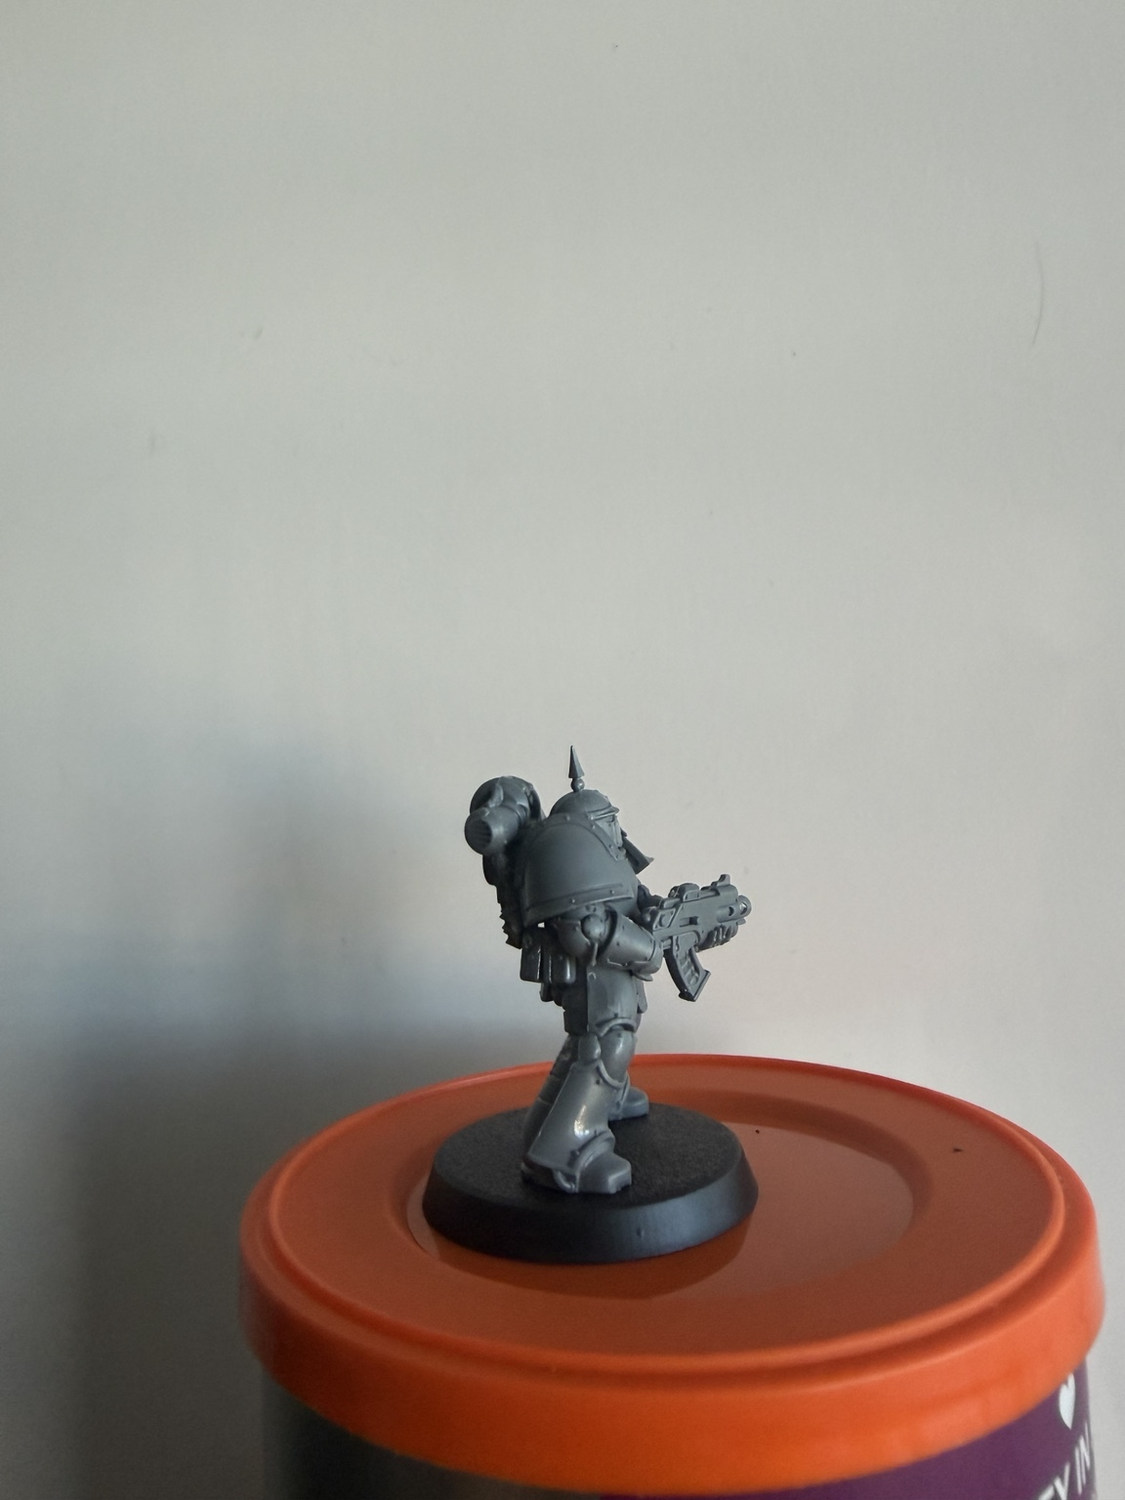
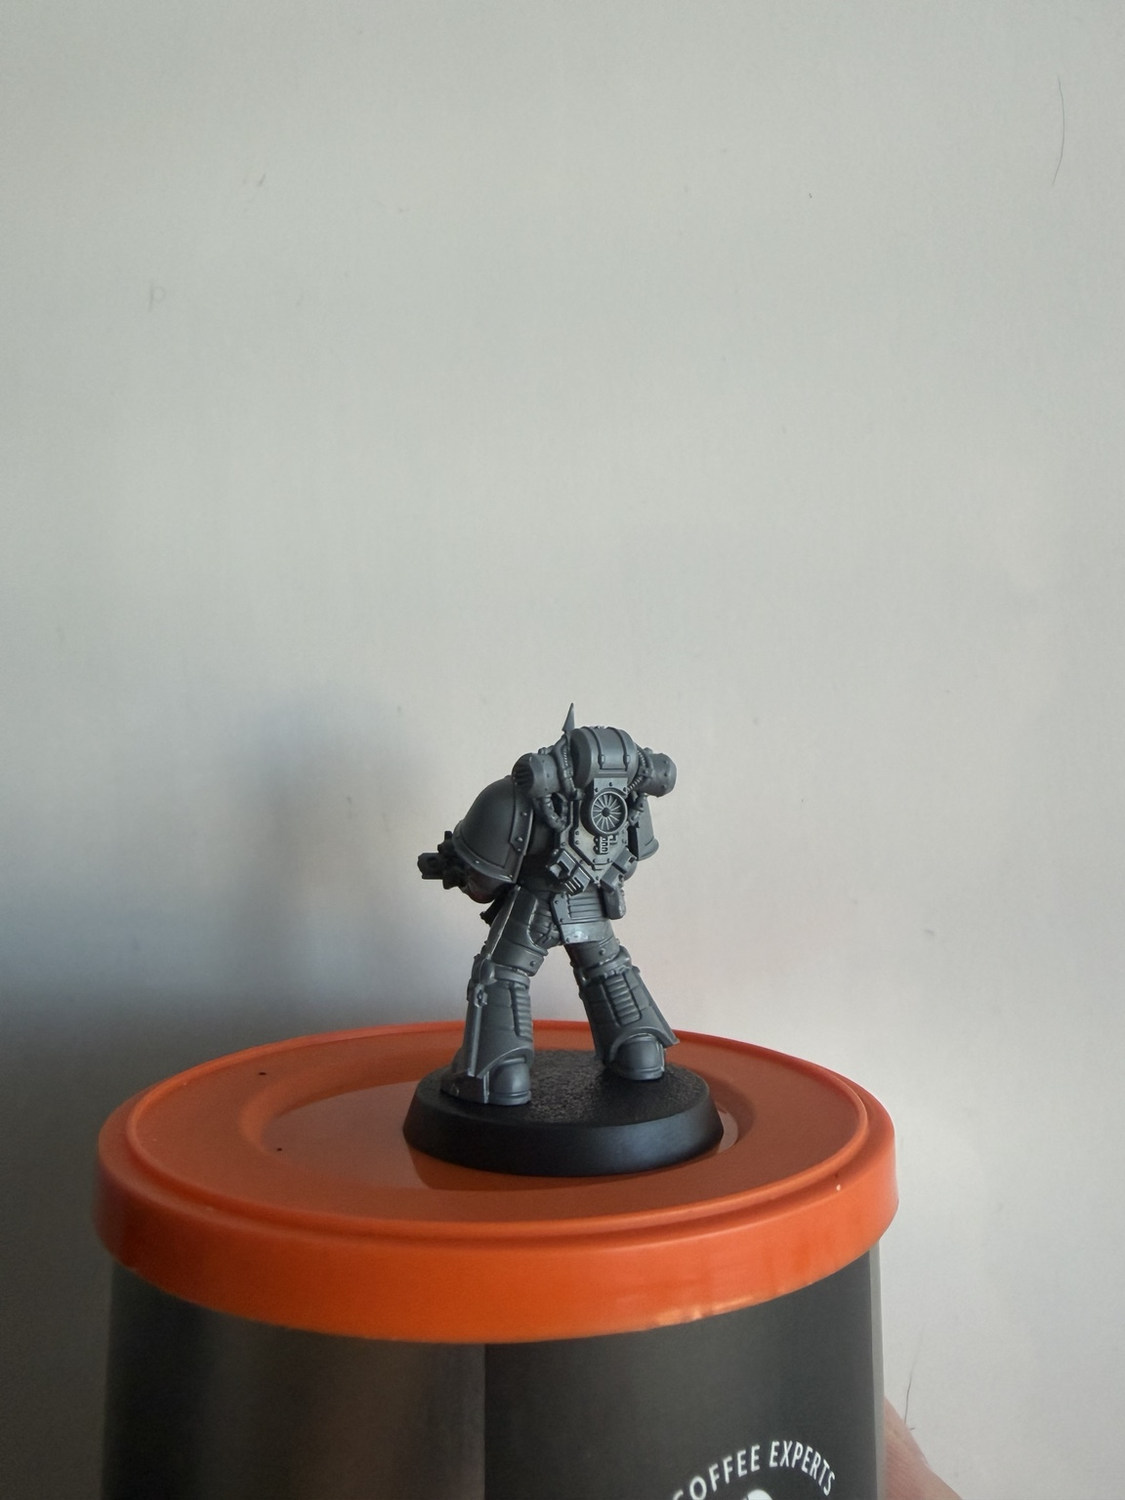
Lewis’s tip: Take reference photographs now. They make it far easier to judge how much the purple has changed and where later metallic paint has strayed.
Step 2: Imperial Purple foundation
Colour Forge Imperial Purple establishes the armour and the deepest shadows.
Paints and materials
- Colour Forge Imperial Purple model primer
Method
Prime the entire miniature with Colour Forge Imperial Purple. Use short passes and turn the model so the spray reaches beneath the shoulder rims, around the backpack and between the legs. The coat needs to be even, but do not flood the rivets or plate joins.
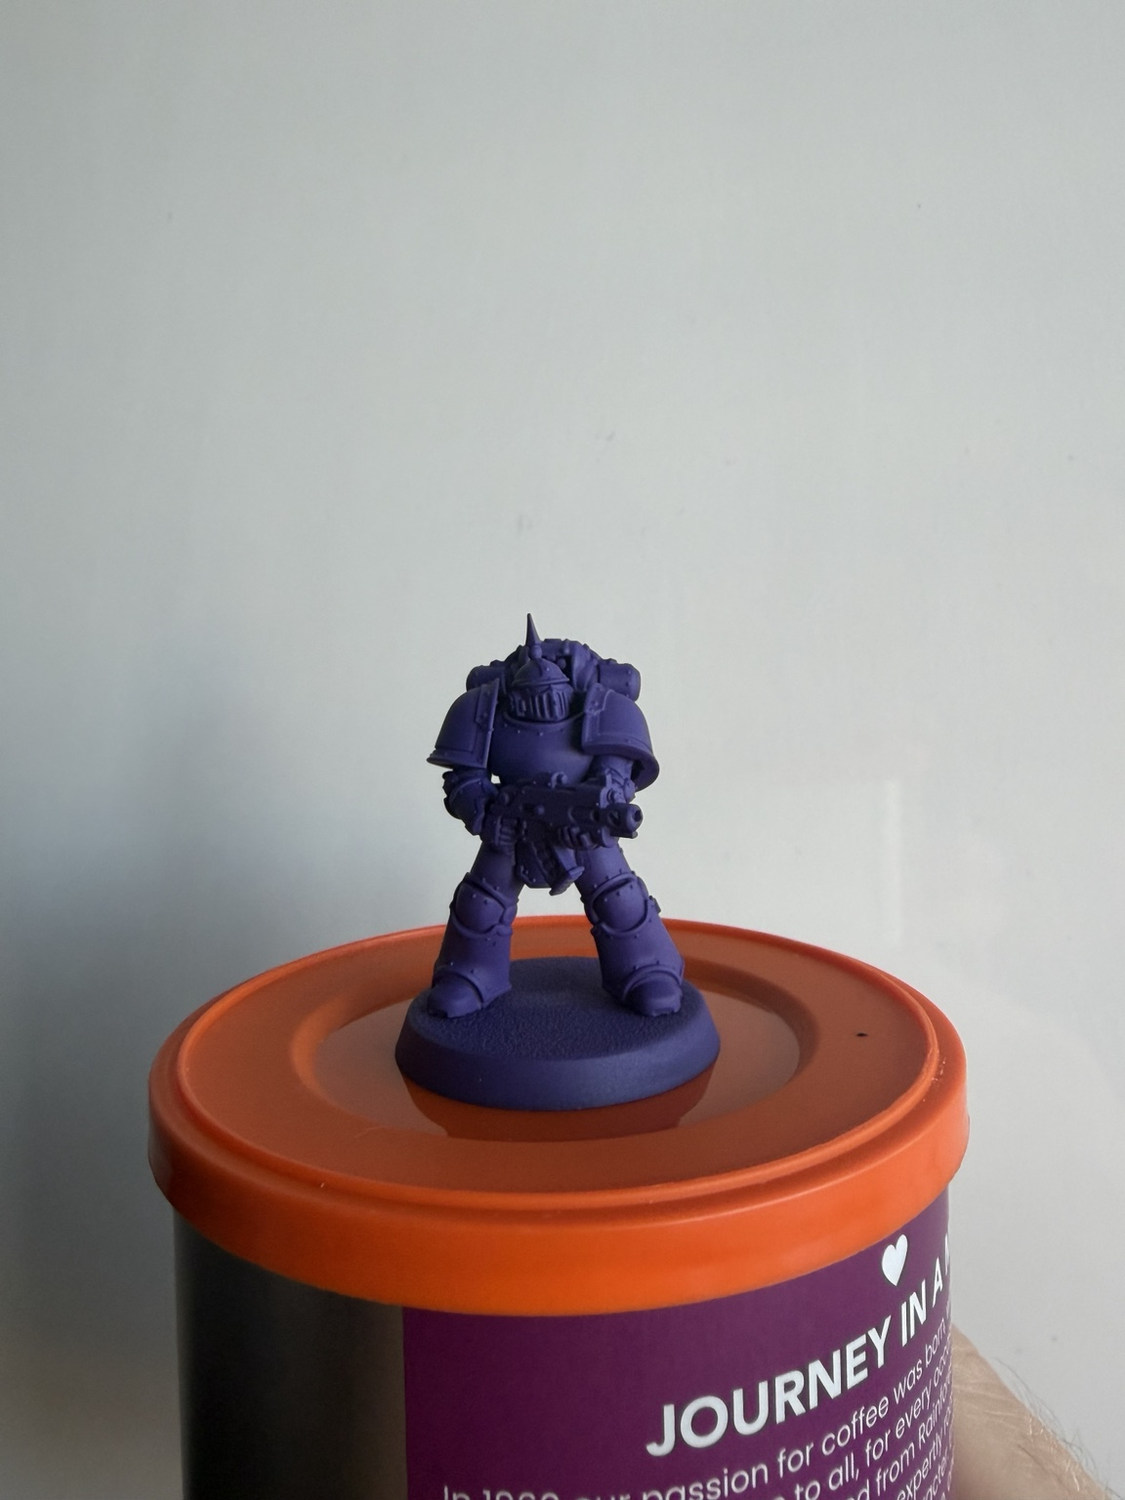
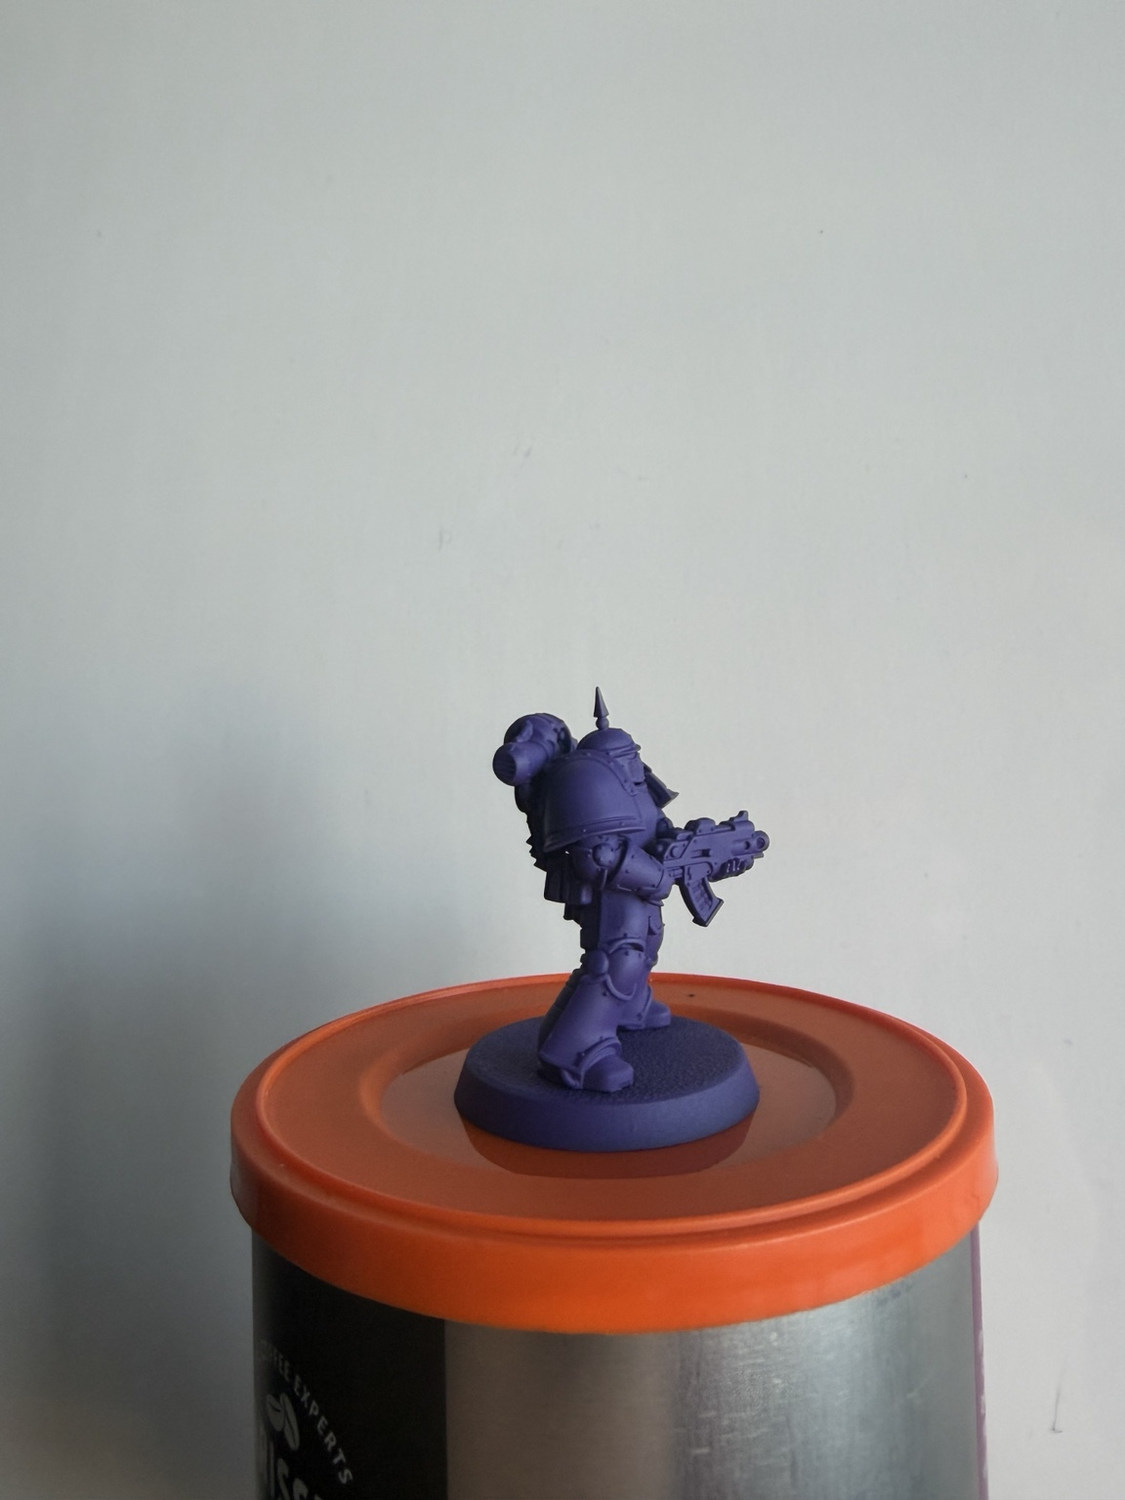
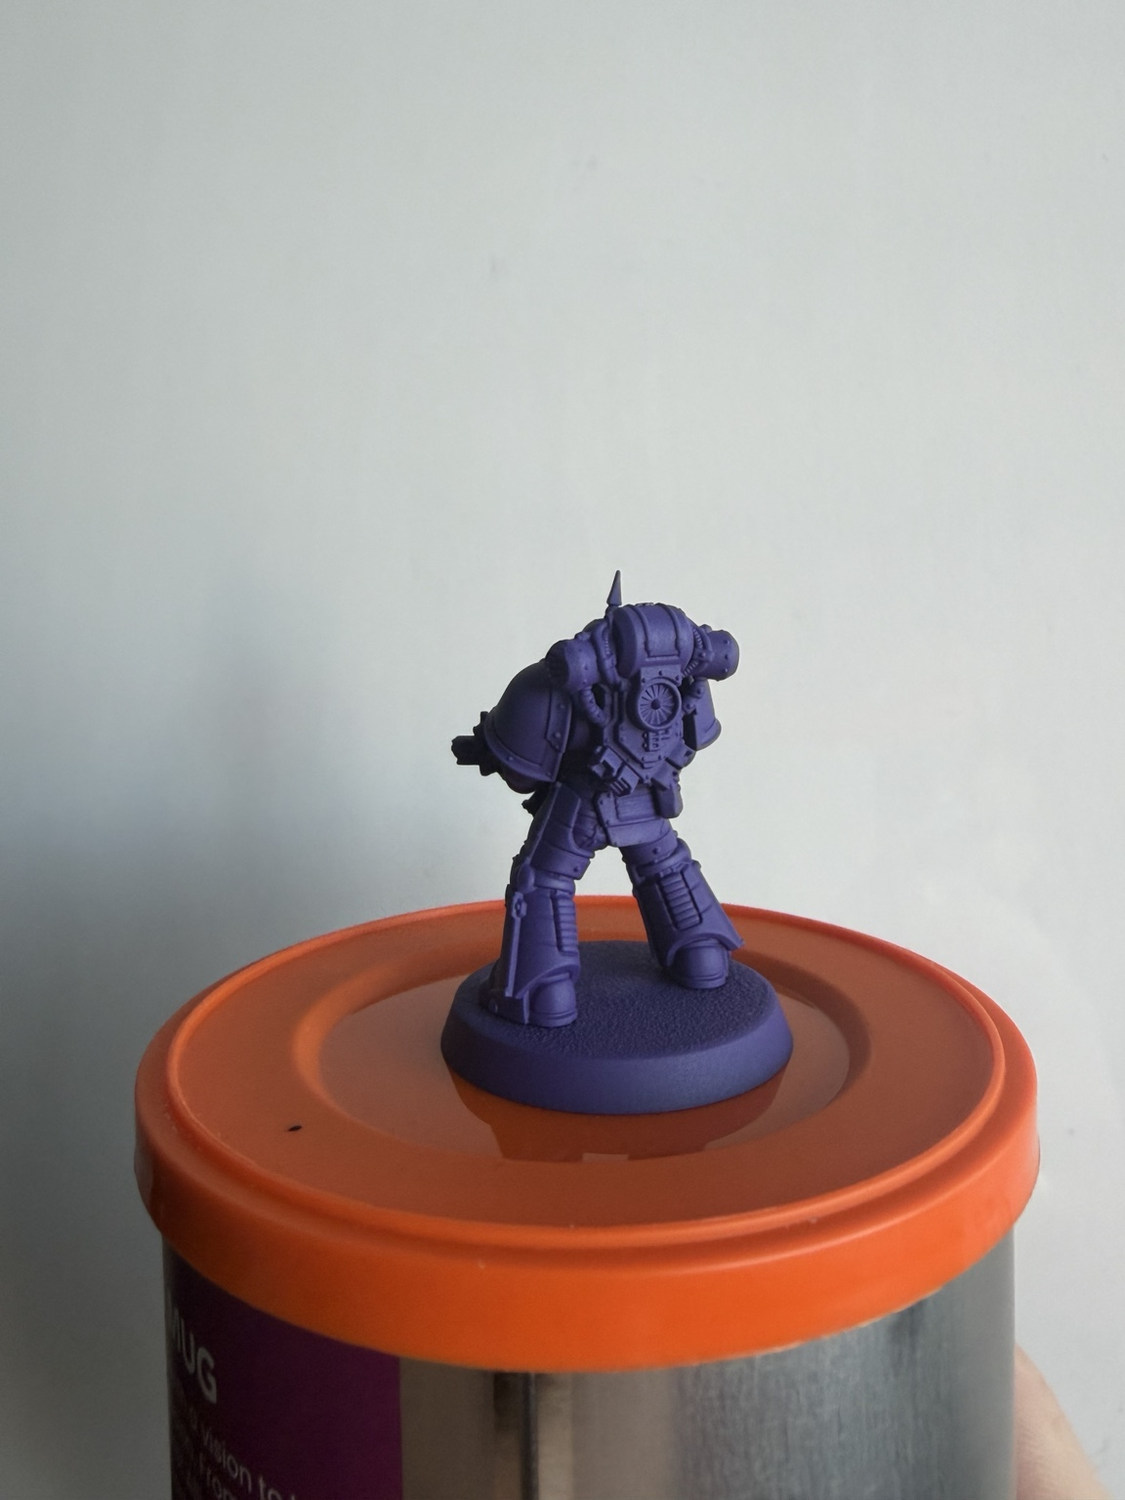
Lewis’s tip: This primer is not merely a convenient base coat - it is the darkest purple in the final armour. Solid coverage now gives the lighter stages something consistent to build over.
Step 3: Cultist Purple midtone
Build the readable armour colour while preserving the primer in the recesses.
Paints and materials
- Army Painter Fanatic Cultist Purple
- Warpaints Stabilizer — optional, only if needed for control
Method
Apply Cultist Purple across the broad, exposed armour plates. Keep the Imperial Purple primer visible around joins, beneath rims, behind the legs and on the lower-facing surfaces. Use thin, controlled coats rather than trying to make every plate one flat colour.
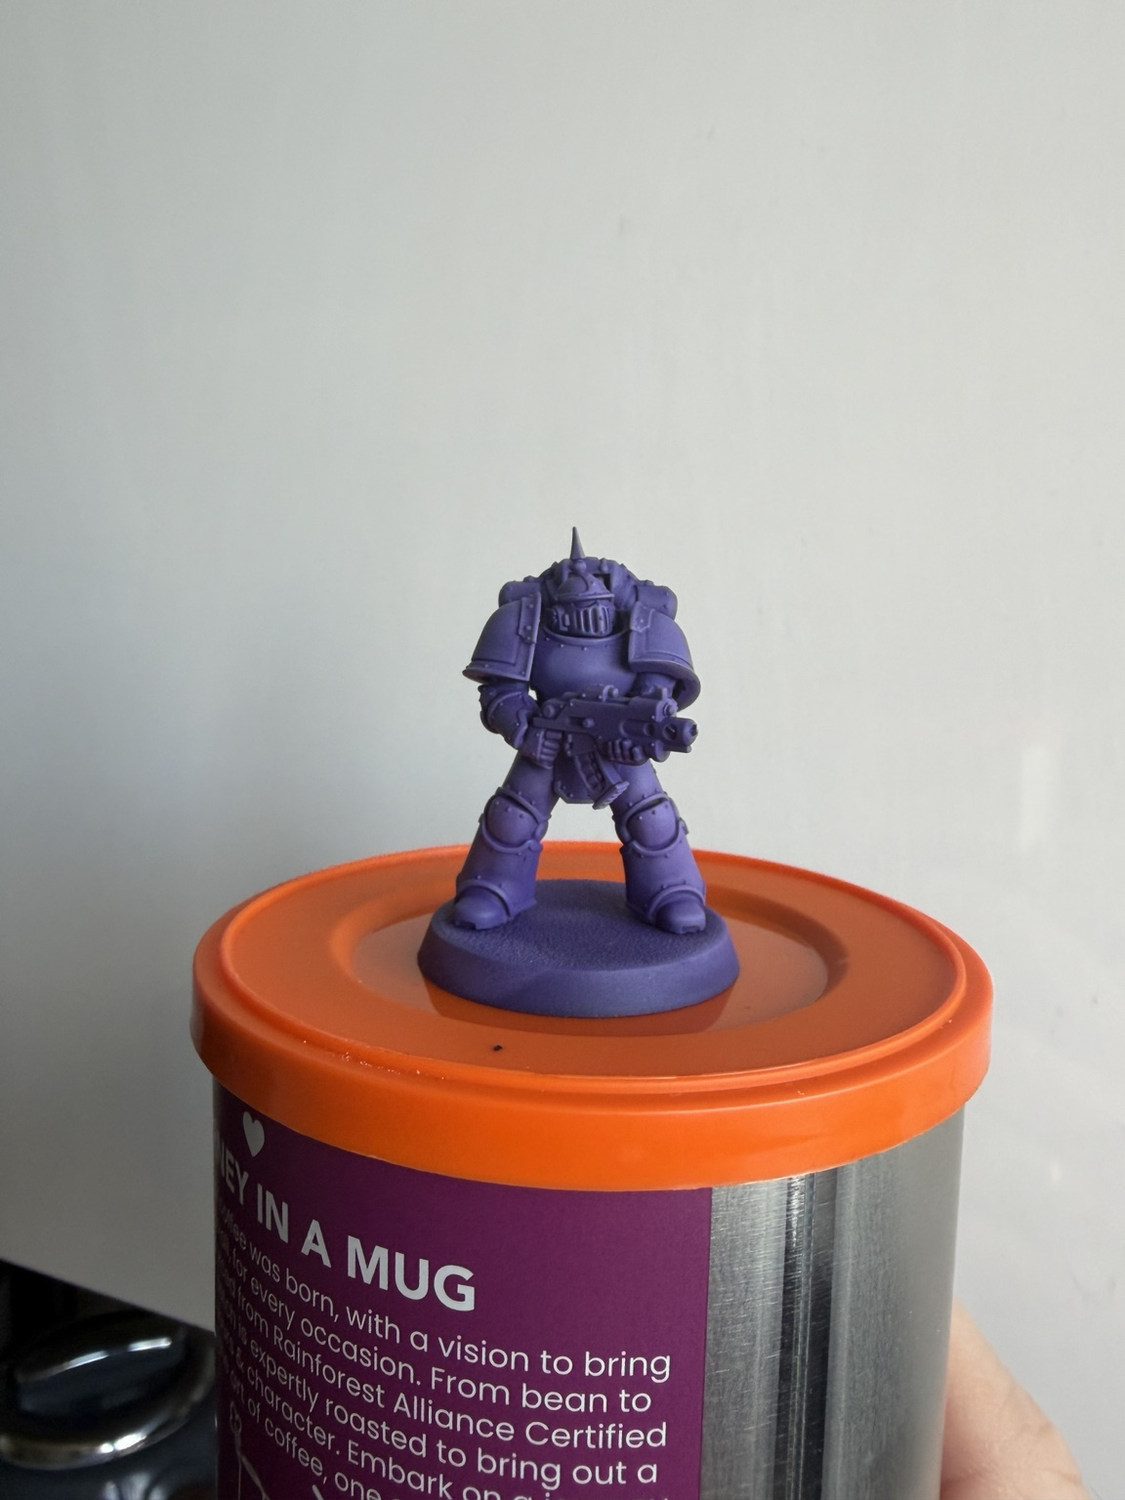
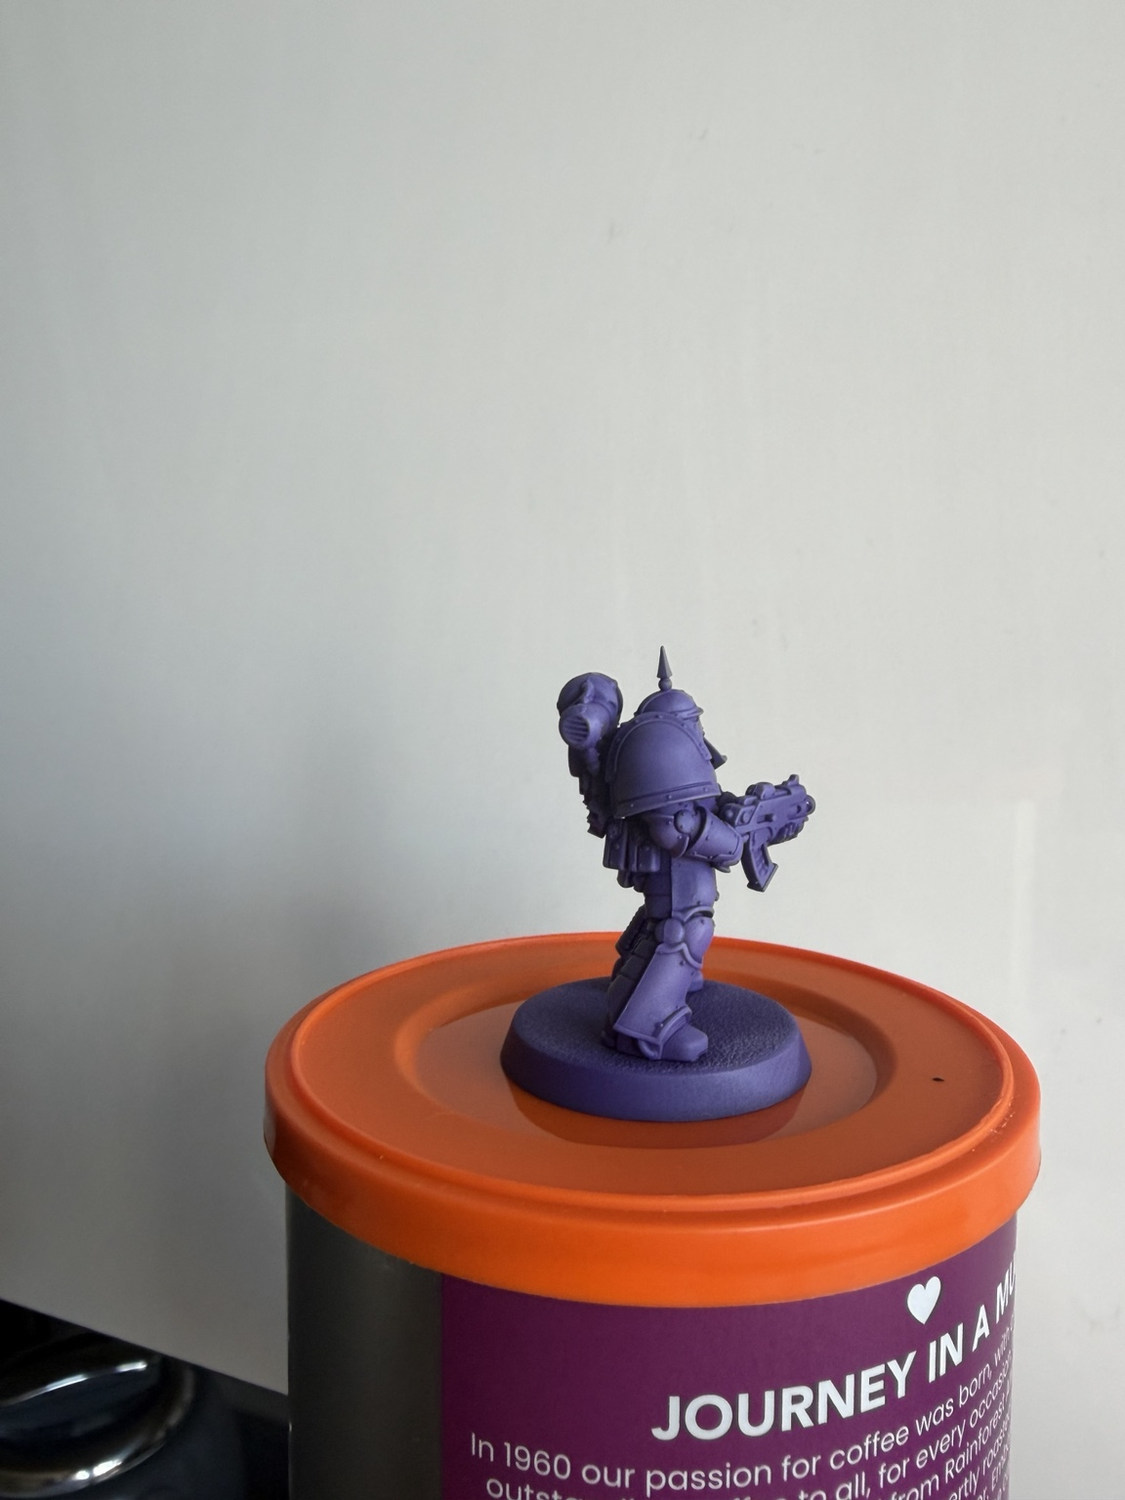
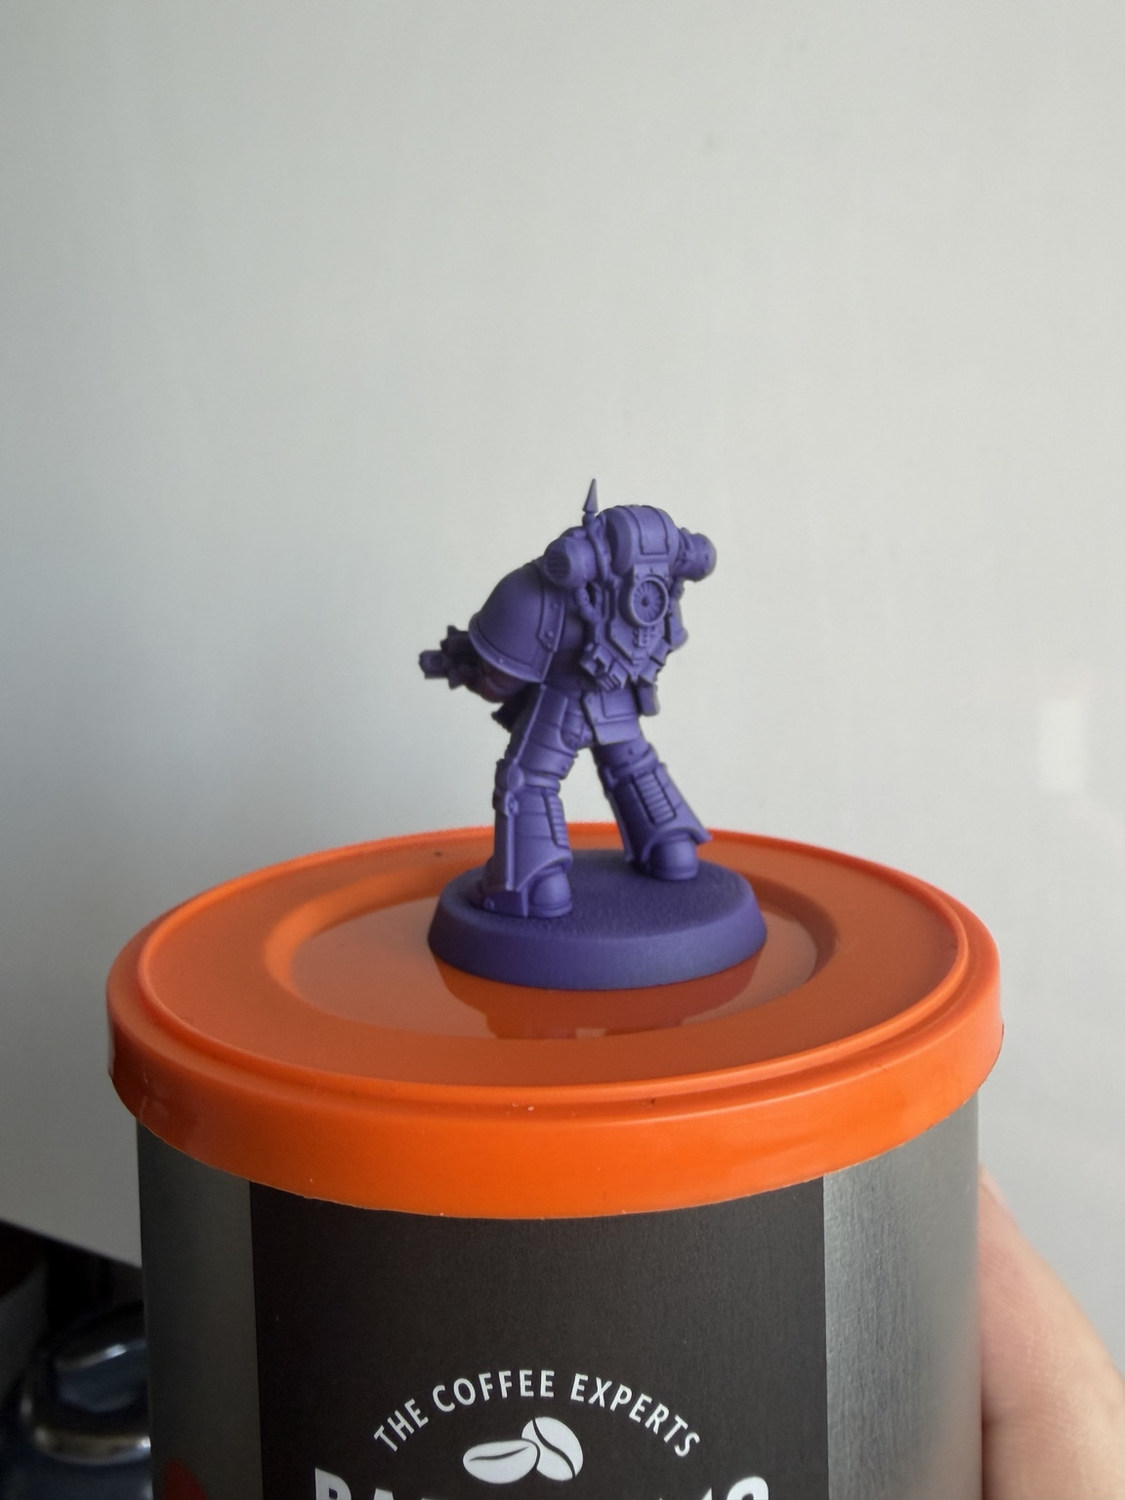
Lewis’s tip: Do not chase full coverage into every recess. The untouched primer is what creates the depth; painting over it everywhere would flatten the model.
Step 4: Alien Purple focus
Concentrate the brighter purple on the armour that catches the light.
Paints and materials
- Army Painter Fanatic Alien Purple
- Cultist Purple for correction
Method
Use Alien Purple more selectively than Cultist Purple. Focus on the helmet, upper chest, shoulder curves, forearms, knees and the fronts of the greaves. Feather or stipple the edges back into the Cultist Purple so the change feels controlled rather than striped.
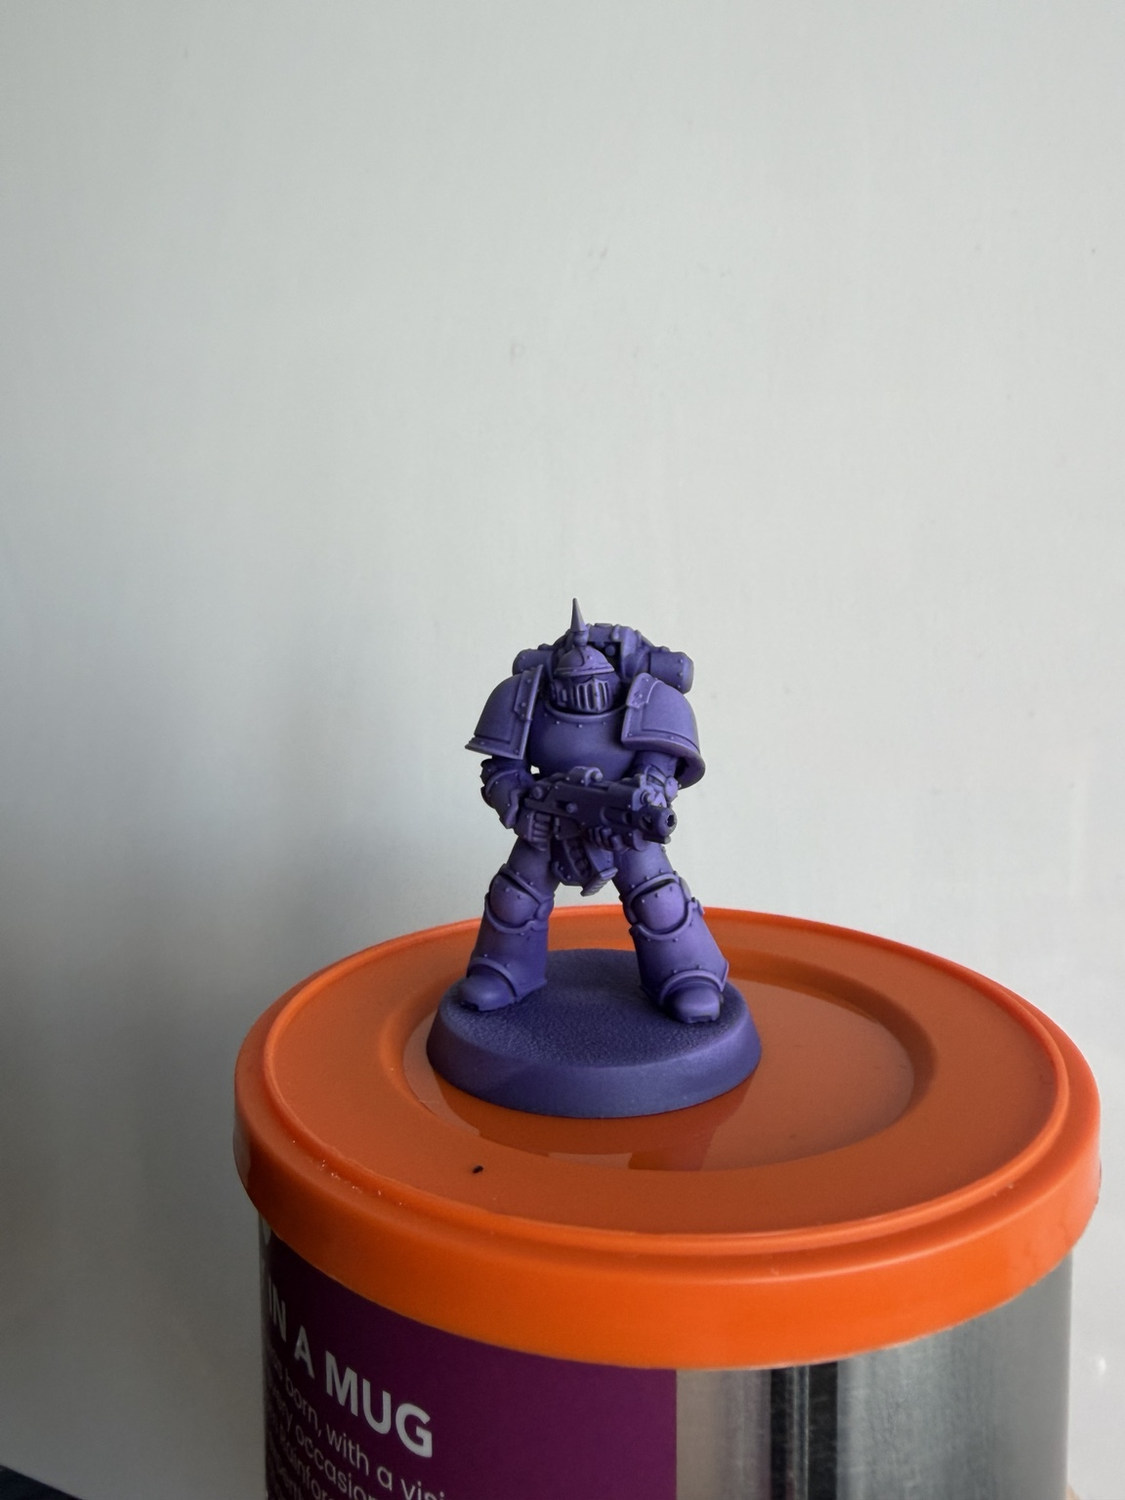
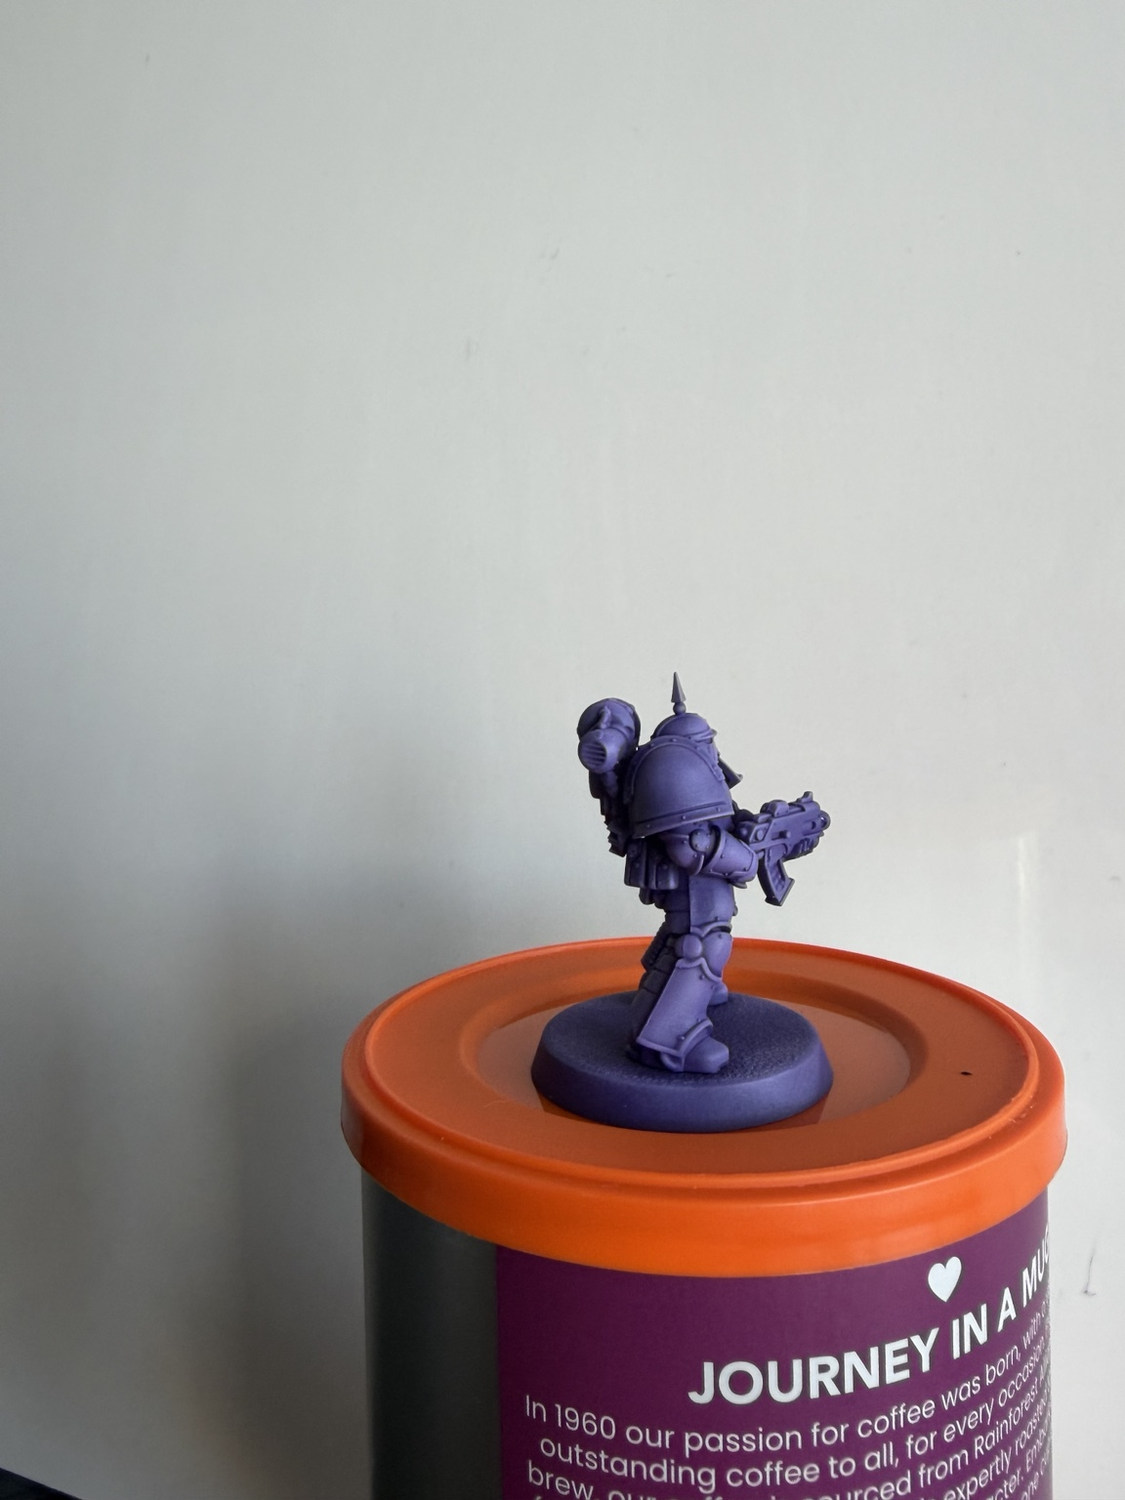
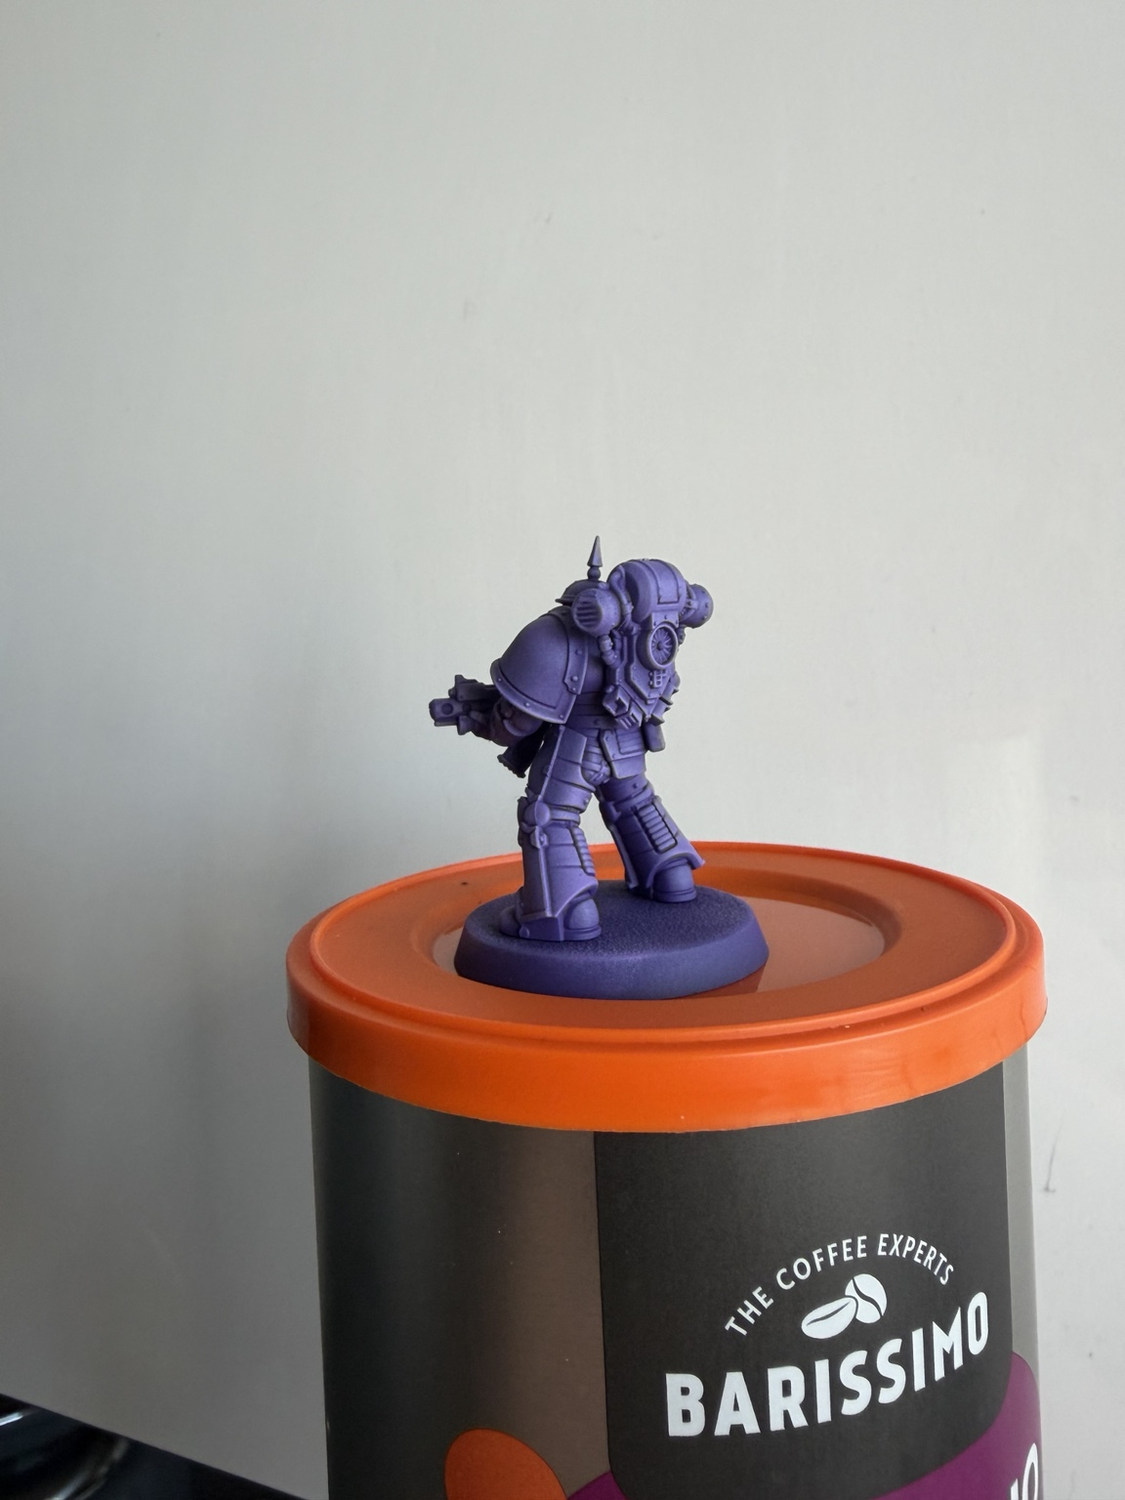
Lewis’s tip: Alien Purple is the accent, not the new base coat. If it reaches every panel edge, the armour becomes too bright and loses the rich III Legion depth.
Step 5: Matt Black structure
Separate the weapon, soft armour and deepest mechanical areas.
Paints and materials
- Army Painter Fanatic Matt Black
Method
Block the bolter casing and the dark structural areas with Matt Black. Pick out ribbed joints, deep gaps and any areas that should visually separate the purple plates. Use the black to sharpen borders, not to widen them unnecessarily.
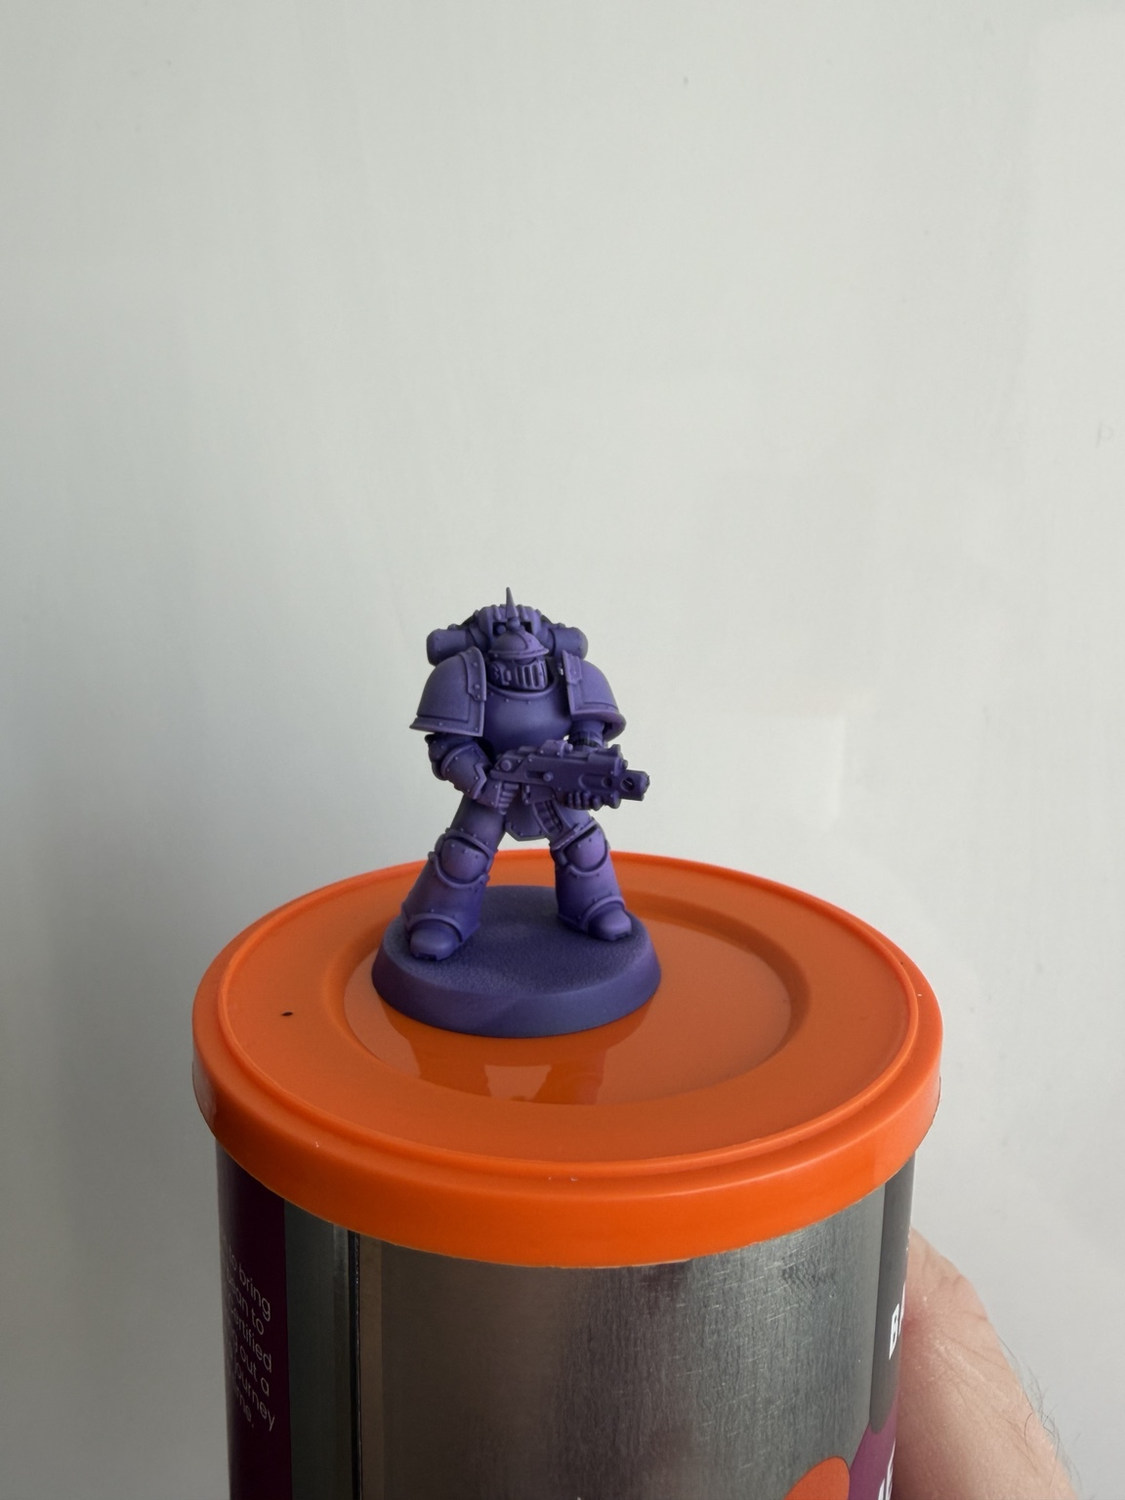
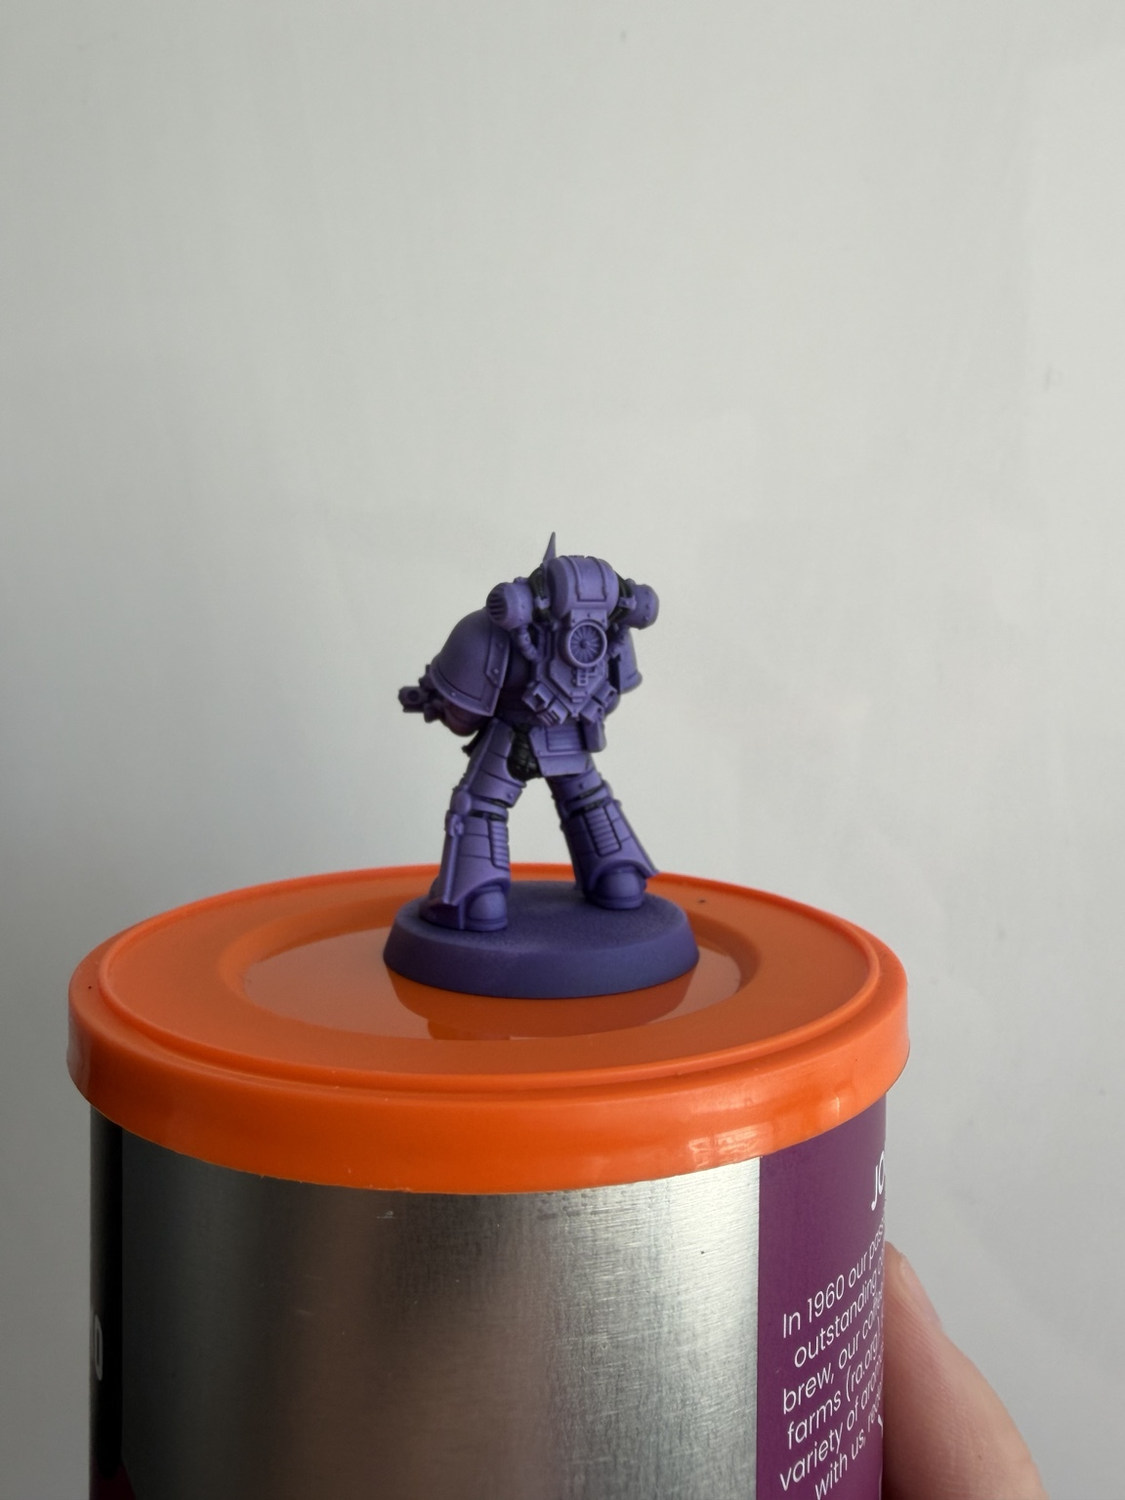
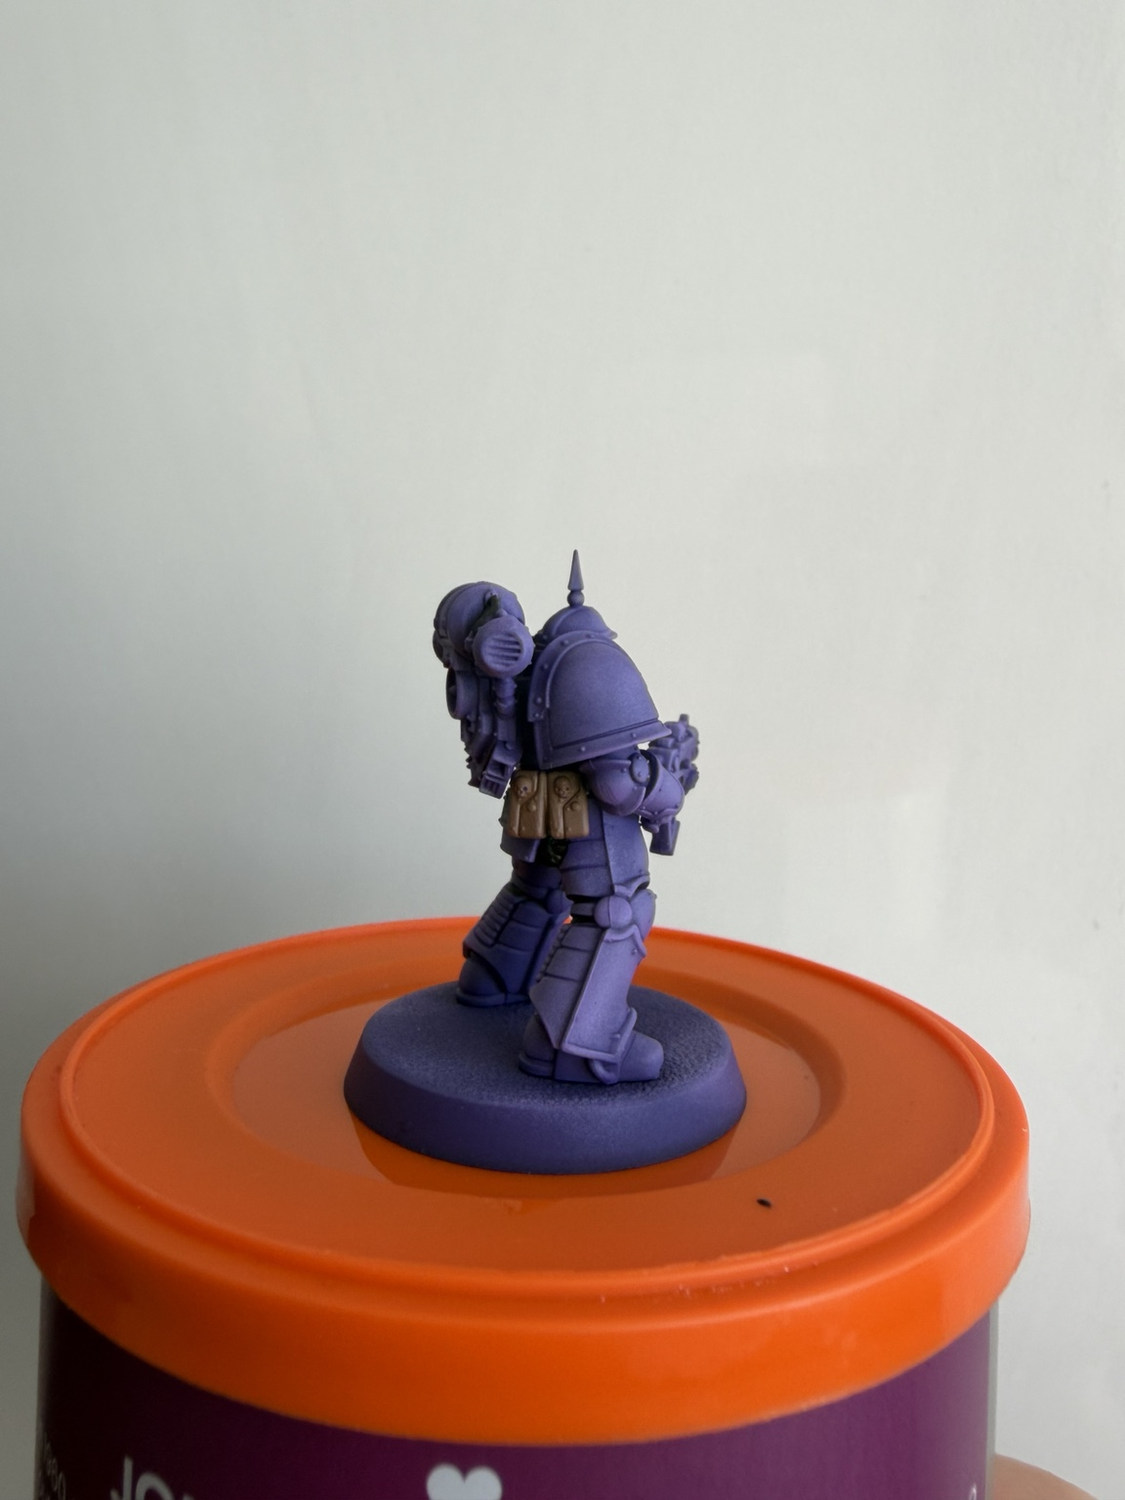
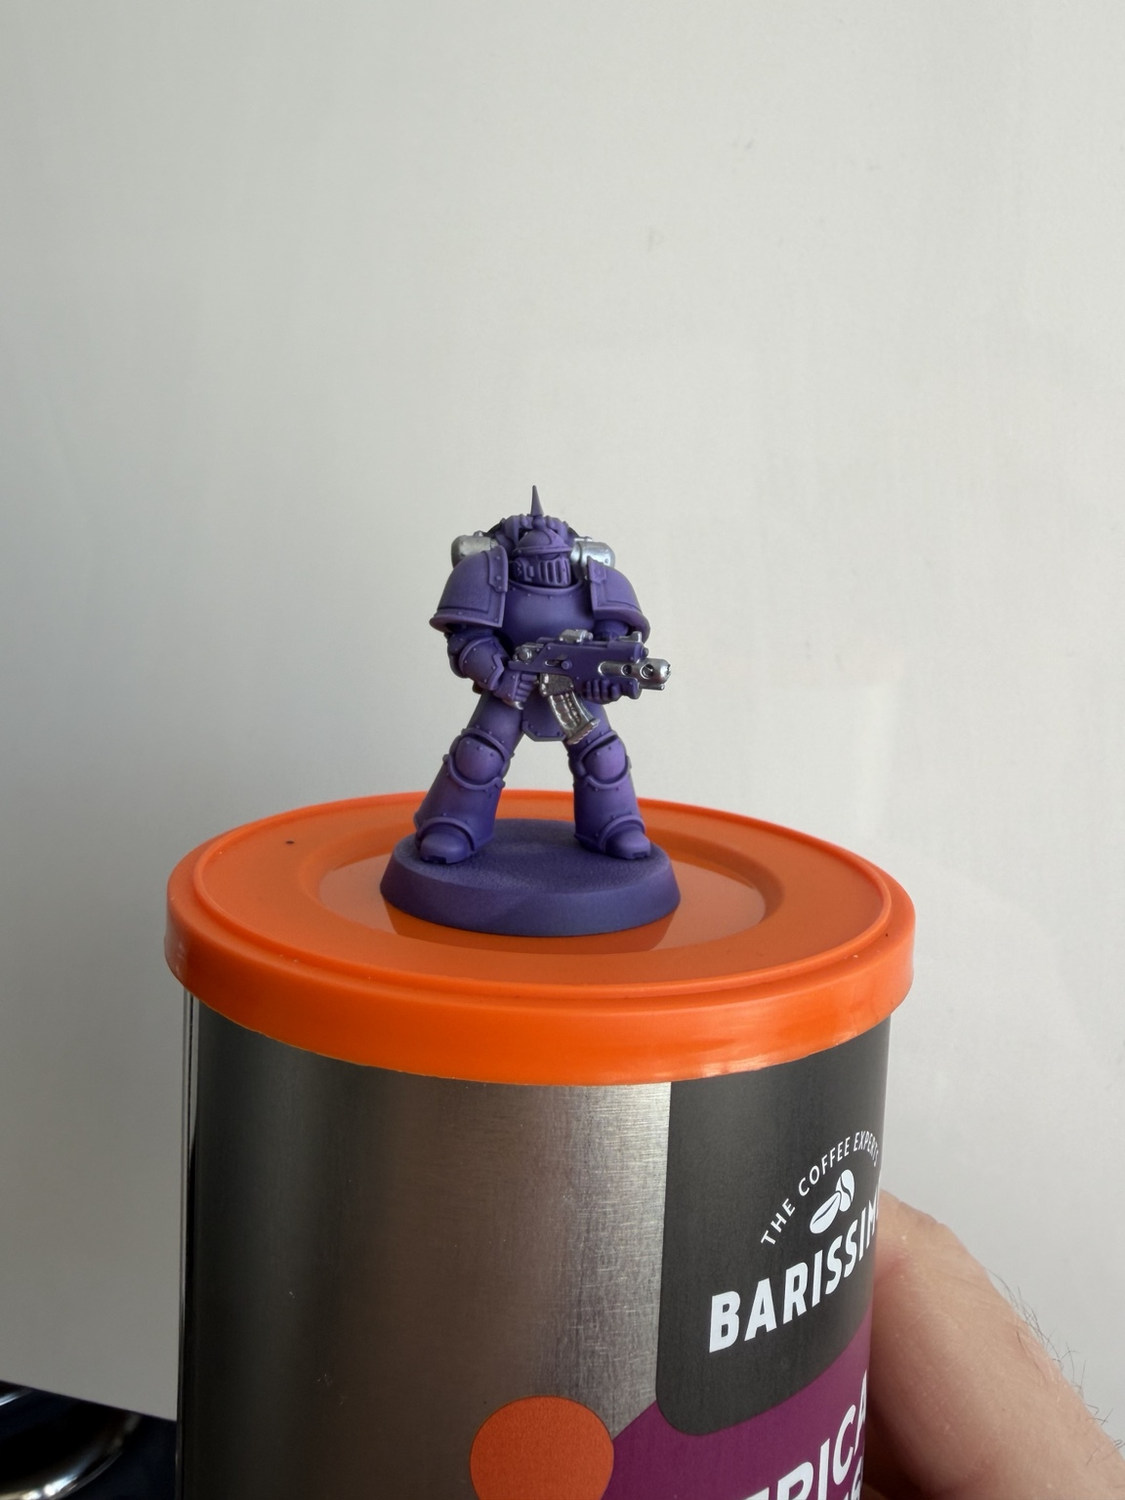
Lewis’s tip: Turn the miniature through every angle. A missed purple patch beneath an arm or beside the backpack is much easier to fix now than after the metallic trim is in place.
Step 6: Leather Brown
Block the pouches and leather fittings before the metallic stages.
Paints and materials
- Army Painter Fanatic Leather Brown
Method
Paint the pouches, straps and leather fittings with Leather Brown. Keep the coverage opaque and the edges clean against the surrounding purple and black. At this stage the leather needs a solid readable colour rather than elaborate highlighting.
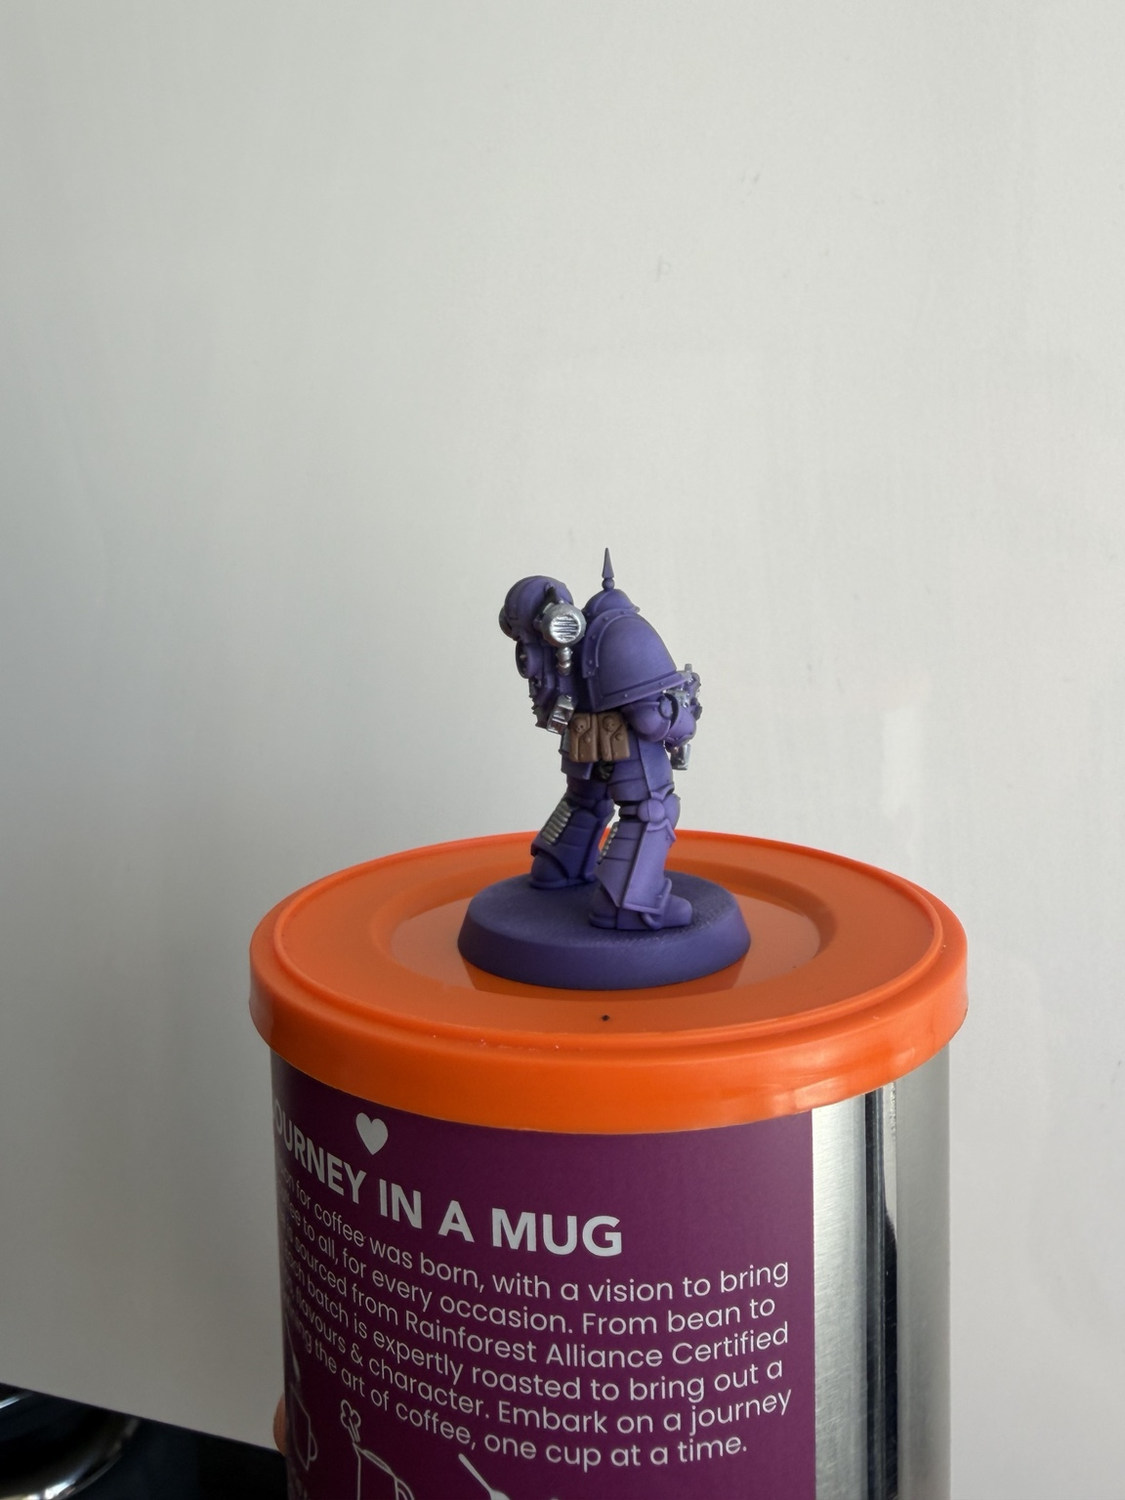
Lewis’s tip: One clean brown coat is more useful than a thick coat that fills the sculpted detail. Let the paint dry, then add a second thin pass only where coverage genuinely needs it.
Step 7: Silver TMM
Establish the cold metal before introducing the warmer gold trim.
Paints and materials
- Vallejo True Metallic Metal Base
- Brush painted — no airbrush required
Method
Brush the main silver onto the backpack vents, weapon barrels, magazine, fittings, joints and mechanical details. Keep the silver tight around the purple armour and black bolter casing. The metallic texture should remain fine rather than being pushed around in one heavy coat.
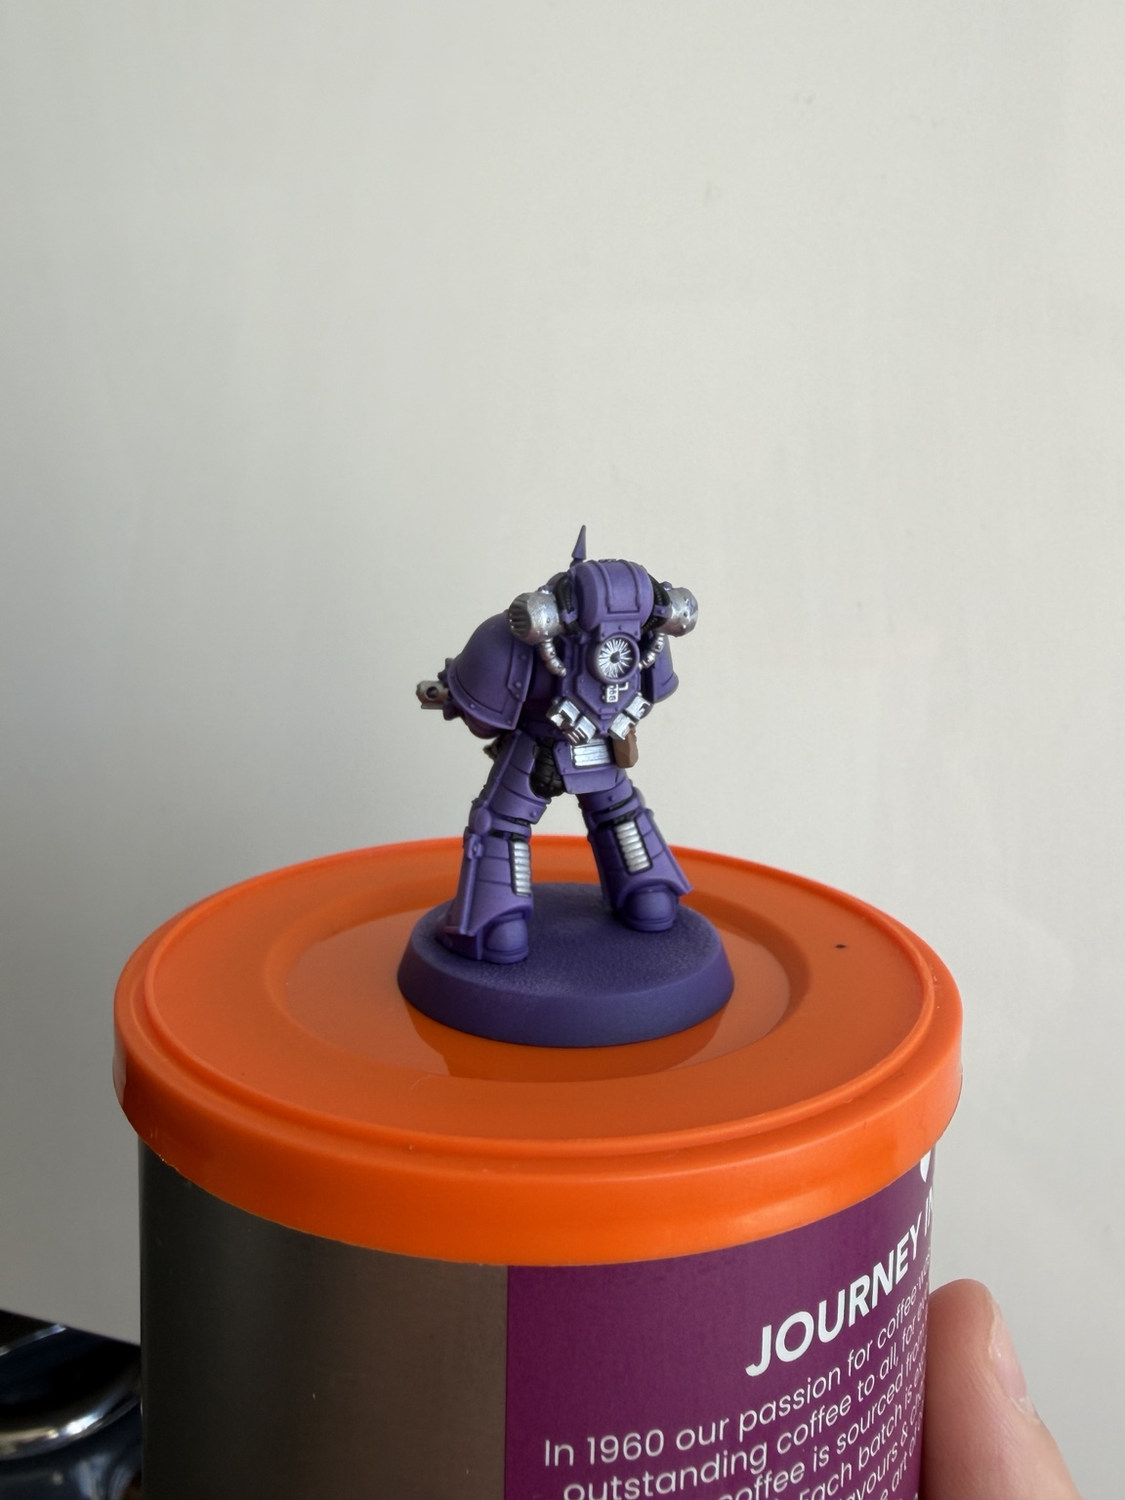
Lewis’s tip: The bottle name describes the metallic range; the paint is being applied with a normal brush here. Keep the sharpest reflections for the later refinement stage.
Step 8: Gold TMM
Frame the armour with warm gold without overwhelming the purple.
Paints and materials
- Vallejo True Metallic Metal Airbrush gold
- Cultist Purple / Matt Black for clean-up
Method
Brush the main gold onto the shoulder trim, helmet crest, armour borders and decorative fittings. Build the colour with controlled thin coats and correct any slips immediately with Cultist Purple or Matt Black while the boundaries are still easy to see.
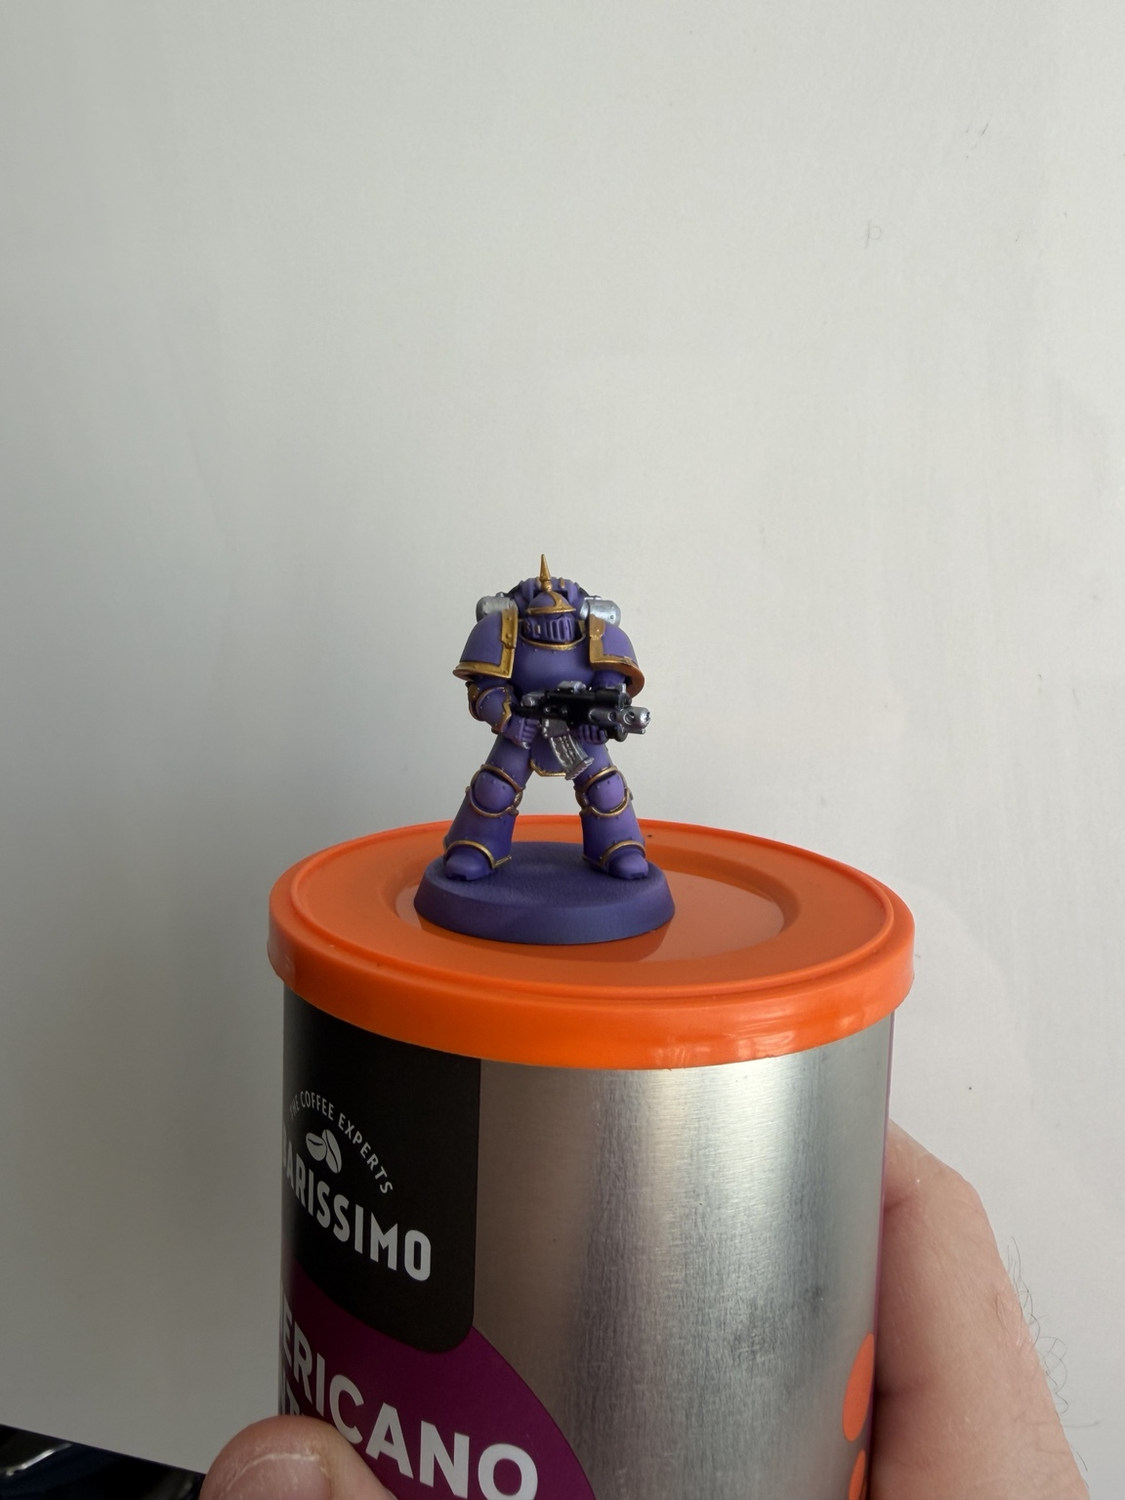
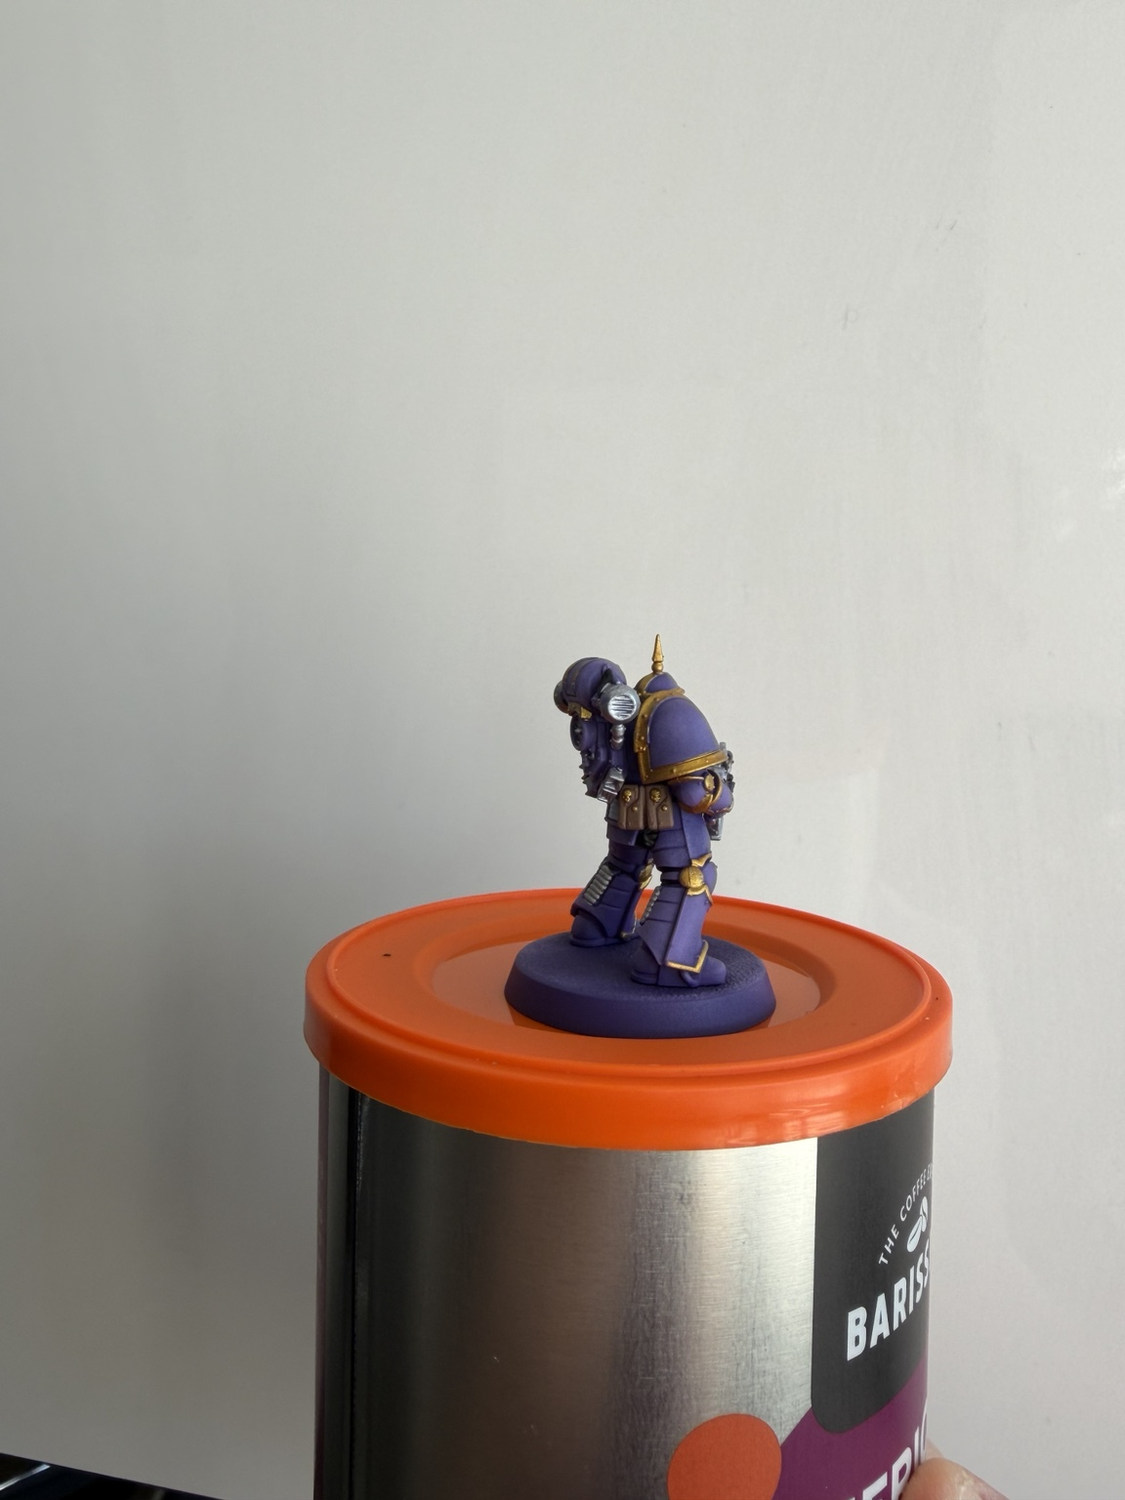
Lewis’s tip: Purple remains the dominant colour. The gold should frame the armour plate shapes and draw the eye to the helmet, not turn every available detail into another bright accent.
Step 9: Bright metallic refinement
Complete the gold areas and add light only to the highest metallic points.
Paints and materials
- Vallejo True Metallic Metal gold
- Vallejo True Metallic Metal Light
- TMM Base silver as required
Method
Finish the remaining gold - including the knees and smaller trim - then use TMM Light sparingly on the highest edges and forward-facing points. Add small bright touches to the silver where they improve separation, leaving the darker metallic base visible beneath.
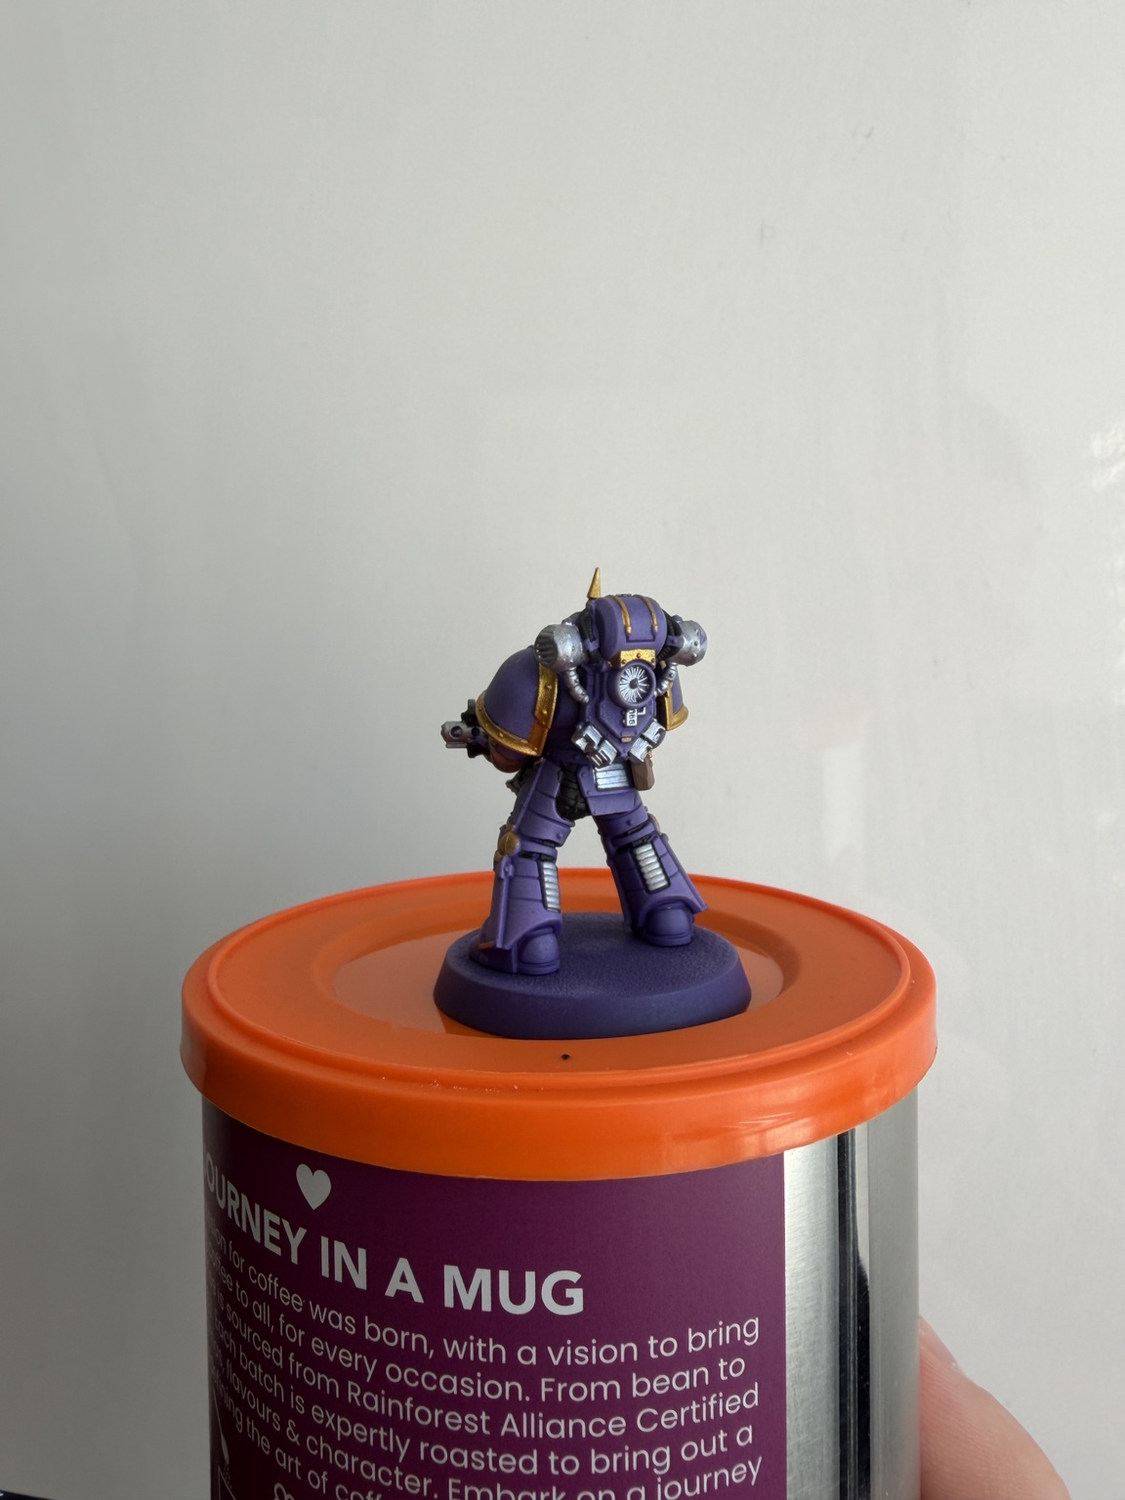
Lewis’s tip: A metallic highlight works because it is small. If the bright metal covers the full trim, there is no darker gold or silver left to create contrast.
Step 10: Weapon + small details
Finish the bolter and the small focal details without cluttering the scheme.
Paints and materials
- Army Painter Fanatic Matt Black
- Vallejo TMM Base silver
- Vallejo TMM Light
- Cultist Purple for clean-up
Method
Refine the Matt Black weapon casing, re-establish the silver barrels and magazine, and pick out the small fasteners and mechanical points. Tidy the purple fingers and armour around the bolter so the model reads clearly from the front.
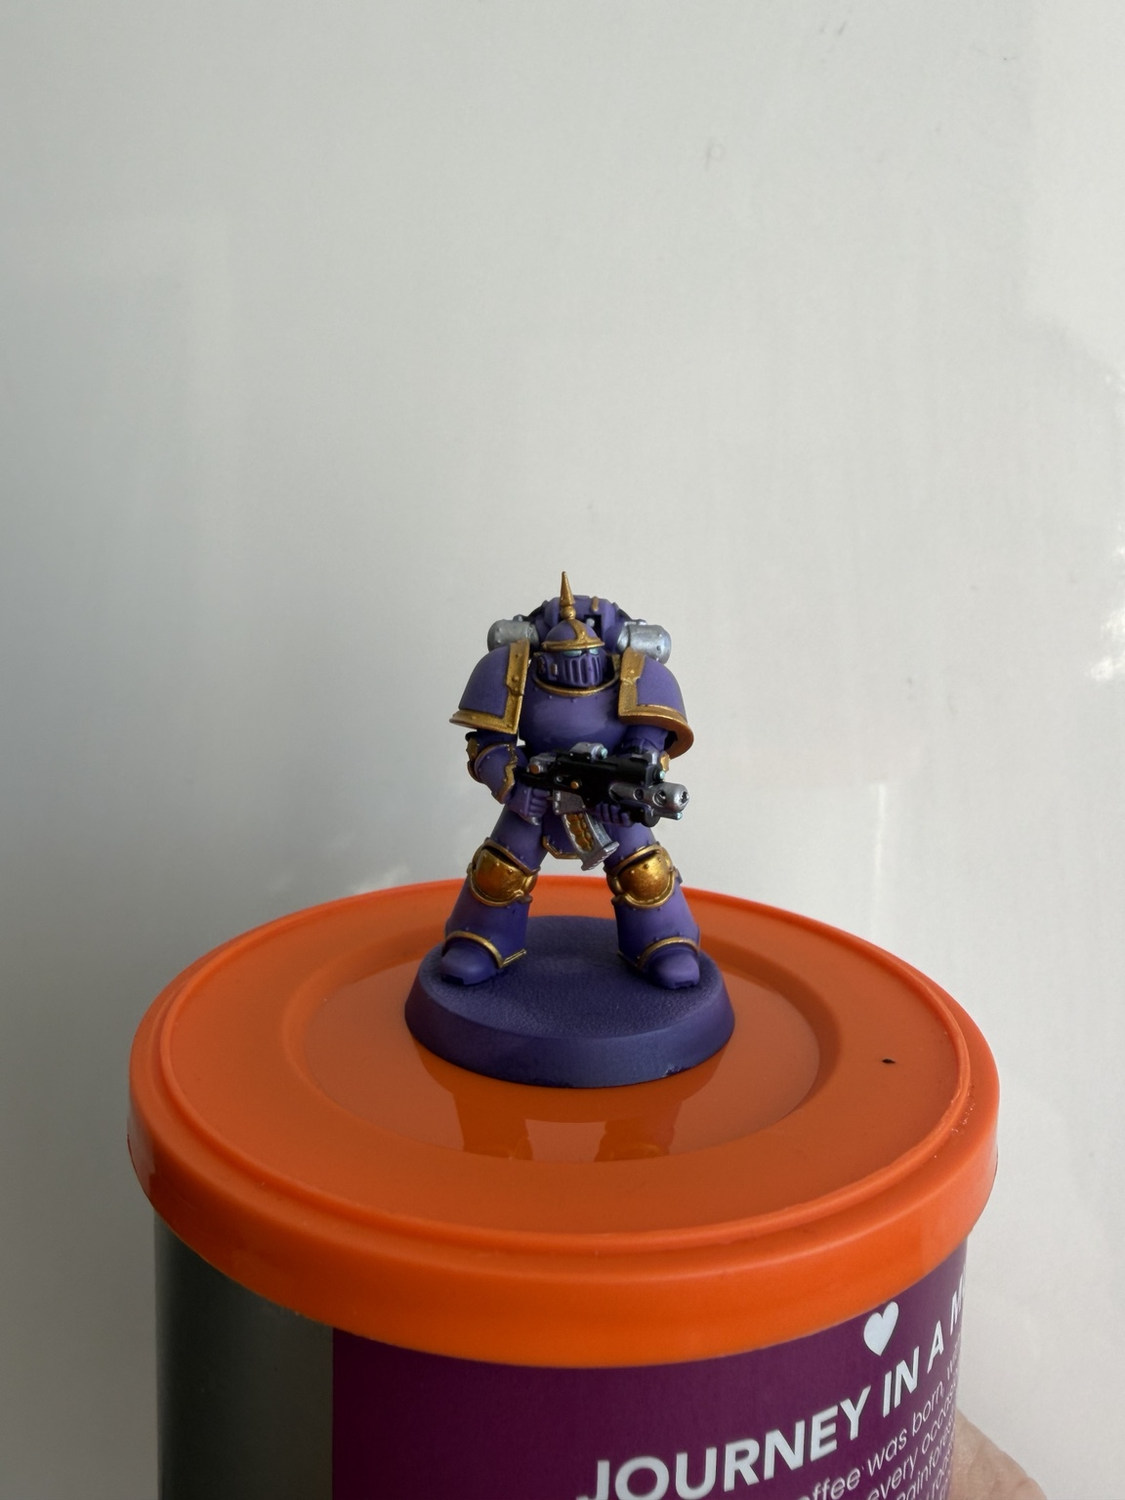
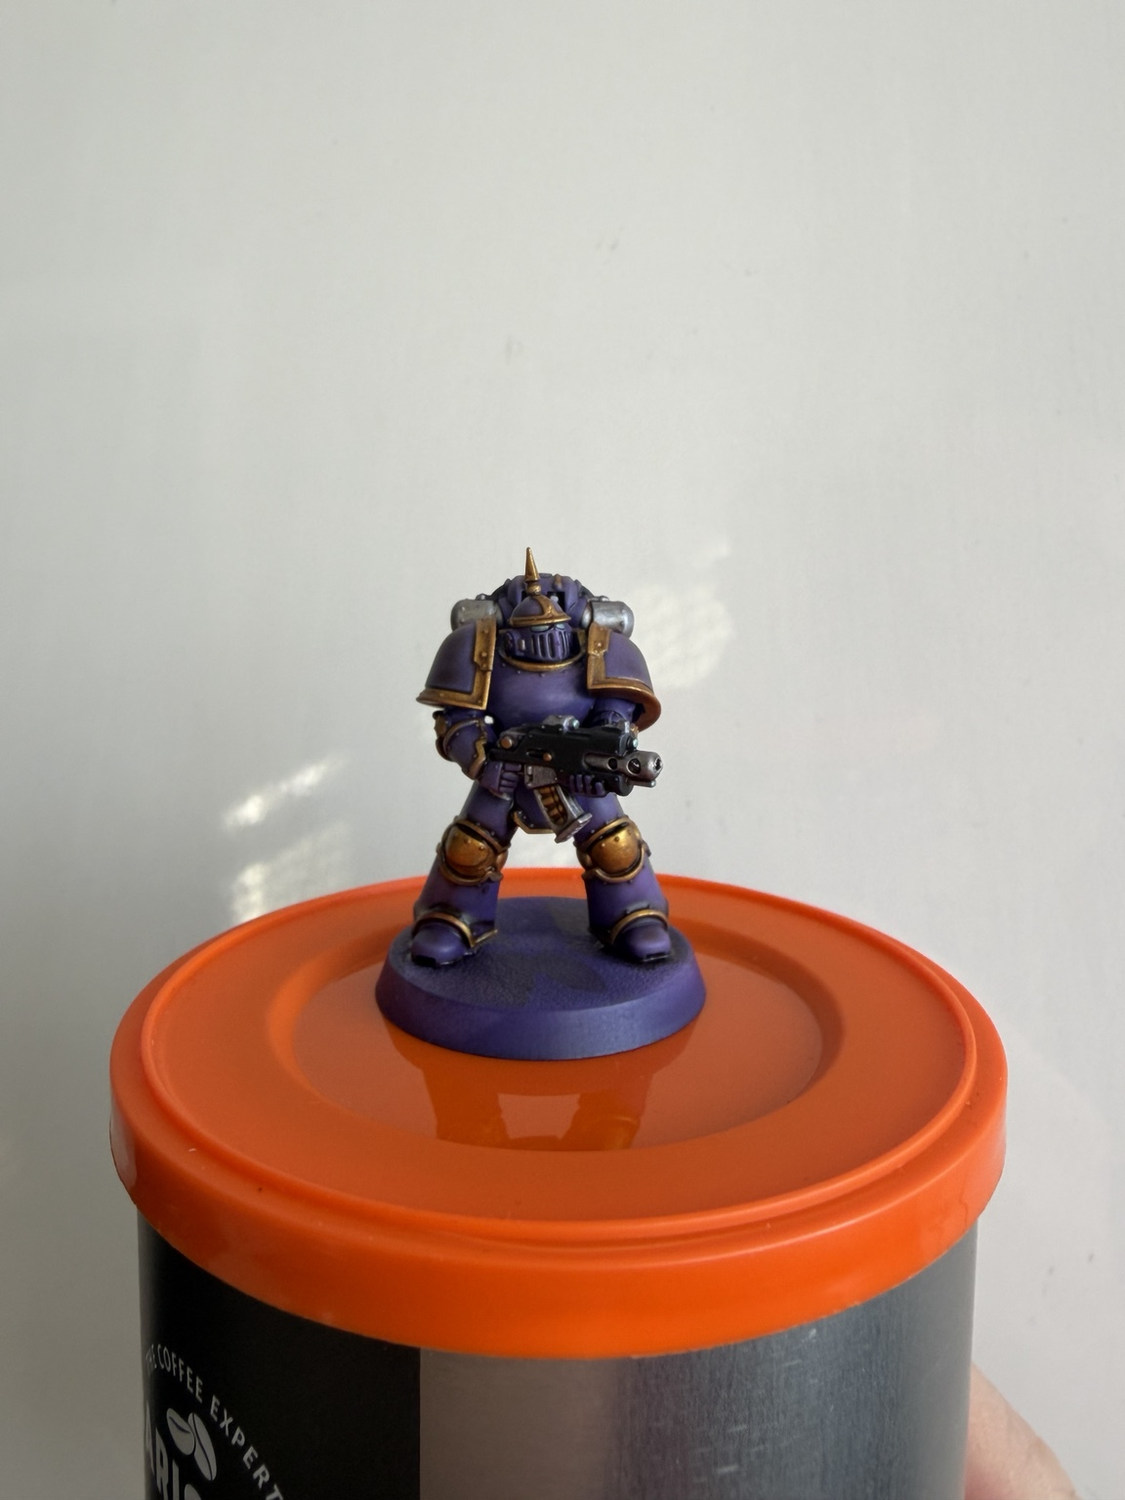
Lewis’s tip: The bolter is a strong dark shape across the chest. Keep it black enough to contrast with the armour, then use only a few metallic points to explain the mechanism.
Check before moving on
- Purple armour is blocked in
- Matt Black structure is complete
- Leather Brown is complete
- Silver TMM is complete
- Gold TMM is complete
- Weapon and small details are complete
Step 11: Marine Juice shade
Unify the completed block-in before restoring the final highlights.
Paints and materials
- 1 part Army Painter Dark Tone
- 1 part Citadel Reikland Fleshshade
- 1 part Citadel Lahmian Medium
Method
First complete and inspect the entire colour block-in: purple, black, leather, silver and gold must all be present and tidy. Mix equal parts Dark Tone, Reikland Fleshshade and Lahmian Medium. Apply the Marine Juice across the miniature, guiding it into recesses and around the metallics. Wick excess shade away from broad armour panels and leave it to dry fully before any refinement.
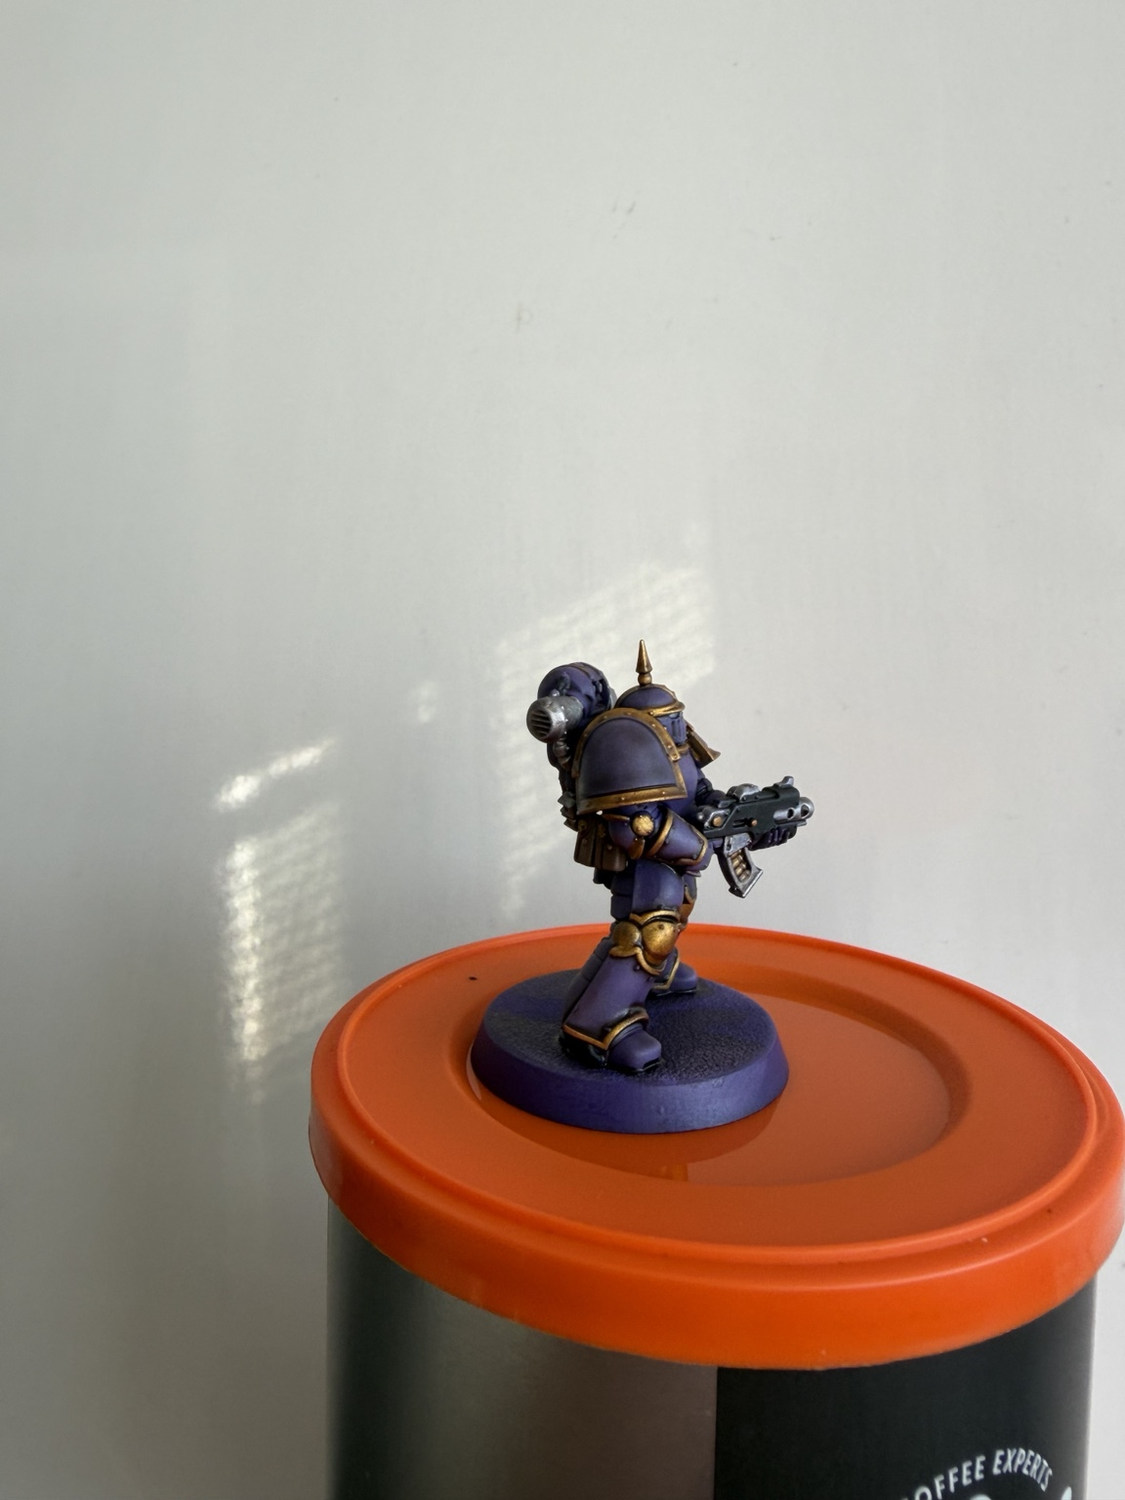
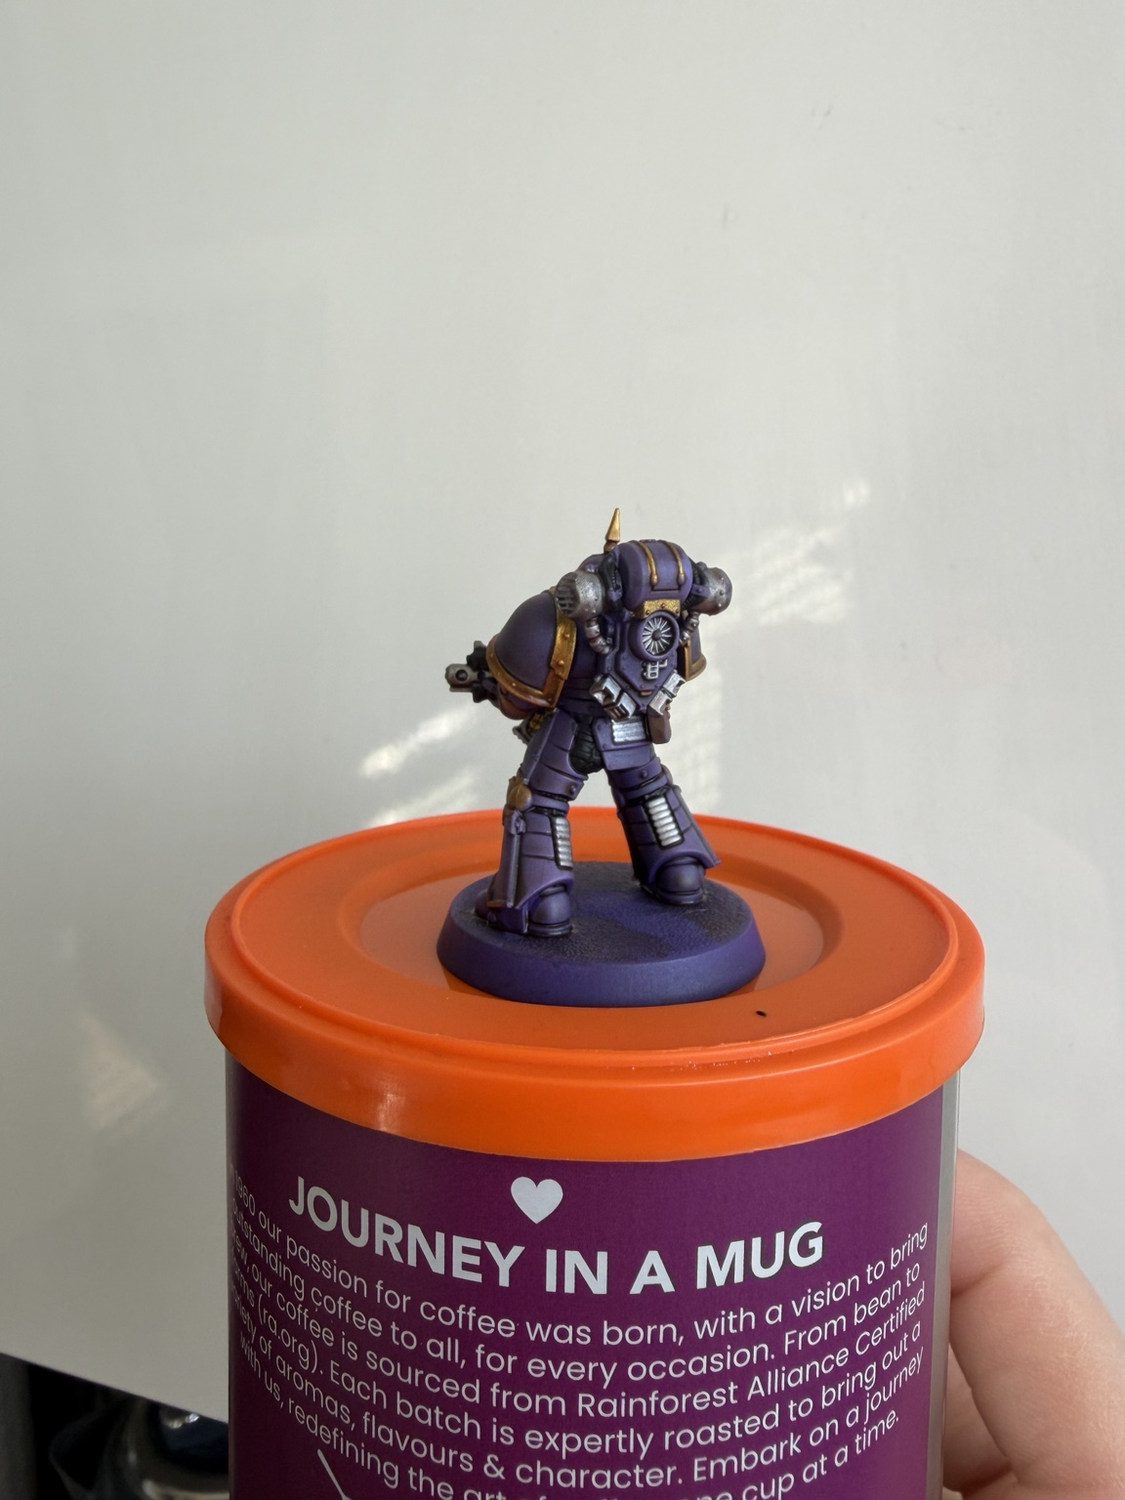
Lewis’s tip: Marine Juice should settle around details and soften the transitions between purple, gold, silver, black and leather. Keep the coat controlled: a pool left on a shoulder pad will dry as a tide mark and undo the clean armour work.
Check before moving on
- The full block-in is complete before applying Marine Juice
- Heavy shade pools have been wicked away
- Marine Juice is completely dry before refining highlights
Step 12: Final armour + metal refinement
Re-establish the important purples and sharpen the brightest metal points.
Paints and materials
- Army Painter Fanatic Cultist Purple
- Army Painter Fanatic Alien Purple
- Vallejo True Metallic Metal Light
Method
Use Cultist Purple to clean the main armour panels, then place Alien Purple only on the chosen light-catching edges and surfaces. Re-sharpen selected gold and silver points with TMM Light. Keep the shadows and the majority of the trim darker so the final result remains deep and controlled.
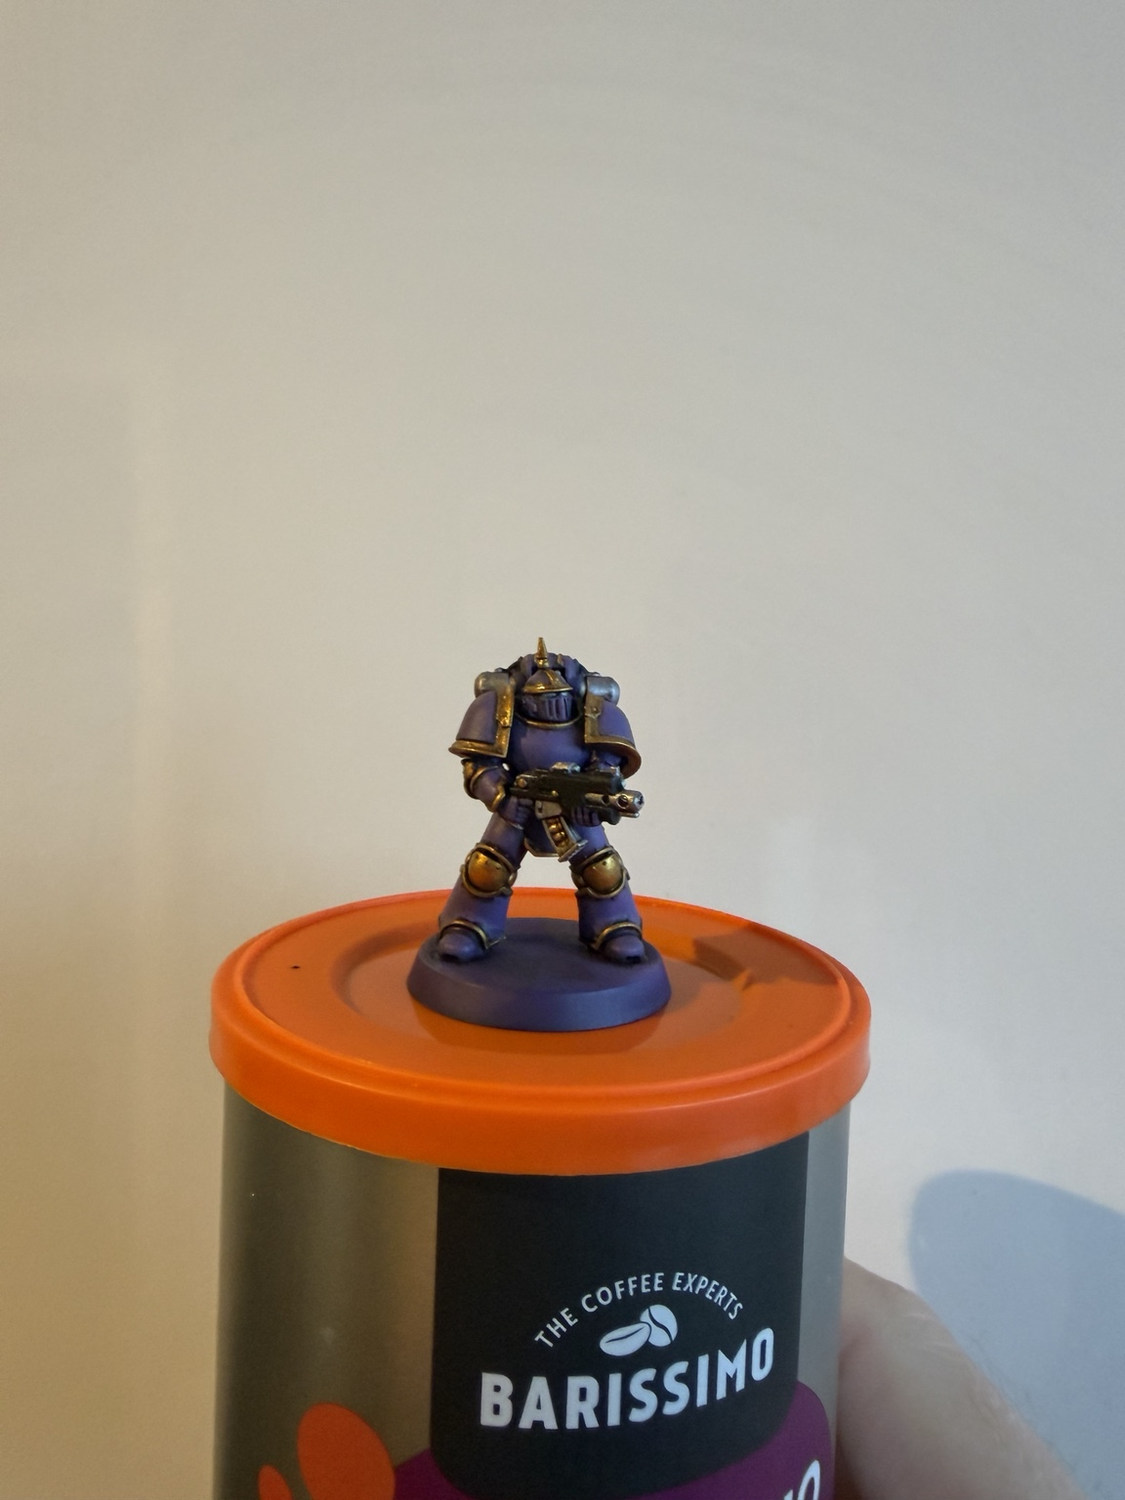
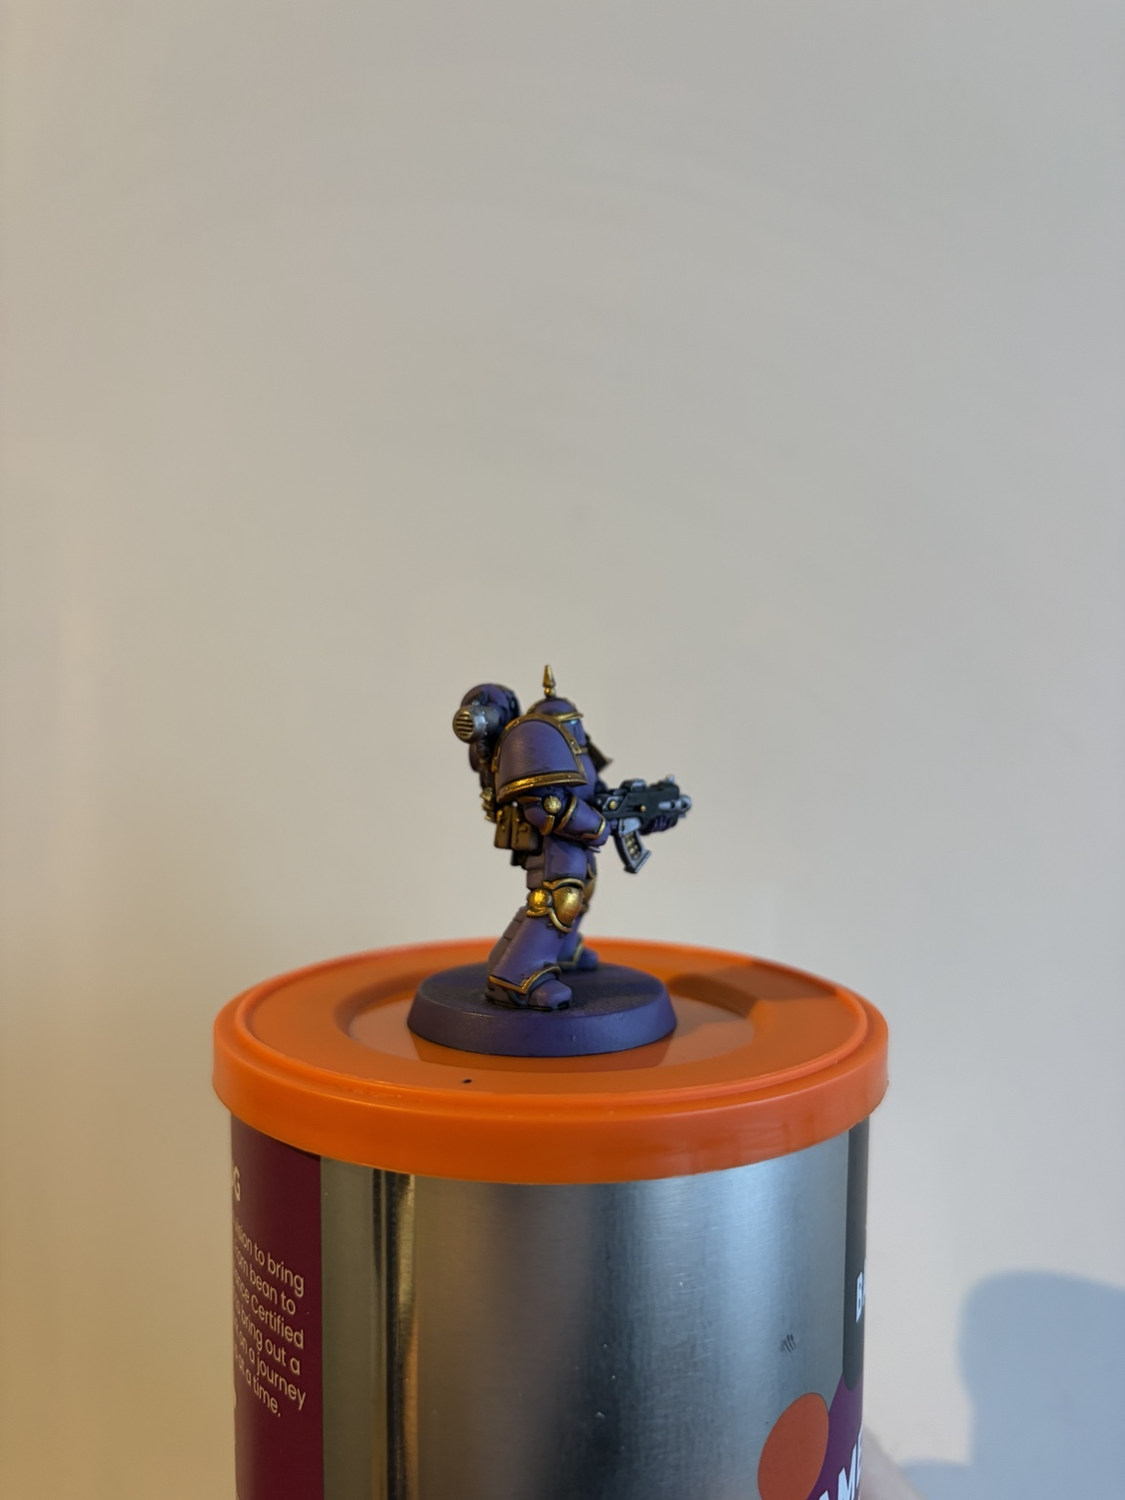
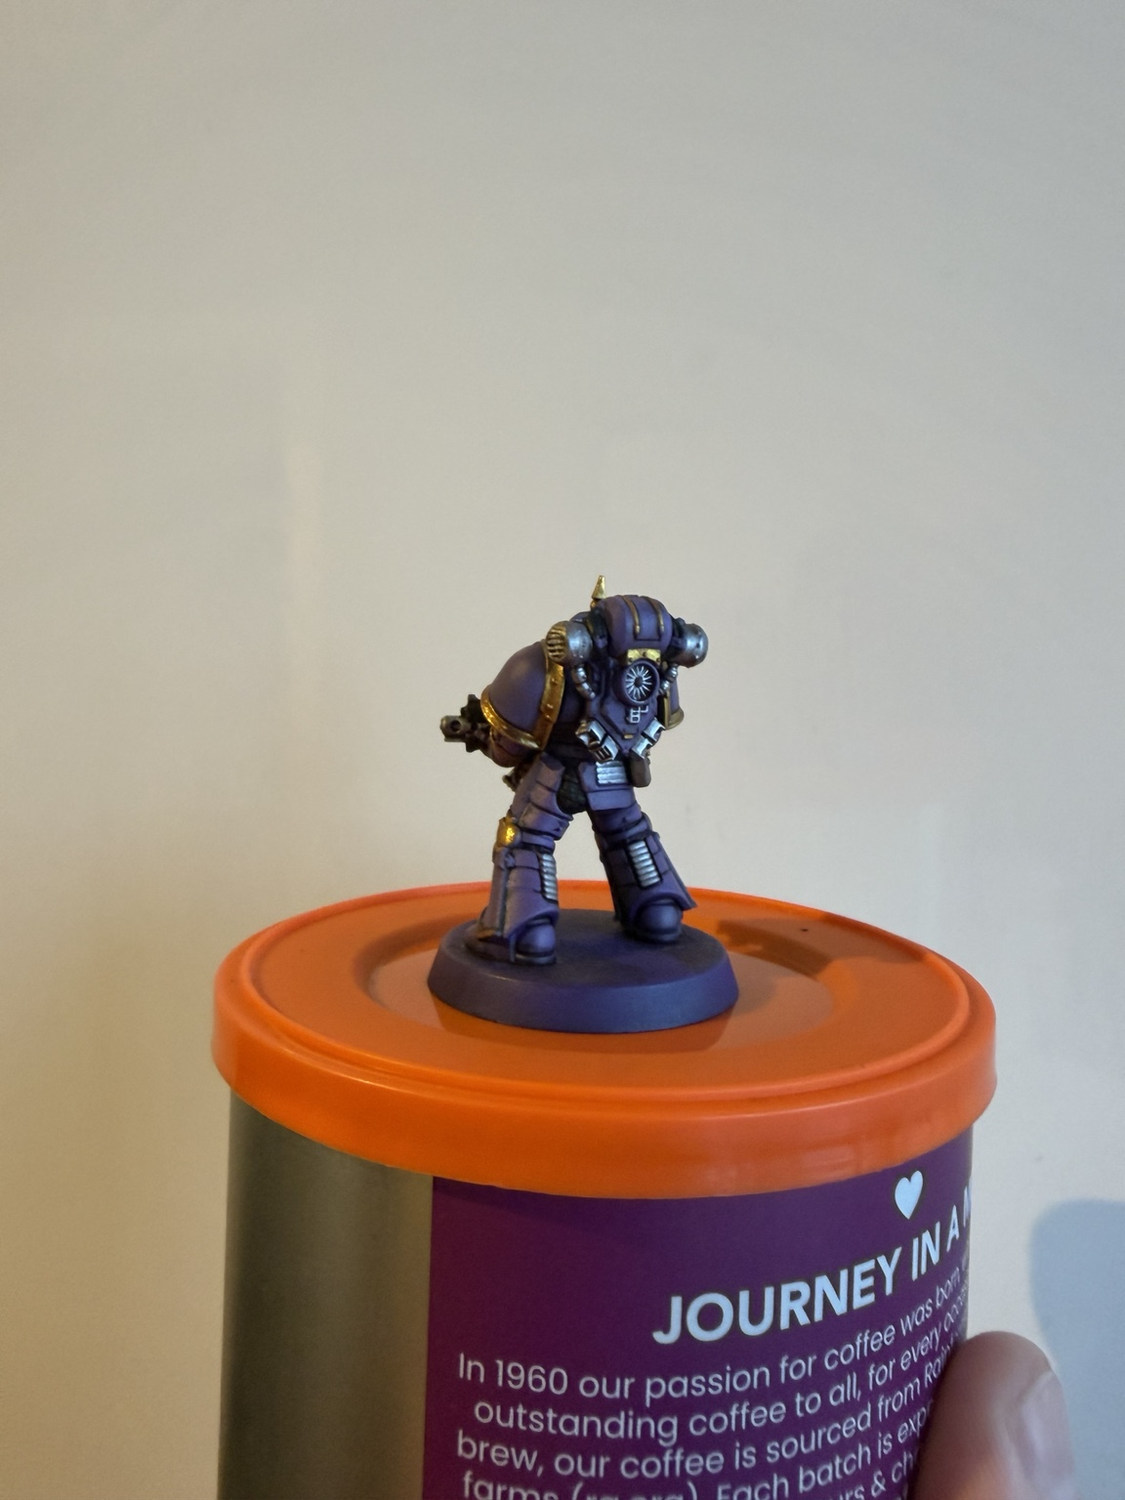
Lewis’s tip: Refinement is selective. A few precise corrections and bright points will improve the miniature more than tracing every edge with the same colour.
Step 13: Legion marking + Martian Earth base
Add the III Legion identity, then finish the model with a red-earth crackle base.
Paints and materials
- Emperor's Children transfer
- Green Stuff World Martian Earth 1817 crackle paint
- Army Painter Fanatic Matt Black — base rim
Method
Apply the Emperor's Children marking to the shoulder pad and let it settle fully before handling. Cover the base with Martian Earth crackle paint, keeping it off the boots. Allow the texture to form naturally, then return the rim to a clean Matt Black and complete one final tidy pass.
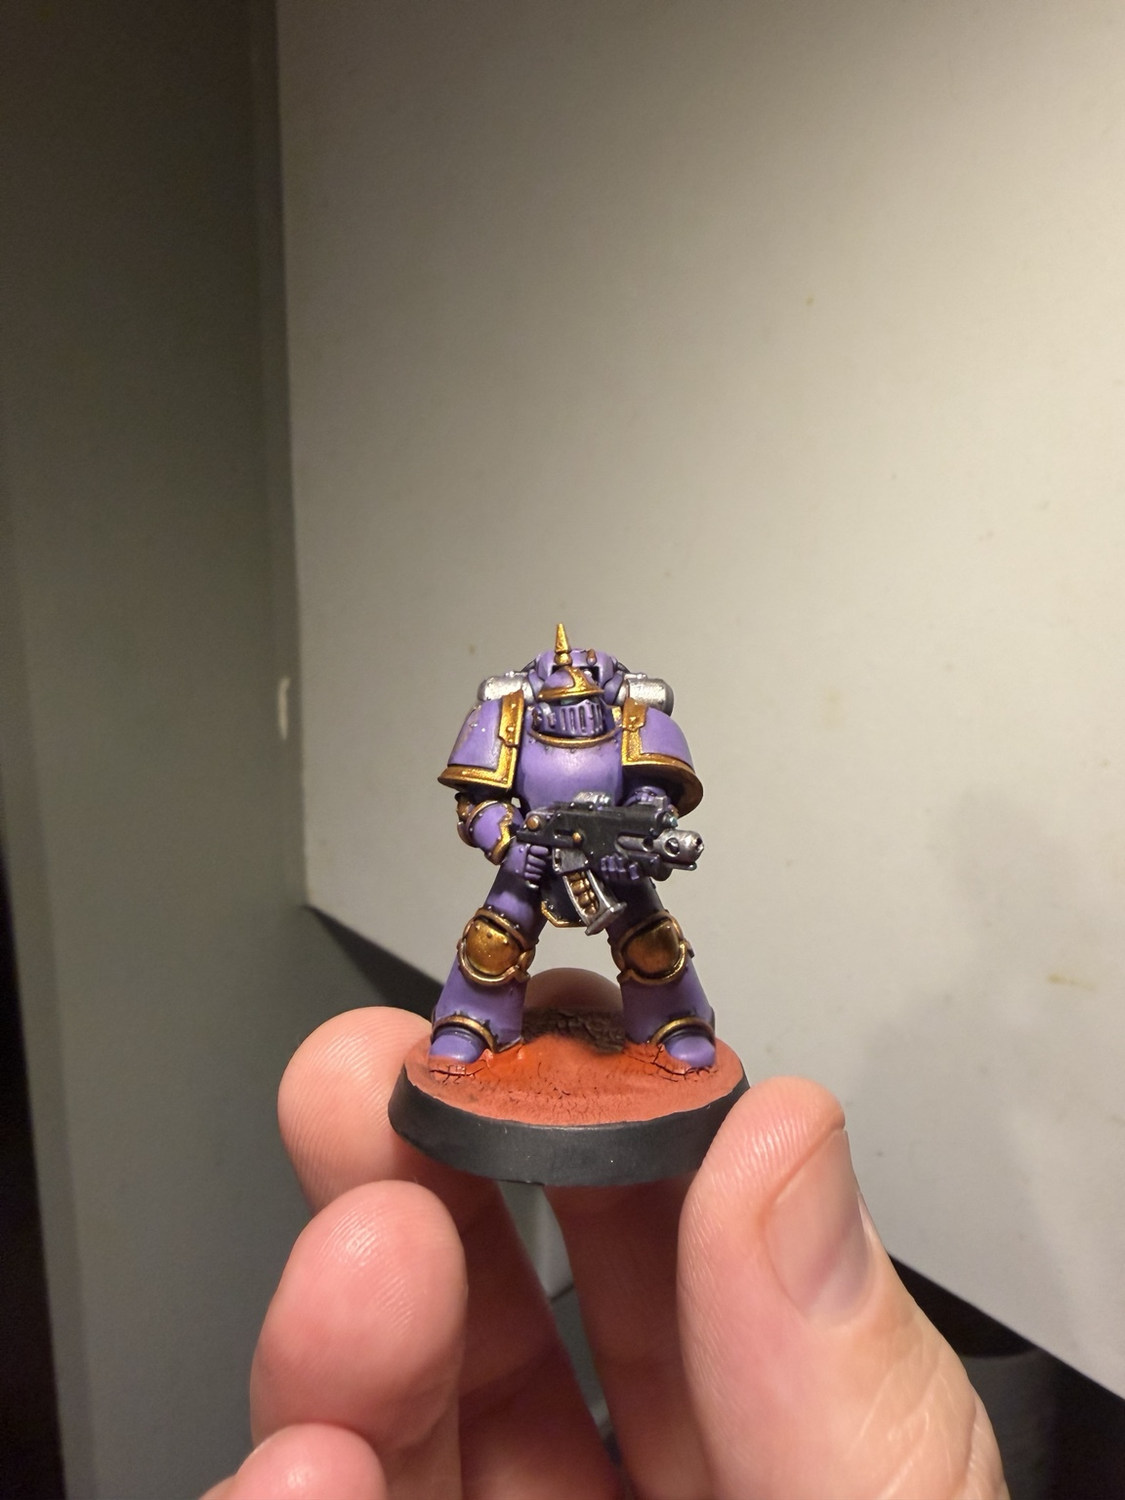
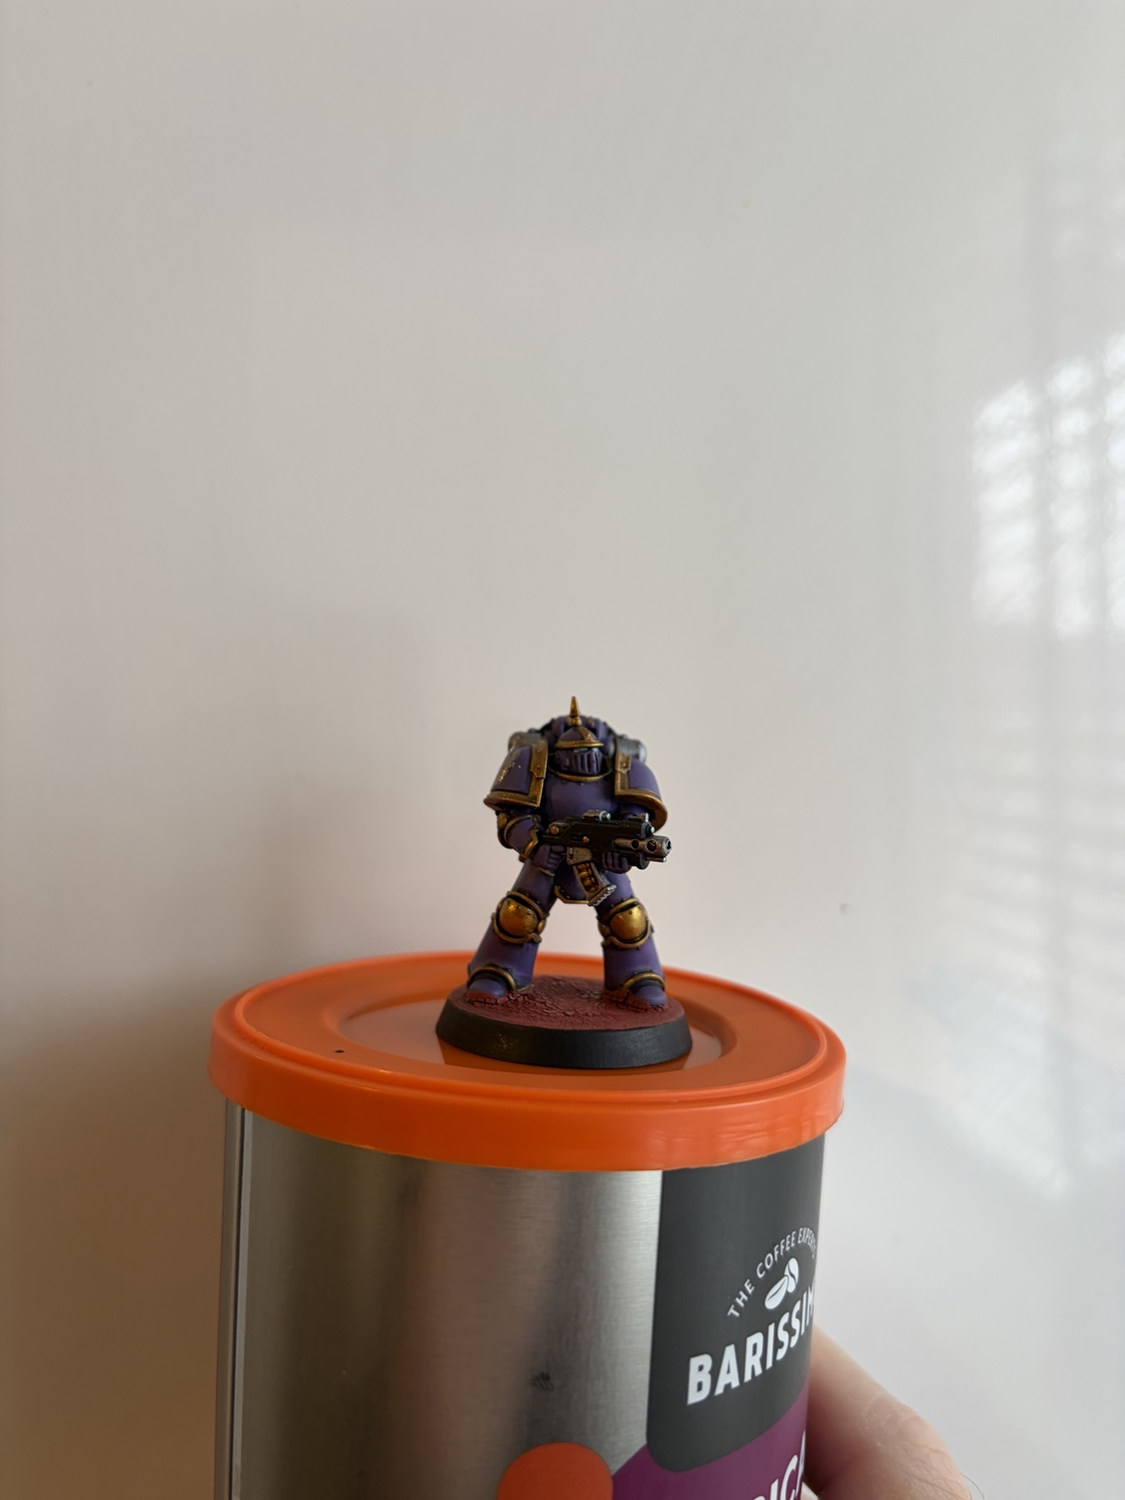
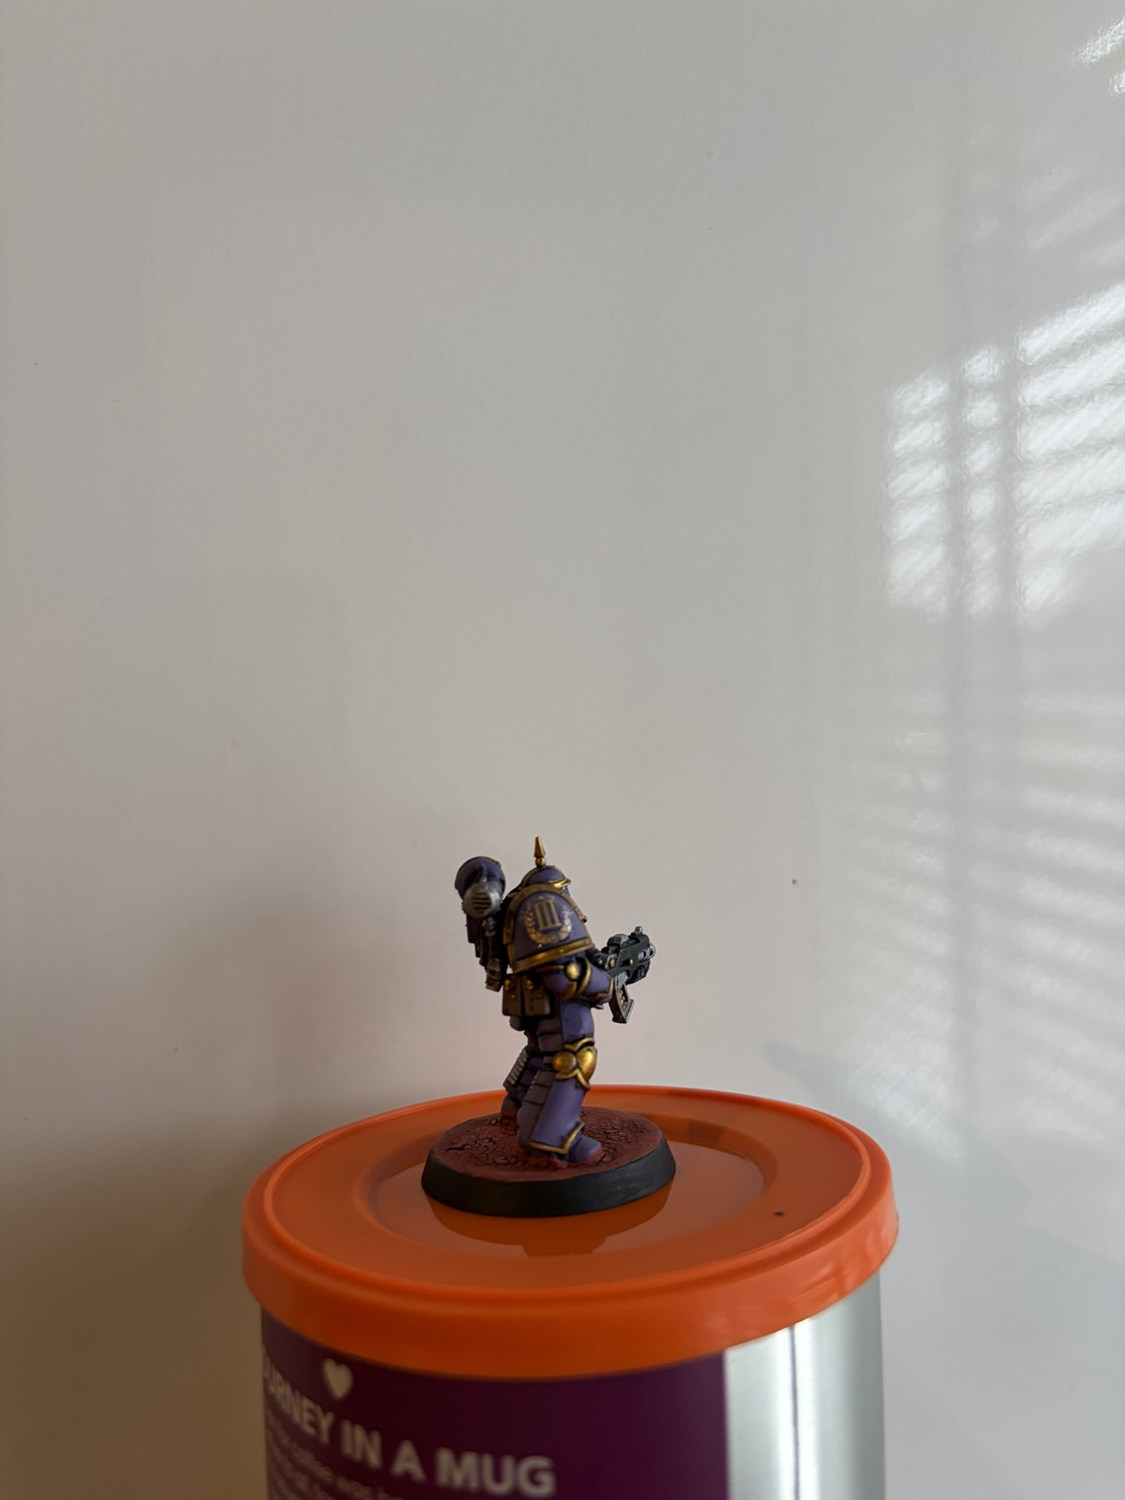
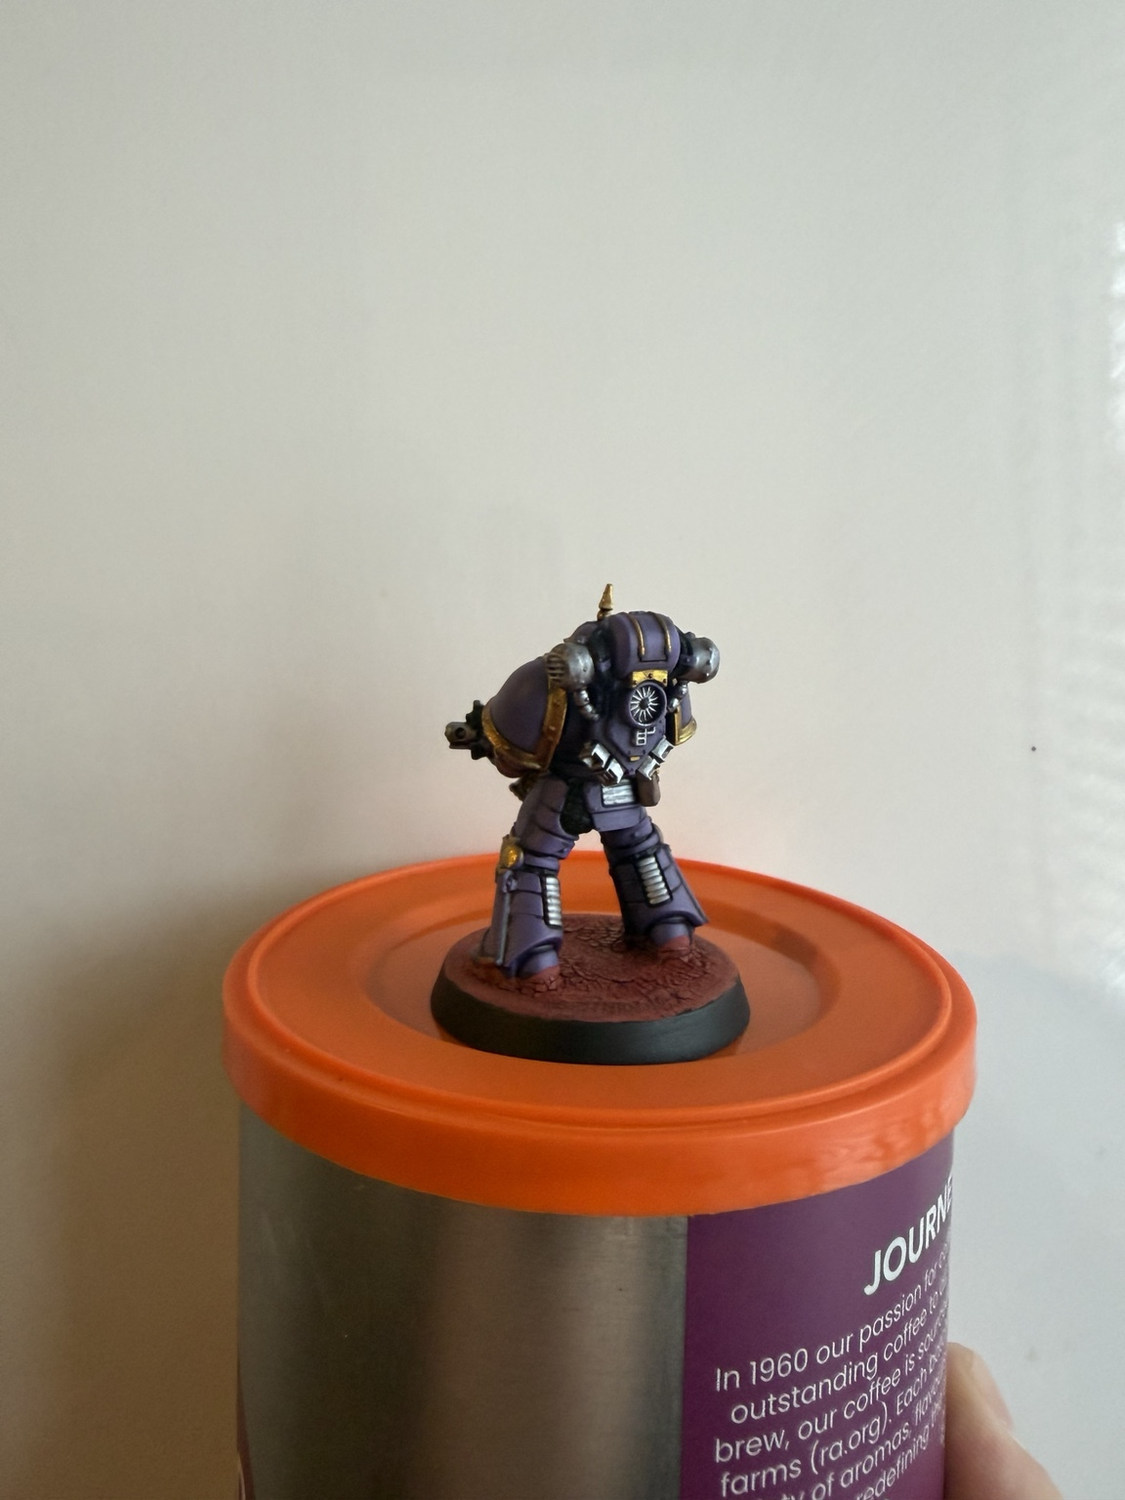
Lewis’s tip: Leave the crackle paint alone while it dries. Touching it too early can flatten or tear the texture. The clean black rim is the final frame around the miniature.
Check before moving on
- Crackle paint is completely dry before tidying the base rim
Finished model and recipe recap
- Prime with Colour Forge Imperial Purple and keep it visible in the deepest joins.
- Build the armour with Cultist Purple, then restrict Alien Purple to the light-catching areas.
- Block Matt Black structure and Leather Brown fittings before the metallics.
- Brush in the TMM Base silver and gold, then use TMM Light only on the brightest points.
- Complete the full colour block-in, then shade with Marine Juice mixed 1:1:1 from Dark Tone, Reikland Fleshshade and Lahmian Medium.
- Re-establish the brightest purple and metallic points, add the III Legion marking, then finish the base and rim.
Purple foundation, brush control: keep the darkest purple in the joins and put the brightest colour only where the armour earns it.