Imperial Fists Horus Heresy : Step-by-Step Painting Guide
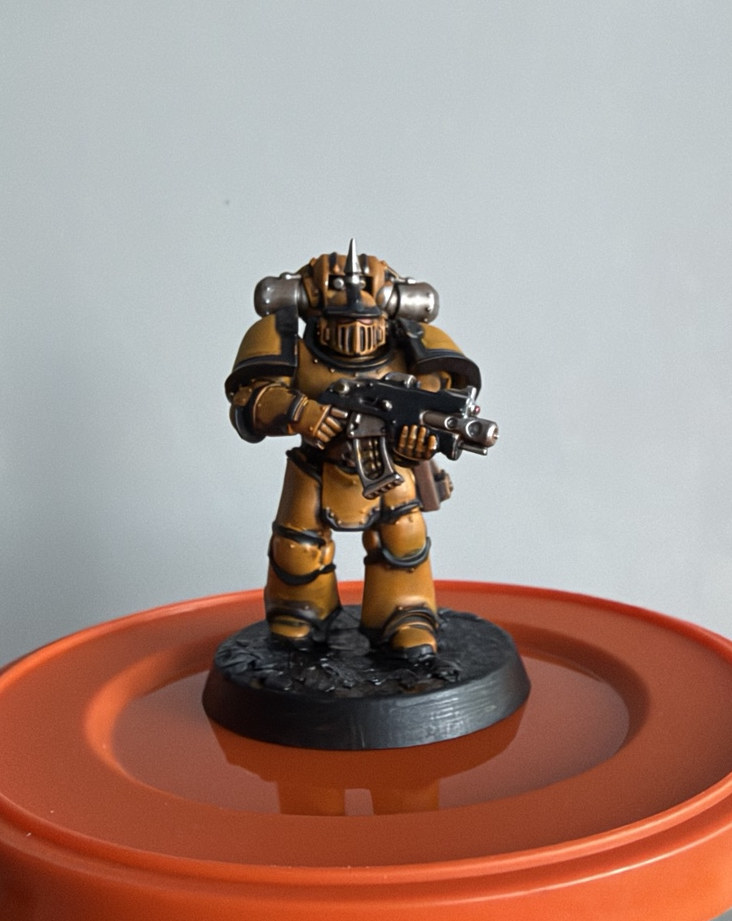
VII Legion yellow from the correct Colour Forge Valrak Yellow spray, then Citadel Bad Moon Yellow, deliberate panel shade and neat black Heresy trim. A bright scheme with battle-worn weight.

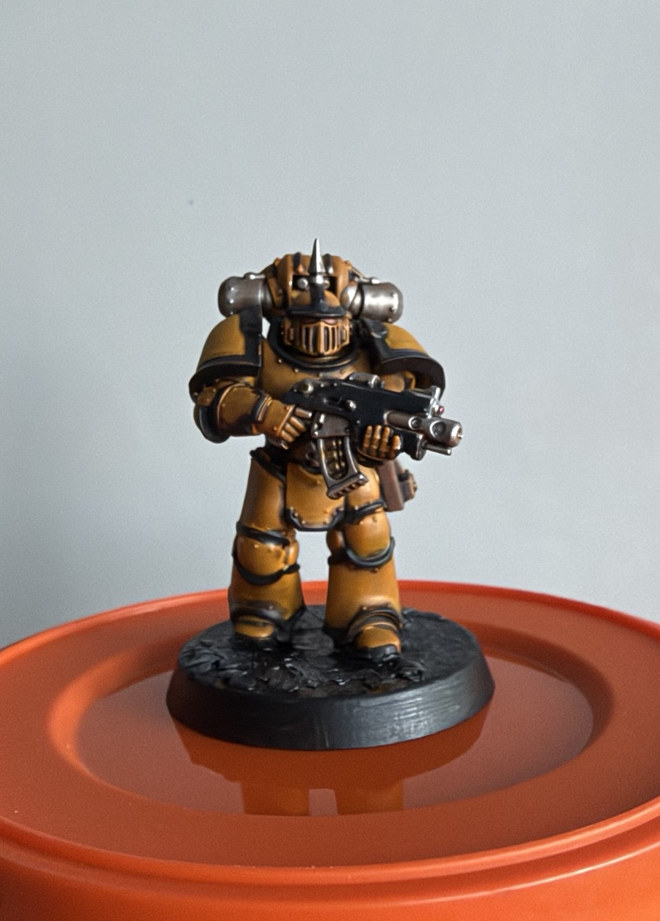
Preserve the clean yellow plates. Use black only where it gives the armour structure and contrast.
Before you start
Accurate primers, brush paints and documented photographic stages.
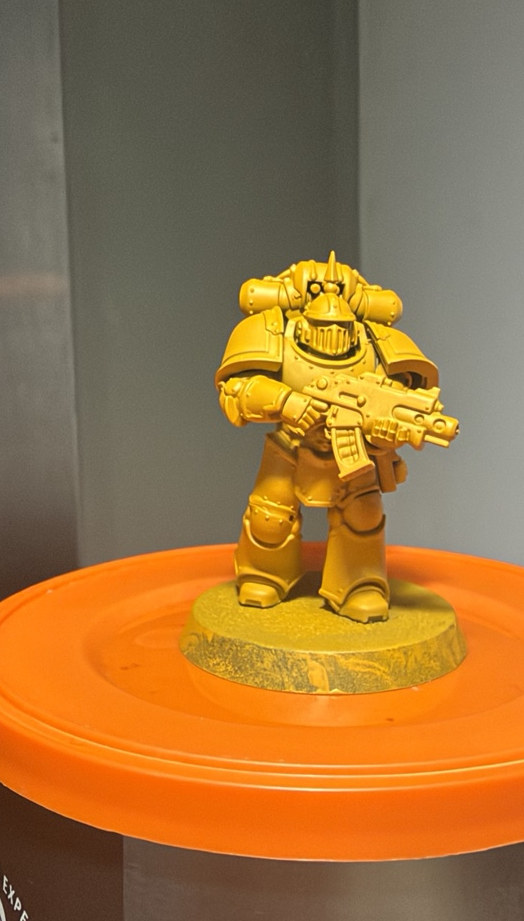
Step 1: Clean build
One Horus Heresy Mk III miniature, prepared before any primer.
Paints and materials
- Assembled Horus Heresy Mk III marine
- Hobby knife and fine file, as required
Method
Remove visible mould lines and check the helmet, shoulder rims, bolter and backpack joins. Make sure the underarms and inside of the greaves can be reached with a brush. The later paint effects work best over crisp plate edges.
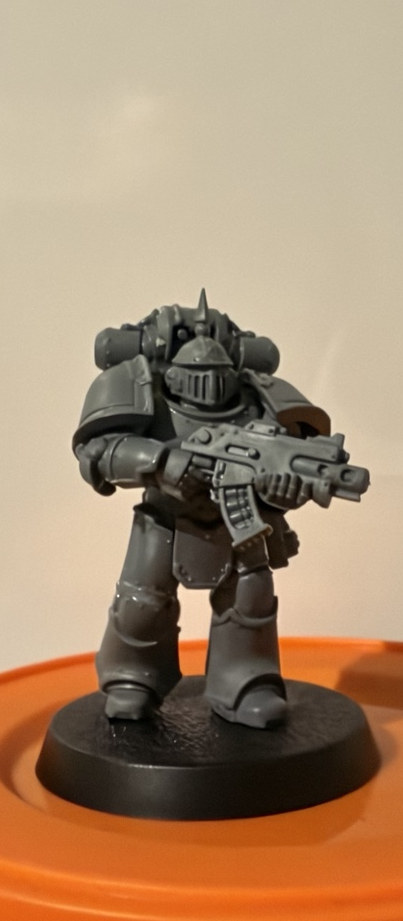
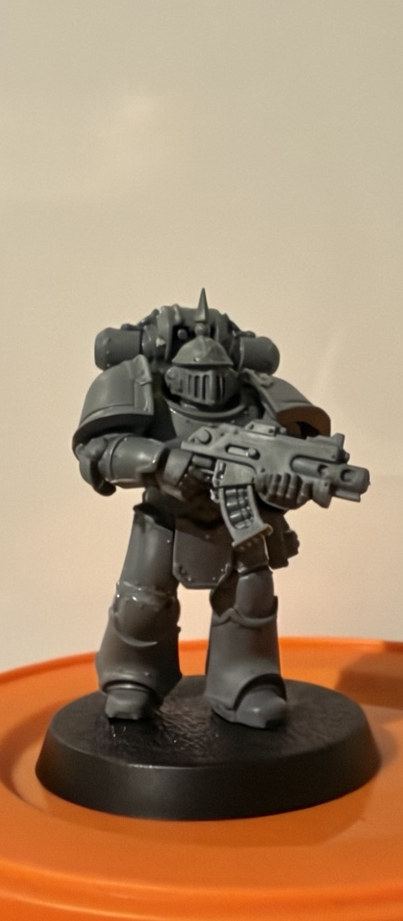
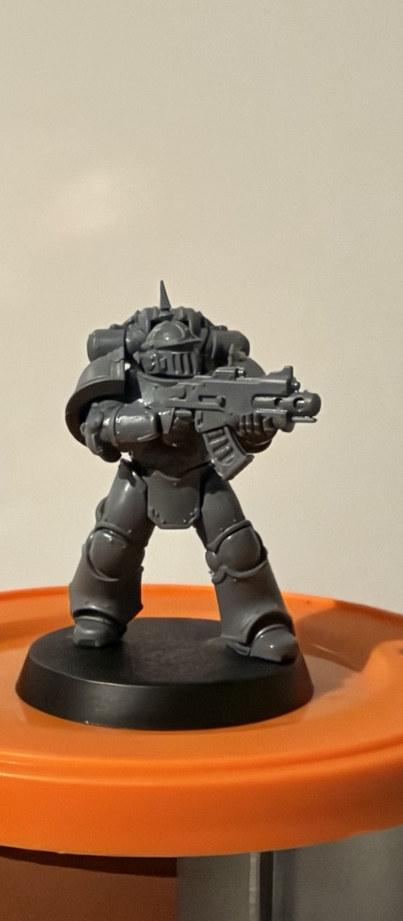
Lewis’s tip: Keep a clean starting photo from each side. It helps show exactly what each layer adds.
Step 2: Valrak Yellow primer
Colour Forge Signature Series Valrak Yellow - the actual first coat.
Paints and materials
- Colour Forge Signature Series Valrak Yellow spray primer
Method
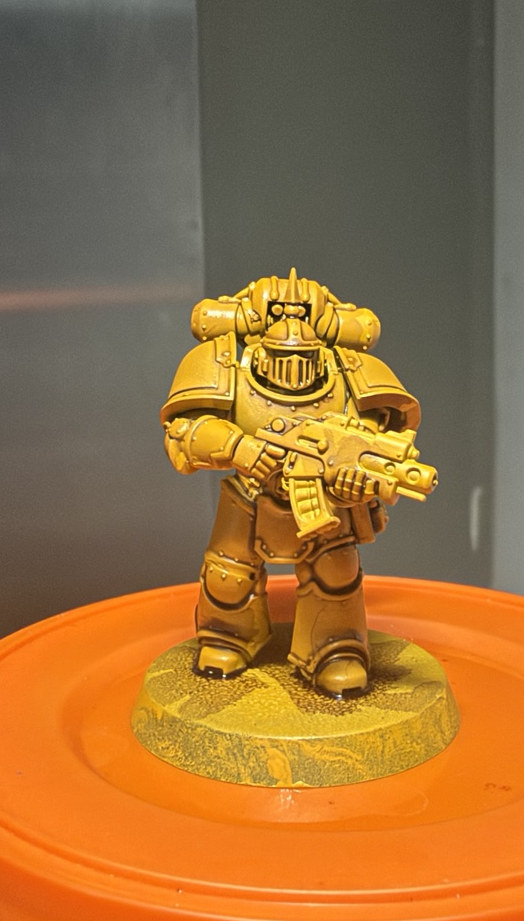
Prime the assembled miniature with Colour Forge Valrak Yellow. Use thin even passes and reach under the arms and behind the backpack. The whole figure becomes yellow at this stage. Once the spray has cured, the armour is ready for Bad Moon Yellow and shade control.
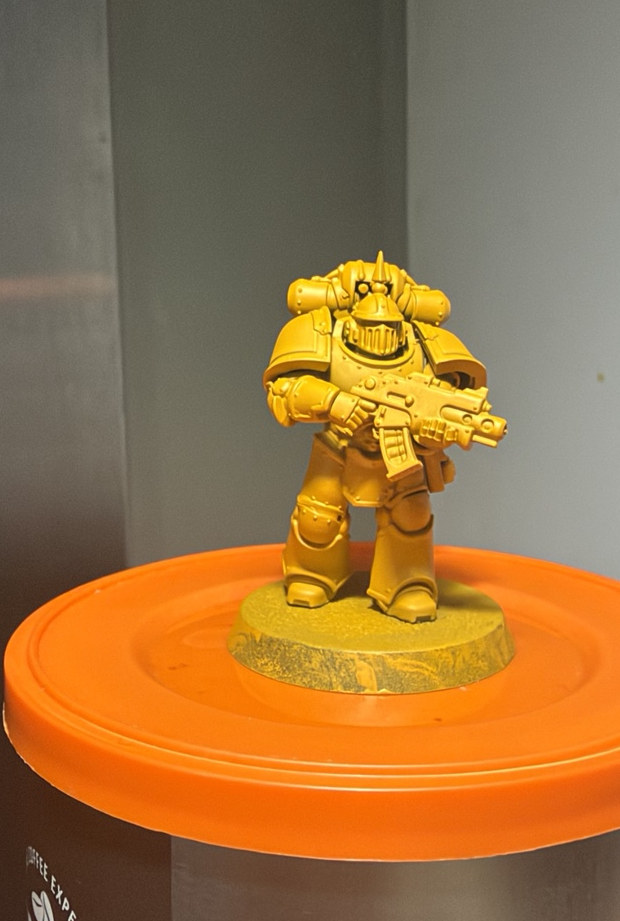
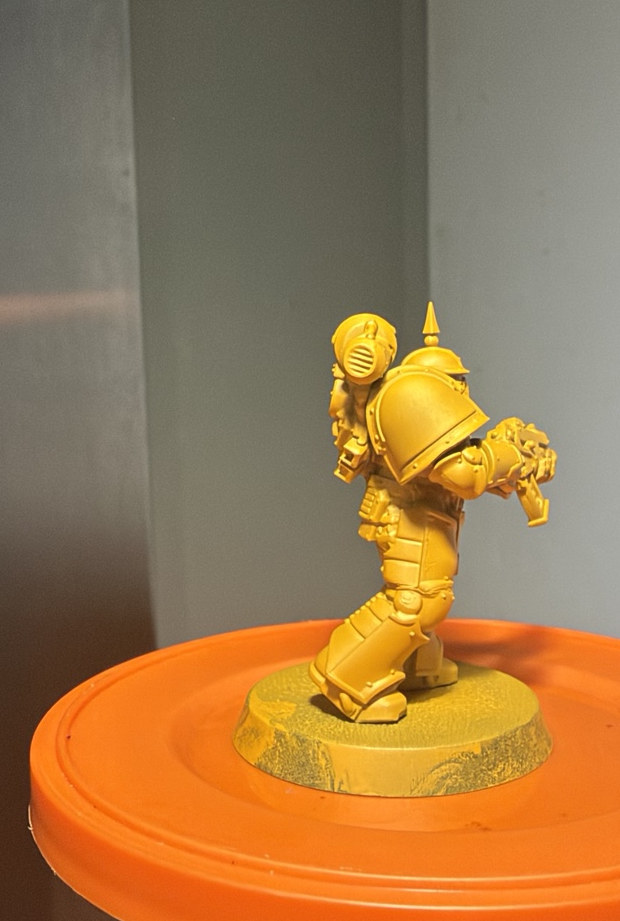
Lewis’s tip: This is not Grey Seer or generic white primer. The yellow spray is an important part of this particular recipe.
Step 3: Bad Moon Yellow
Build the strong VII Legion armour colour over the yellow primer.
Paints and materials
- Citadel Bad Moon Yellow Contrast
- Medium brush, palette and water
Method
Apply Citadel Bad Moon Yellow Contrast in careful, controlled passes. Work across each armour plate, guiding excess away from flat centres before it dries. The yellow foundation below should stay luminous while the added layer gives the yellow richer definition.
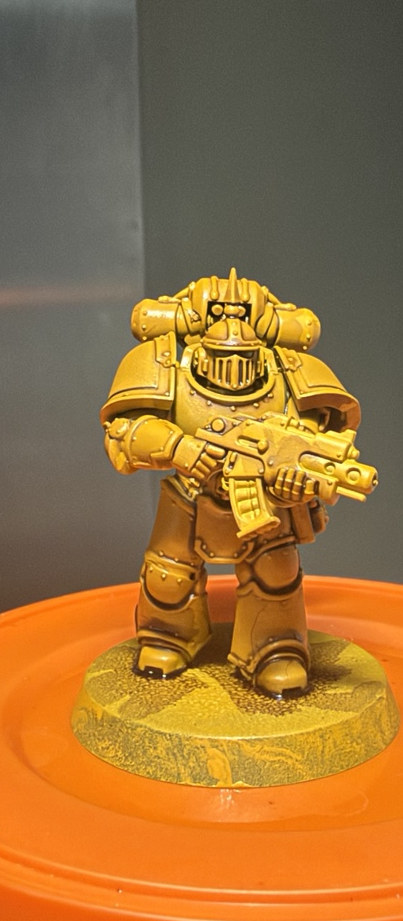
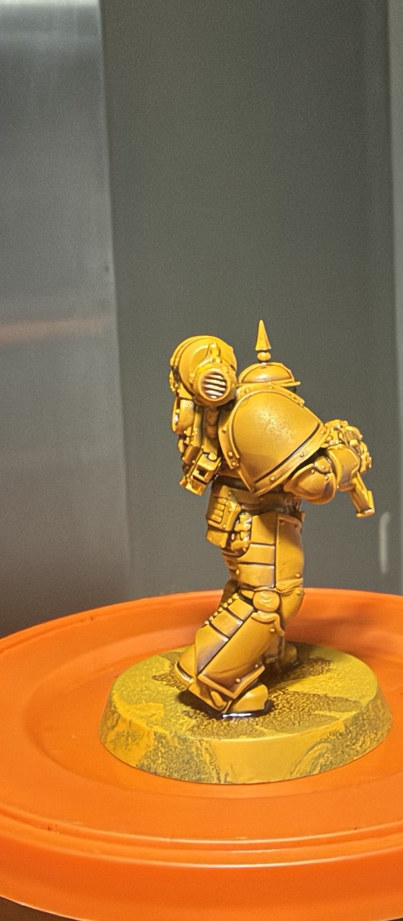
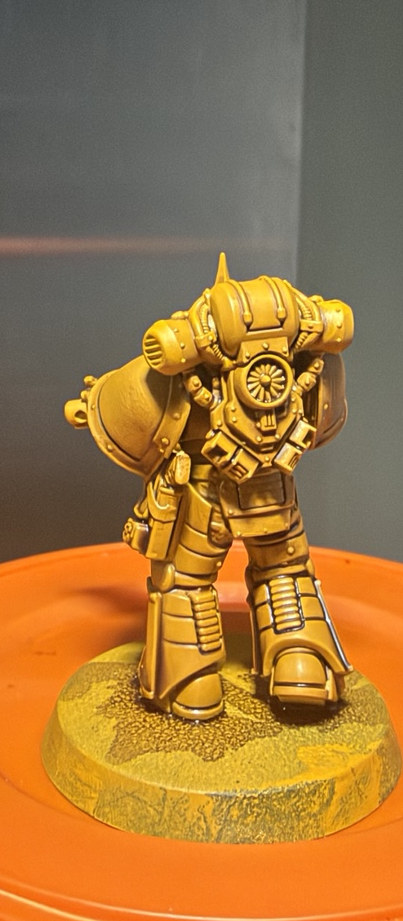
Lewis’s tip: Do not keep brushing back over a drying Contrast layer - that is how tide marks appear.
Step 4: Build panel definition
Control shadows without losing bright yellow on the armour faces.
Paints and materials
- Bad Moon Yellow for clean-up
- Controlled recess shade / dark yellow-brown
- Fine pointed brush
Method
Darken narrow recesses around knees, below shoulder lips, under the bolter and where armour plates overlap. Keep the centres of the shoulders and shins bright. Where shade spreads into the open panel, tidy it back with yellow after it has dried.
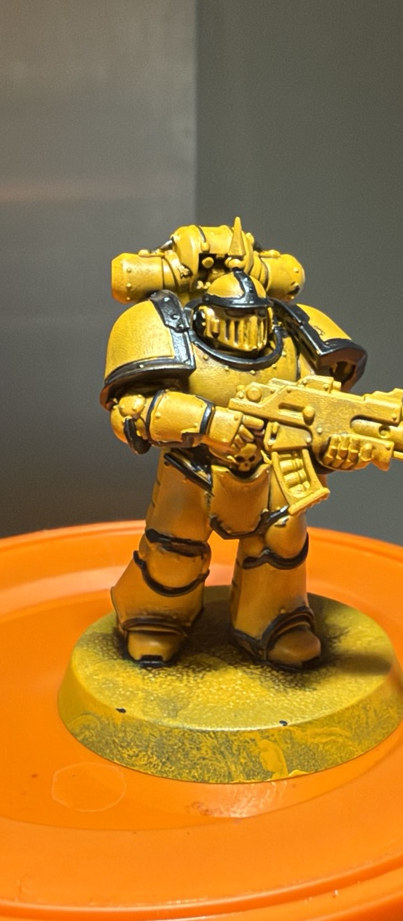
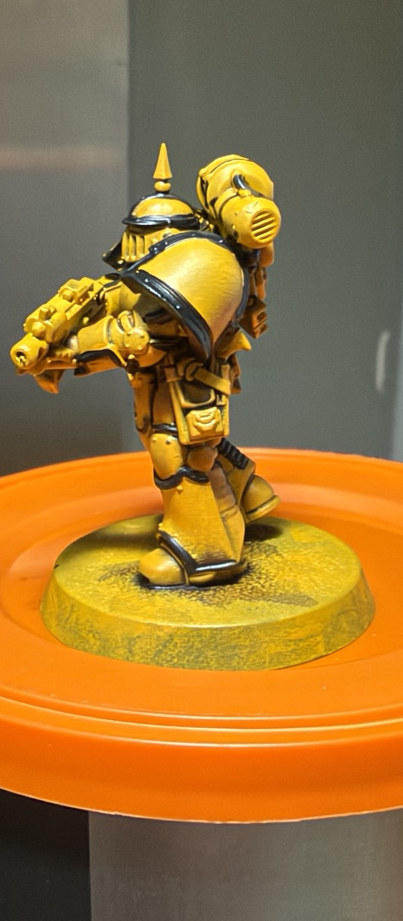
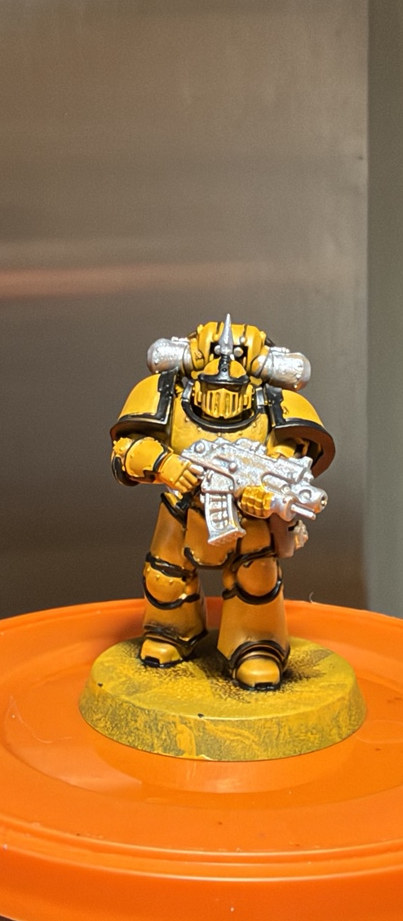
Lewis’s tip: The armour should have a bright centre and a dark join, not a brown film across the whole panel.
Step 5: Matt Black trim + joints
Crisp black framing is the defining contrast to Valrak Yellow.
Paints and materials
- Army Painter Fanatic Matt Black
- Bad Moon Yellow for corrections
- Fine brush
Method
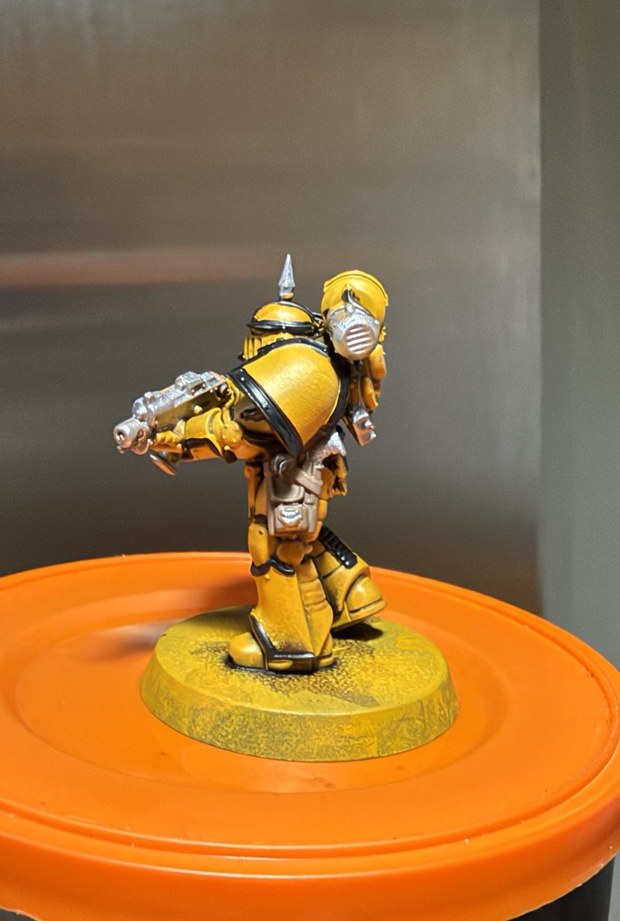
Paint the shoulder rims, flexible joints, visor surrounds and mechanical gaps in Army Painter Fanatic Matt Black. Follow the sculpted lip rather than drawing an oversized border. Check the backpack and greaves, then repair slips with yellow where necessary.
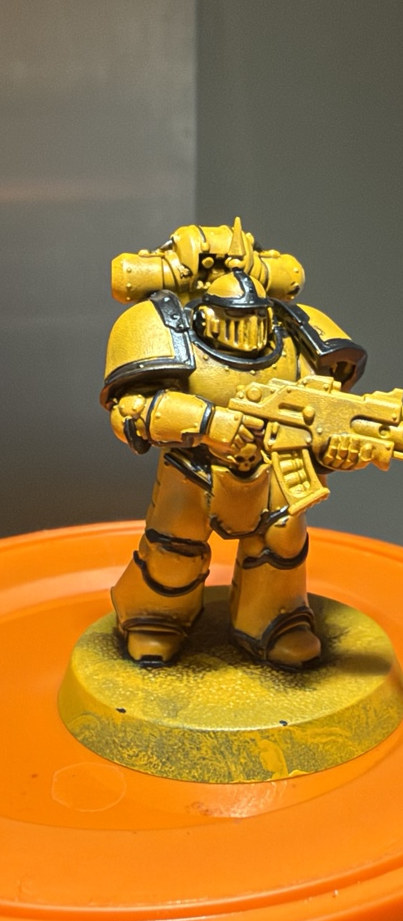
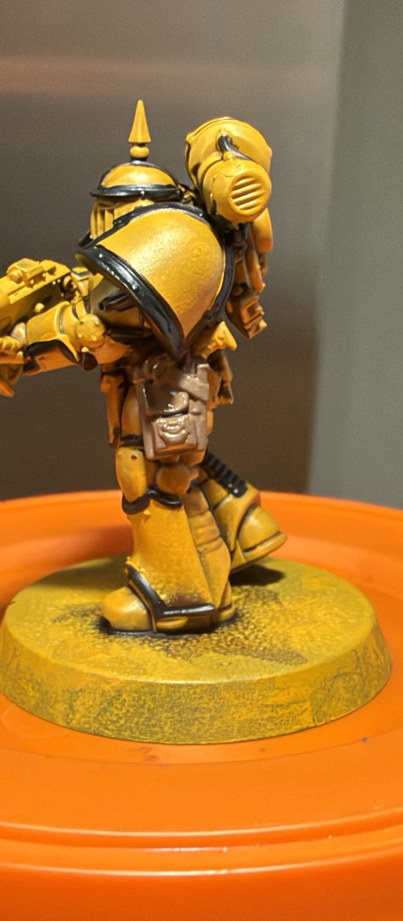
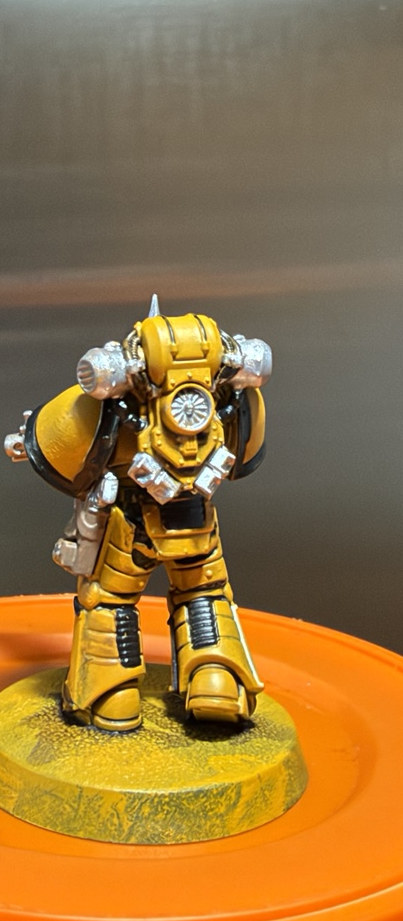
Lewis’s tip: Consistent thin black rims make more difference than dramatic yellow highlights at this scale.
Step 6: Silver TMM + bolter detail
Brush-paint cold metal before the final dark weapon casing.
Paints and materials
- Vallejo True Metallic Metal Sterling Silver
- Fine or medium detail brush
Method
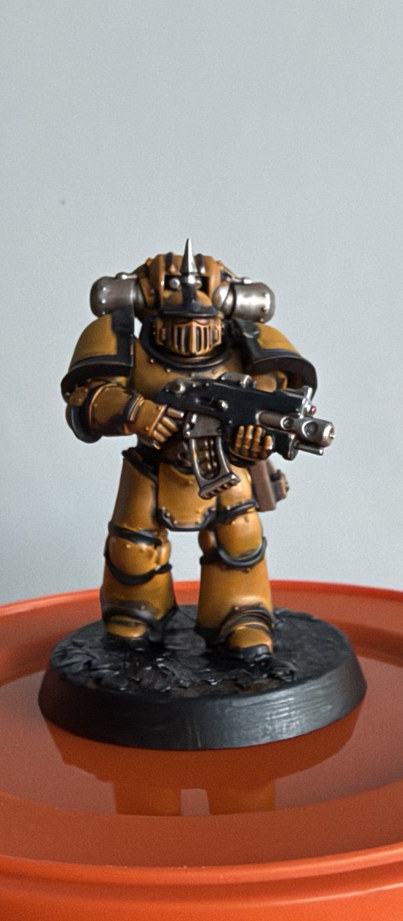
Use Vallejo TMM Sterling Silver on the bolter, barrels, ammunition fittings, power-pack vents and selected hardware. The photographed weapon is substantially silver at this stage. Leave enough depth between the metal parts to keep it from becoming one shiny block.
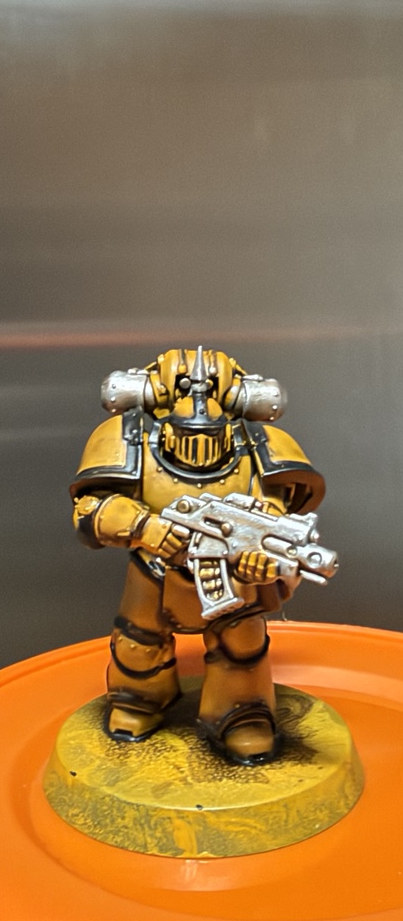
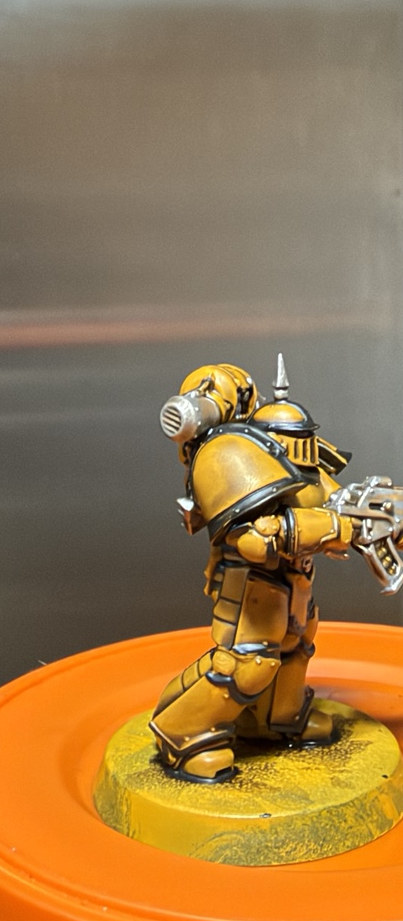
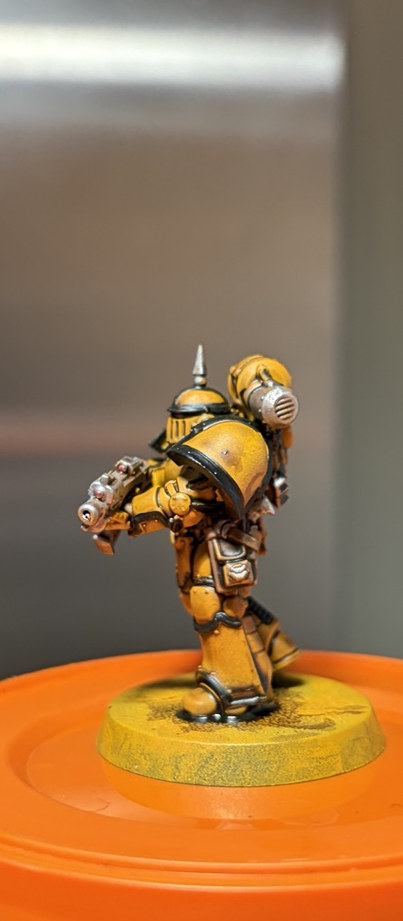
Lewis’s tip: Paint metallic mechanisms first. Cutting the casing back in black is easier than fixing silver overspill later.
Step 7: Leather + small fittings
Complete the small equipment colours before final shade.
Paints and materials
- Army Painter Fanatic Leather Brown
- Vallejo TMM Sterling Silver
- Army Painter Matt Black
Method
Pick out pouches and belts with Leather Brown, then restore the metal fittings and tiny details. Keep warm and silver accents restrained against the dominant yellow-and-black armour. Clean around the hands and boltgun grip before proceeding.
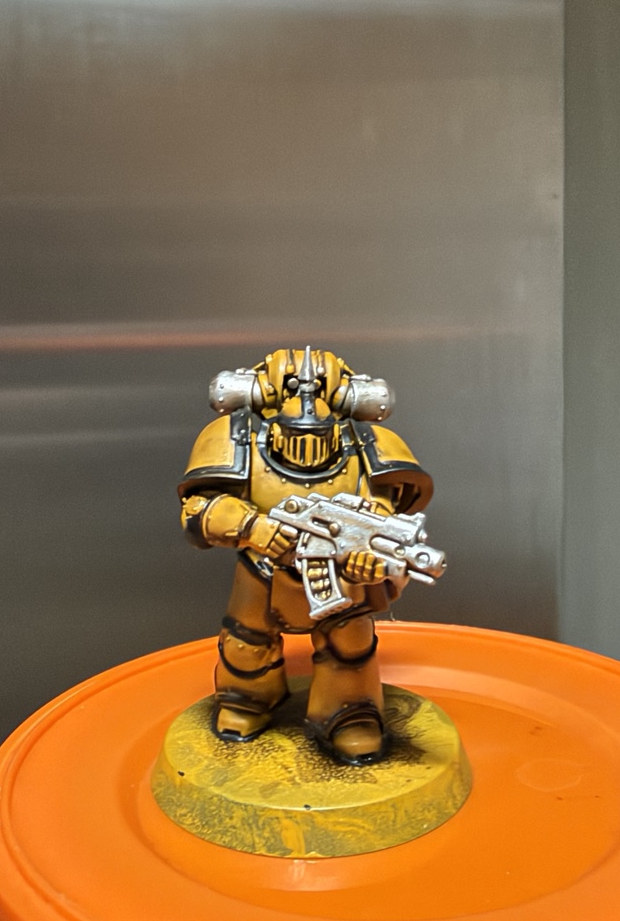
Lewis’s tip: A limited palette is more readable than introducing another loud colour into the yellow suit.
Step 8: Finish the black bolter
Create one dark focal shape across the chest.
Paints and materials
- Army Painter Fanatic Matt Black
- Vallejo TMM Sterling Silver - small re-picks
Method
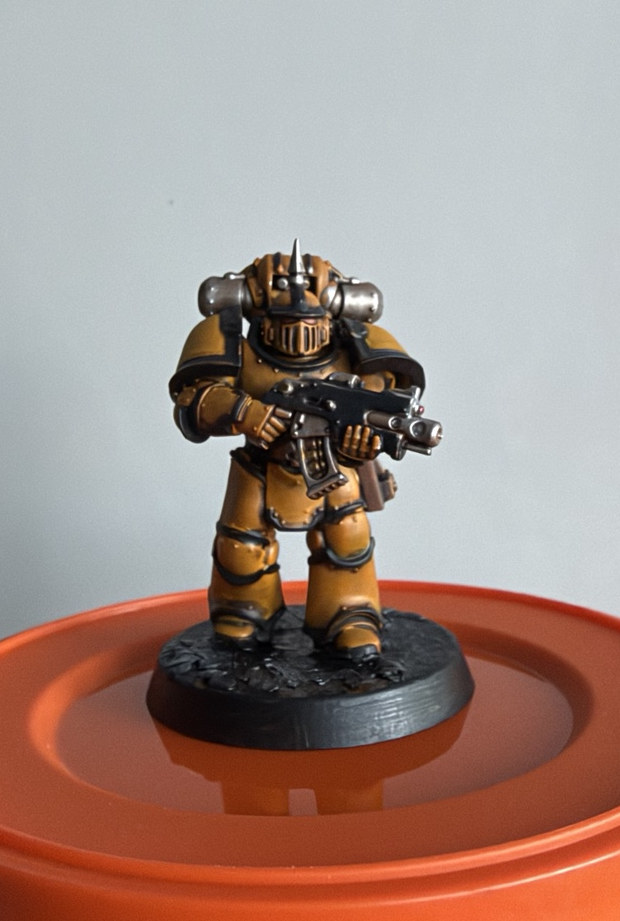
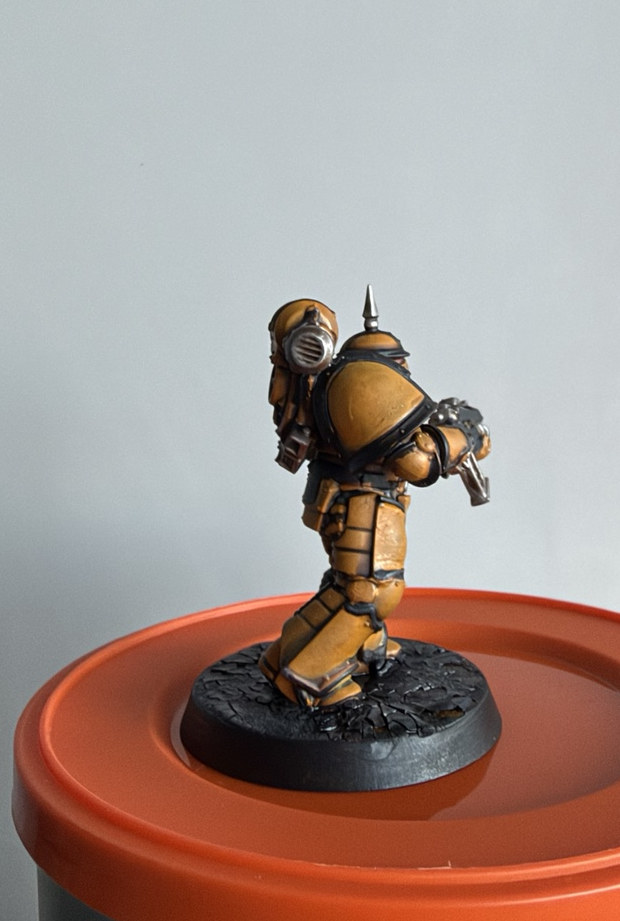
Paint the bolter outer casing Army Painter Matt Black, keeping the barrel, magazine and selected sights metallic. The dark weapon creates a strong contrast to the yellow body. Tidy the casing edges; save bright silver for functional metal spots.
Lewis’s tip: The gun should look purposeful and dark, not like another full silver armour plate.
Step 9: Full block-in check
Yellow, black, silver and leather should all be present now.
Paints and materials
- All preceding paints
- Detail brush for tidy-up
Method
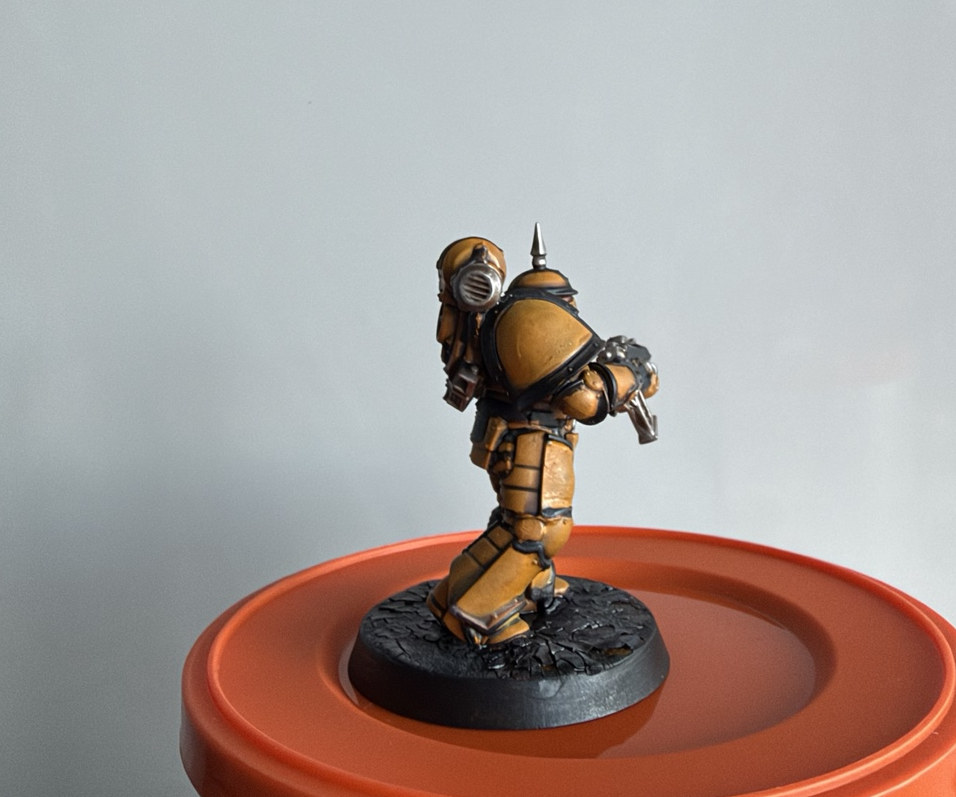
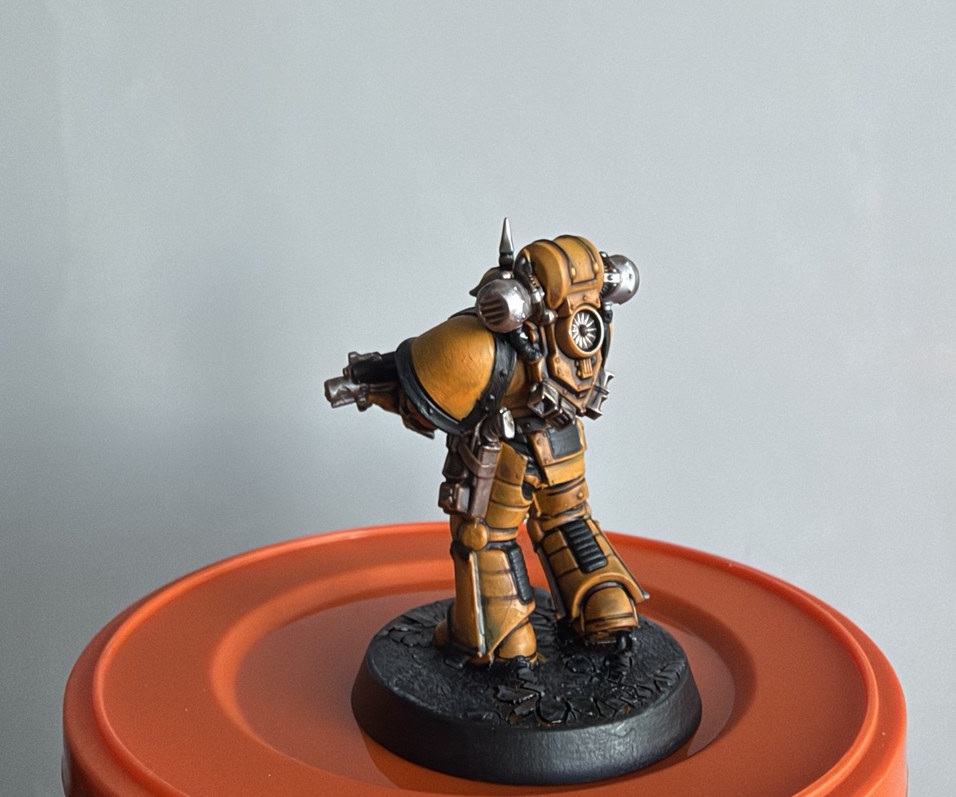
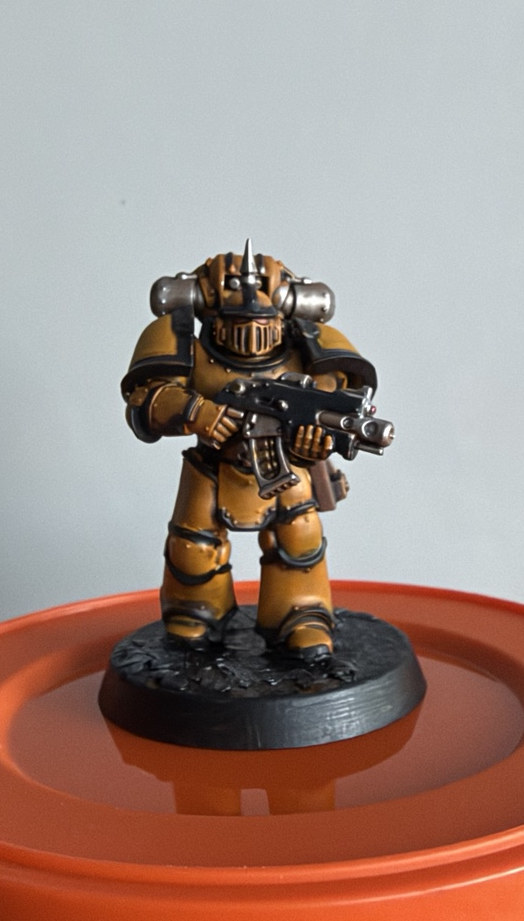
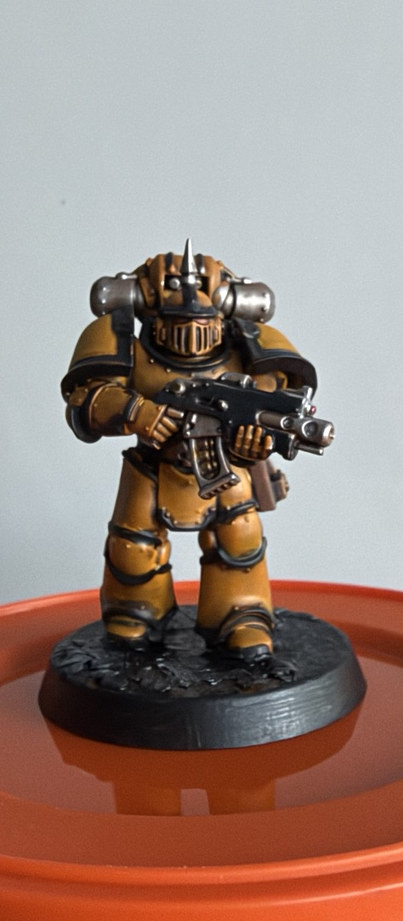
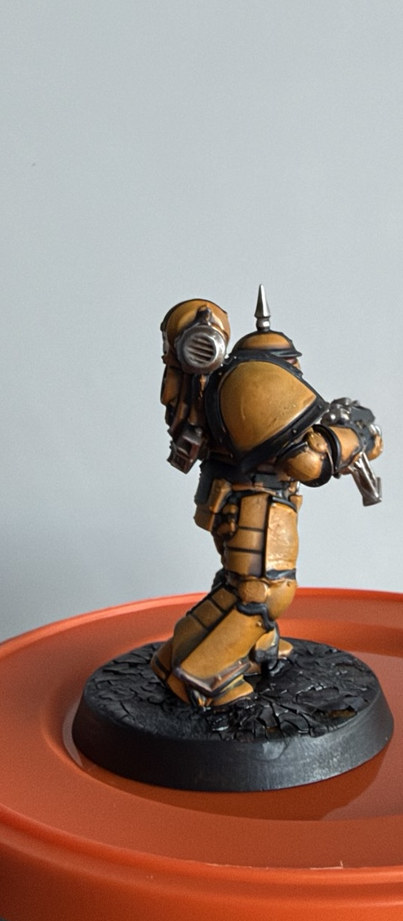
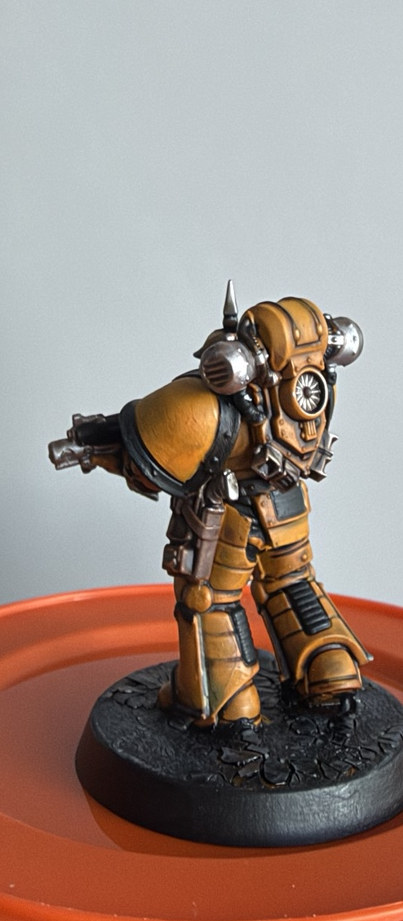
Inspect the completed colour blocks: yellow armour, black trim and joints, black bolter, silver barrel and backpack details, leather equipment and recessed panel shading. Correct visible mistakes before any final unifying shade. These later photos are reference views of the completed colour placement.
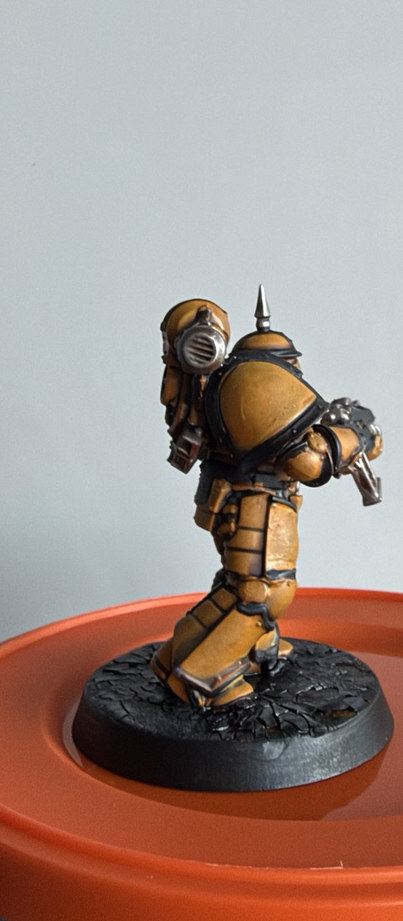
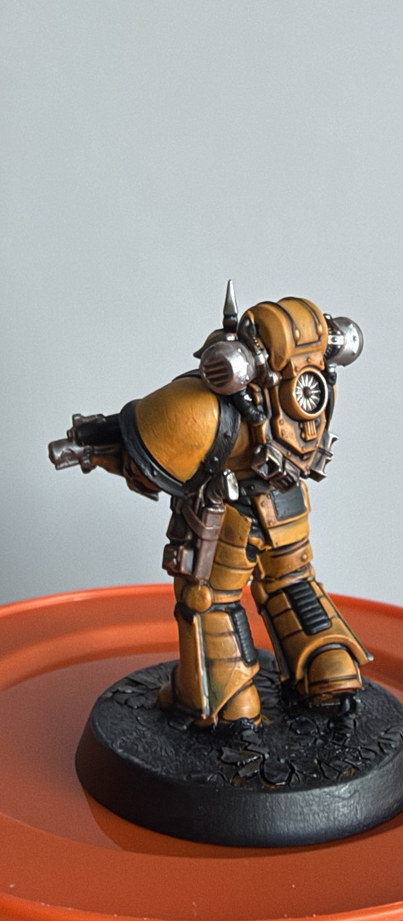
Lewis’s tip: A wash is not a substitute for painting the missing mechanical details.
Step 10: Selective shade + repair
Protect the yellow centres - avoid a heavy all-over brown wash.
Paints and materials
- Marine Juice (Dark Tone / Reikland / Lahmian 1:1:1)
- Citadel Bad Moon Yellow Contrast
- Vallejo TMM Sterling Silver
Method
Use the usual Marine Juice blend sparingly in the recesses, on leather and metallic fittings if these need a shared shade. Do not flood the broad yellow shoulder or shin plates. After everything is dry, restore bright yellow with controlled Bad Moon Yellow touch-ups and re-pick a few sharp metal points.
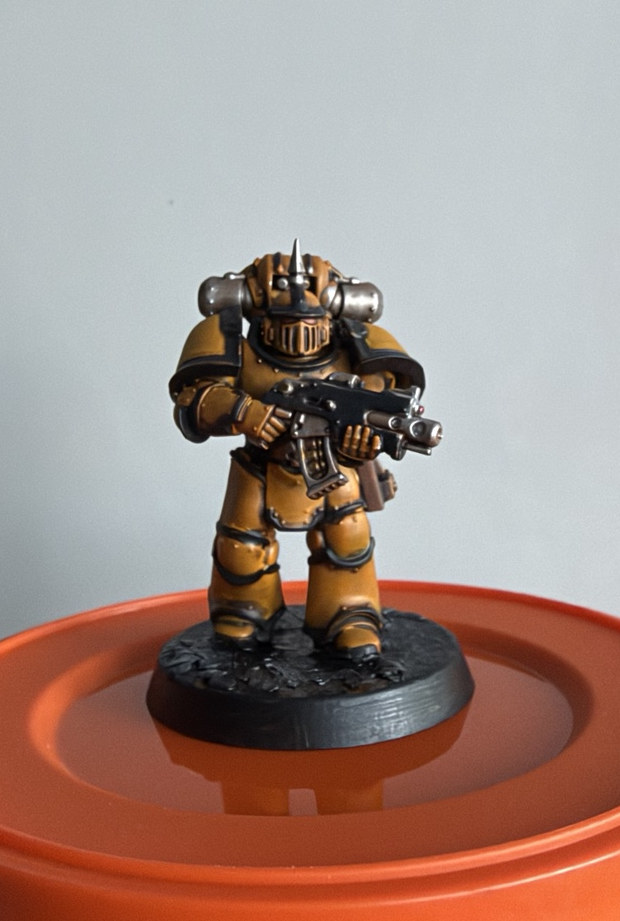
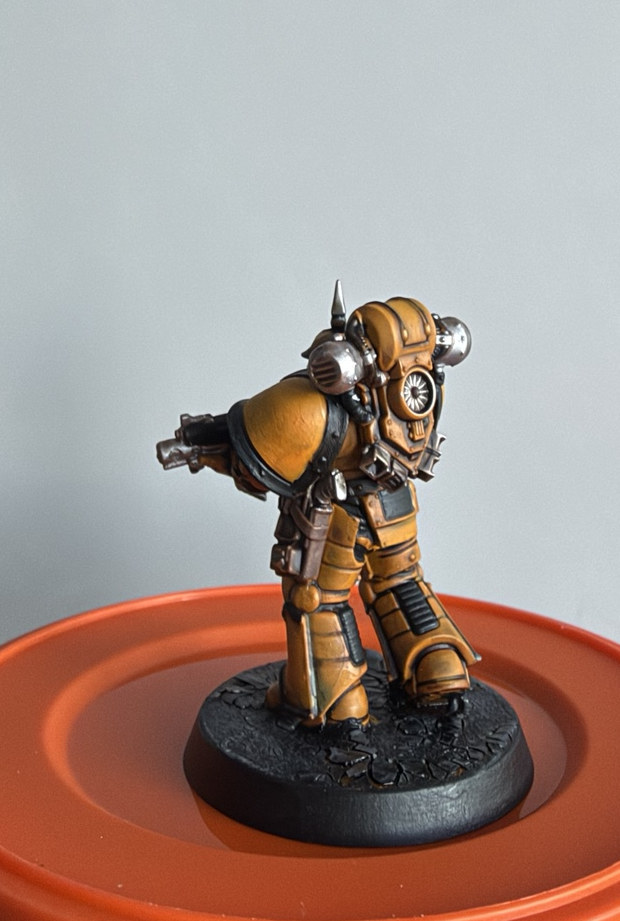
Lewis’s tip: Yellow should remain the bright material. The shade is there to separate the plates.
Step 11: Dark base + final clean-up
Black cracked earth frames the yellow rather than competing.
Paints and materials
- Dark crackle / cracked-earth texture
- Army Painter Fanatic Matt Black
- Muted grey drybrush - optional
Method
Apply dark crackle texture or cracked-ground material around the boots and allow it to cure. If desired, lightly brush raised ground edges with neutral grey. Paint the outer rim Matt Black and tidy any splashes on the lower armour. The finished pictures show the dark base.
Lewis’s tip: On a display shelf, the near-black base makes the warm yellow look brighter.
Finished model and recipe recap
- Prime with Colour Forge Valrak Yellow - not white or grey.
- Citadel Bad Moon Yellow across the armour.
- Narrow recess shade and crisp Matt Black trim.
- Brush Sterling Silver metal and Leather Brown details.
- Finish the black bolter; shade recesses carefully without drowning yellow.
- Dark cracked base, clean Matt Black rim.
Yellow stays the hero: Valrak Yellow provides the foundation, black provides definition.