Iron Warriors Horus Heresy : Step-by-Step Painting Guide
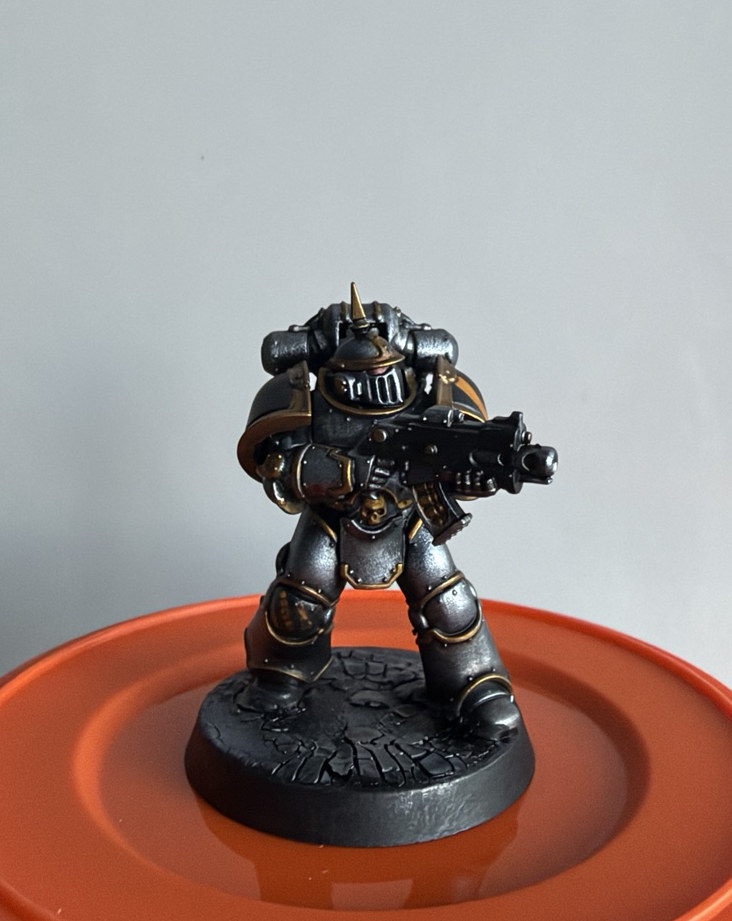
Hard-worn IV Legion steel: a solid black foundation, deliberately textured cold silver, warm gold trim and hand-painted hazard stripes. A brush-and-sponge Heresy scheme without an airbrush.

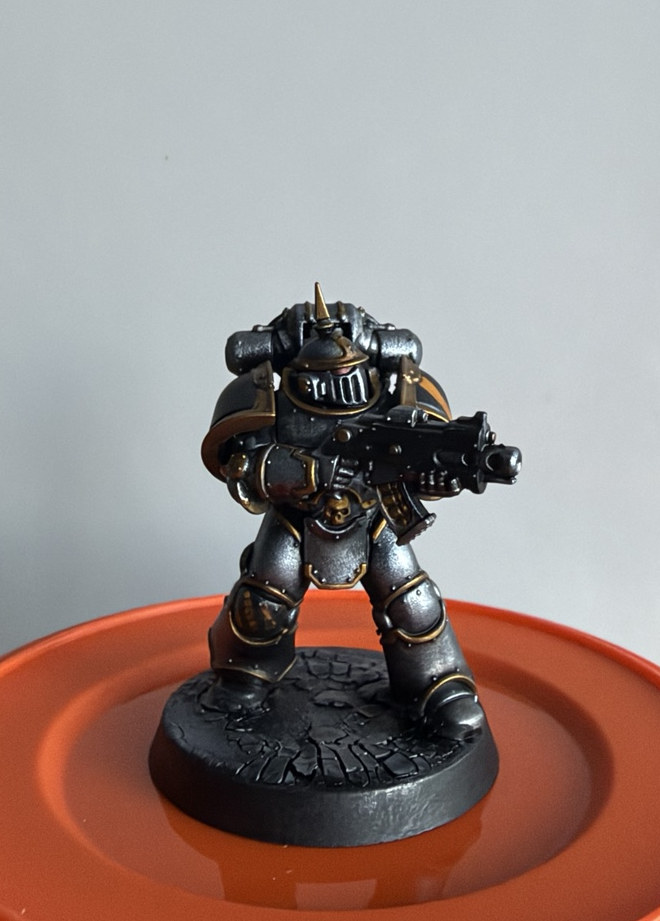
The shine belongs to the metal, not the finish. Keep the recesses dark, the trim controlled and the weathering deliberate.
Before you start
Accurate primers, brush paints and documented photographic stages.
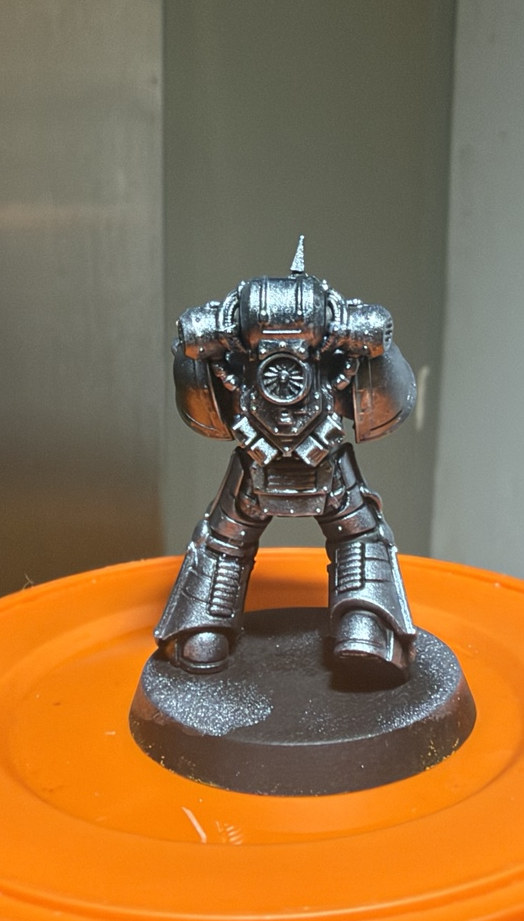
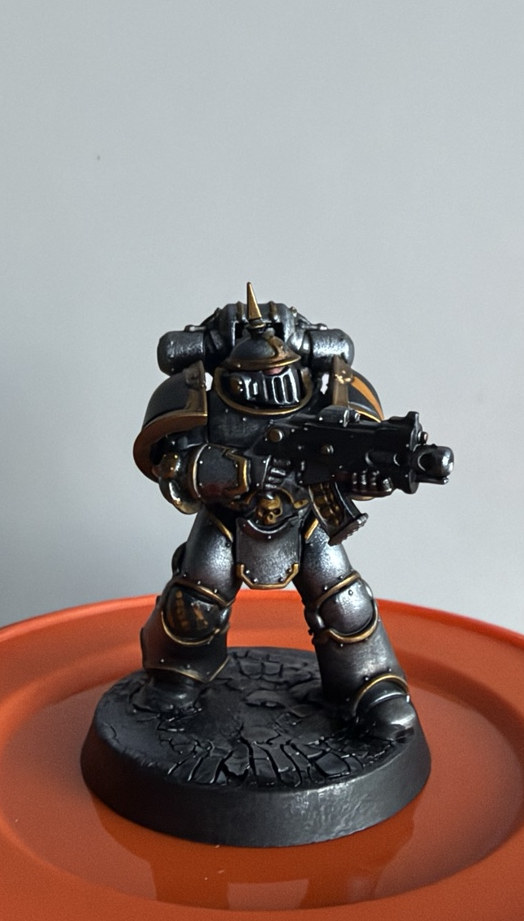
Step 1: Clean build
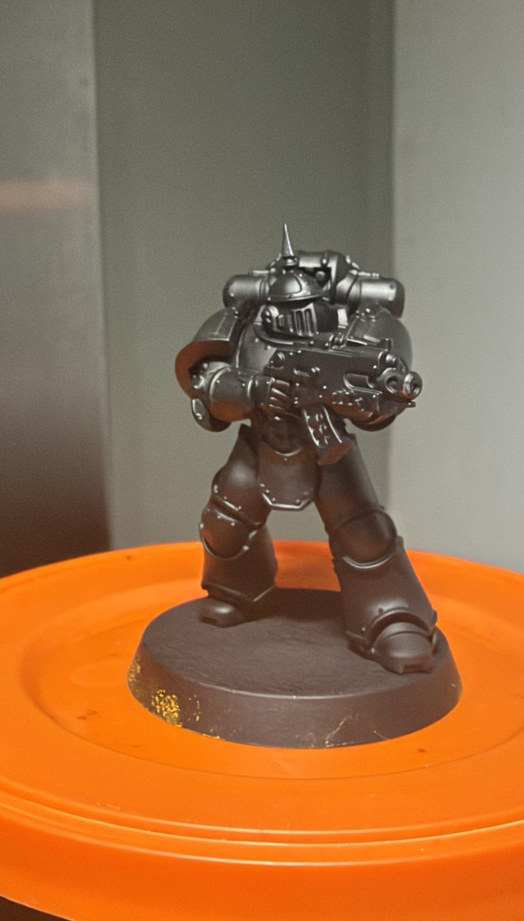
One Horus Heresy Mk III miniature, prepared before any primer.
Paints and materials
- Assembled Horus Heresy Mk III marine
- Hobby knife and fine file, as required
Method
Remove visible mould lines and check the helmet, shoulder rims, bolter and backpack joins. Make sure the underarms and inside of the greaves can be reached with a brush. The later paint effects work best over crisp plate edges.
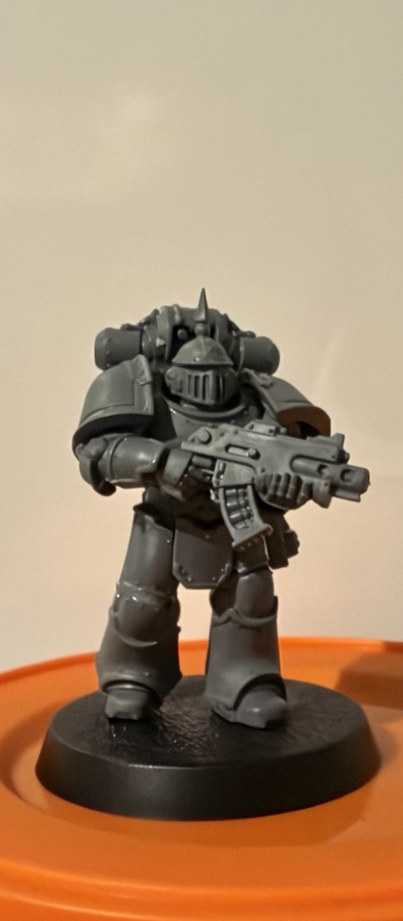
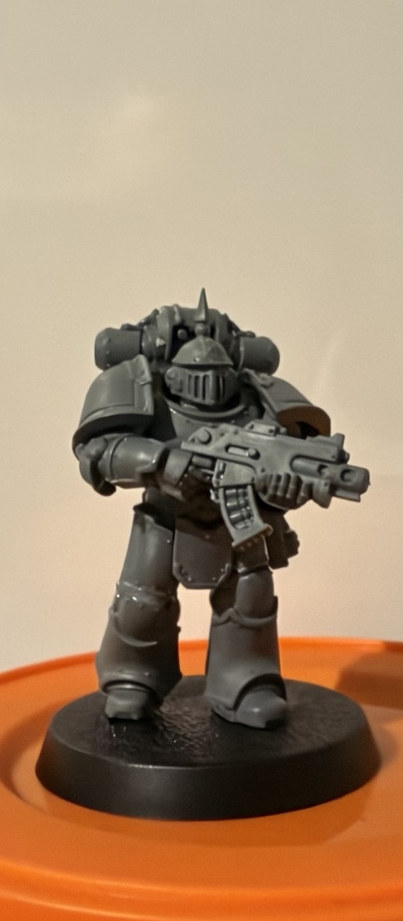
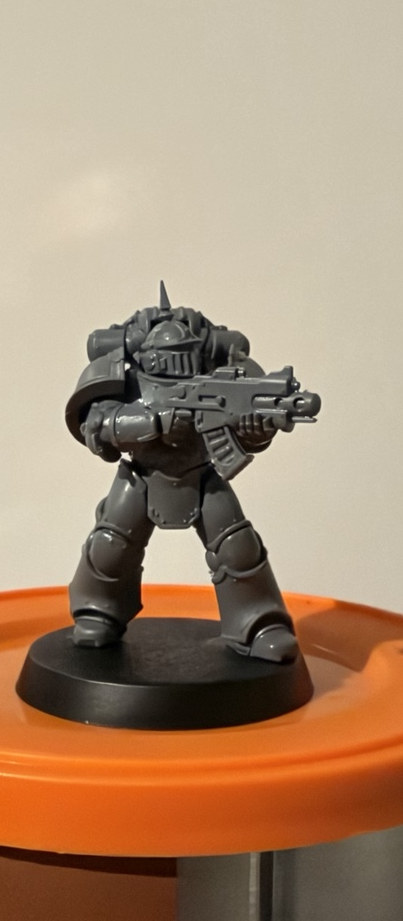
Lewis’s tip: Keep a clean starting photo from each side. It helps show exactly what each layer adds.
Step 2: Matt Black primer
Colour Forge Matt Black - confirmed, not an unidentified dark undercoat.
Paints and materials
- Colour Forge Matt Black model primer
Method
Spray the whole model with Colour Forge Matt Black in several light passes. Check below the shoulder plates, under the bolter and behind the legs. This dark coat is the visual shadow that will remain visible beneath the steel.
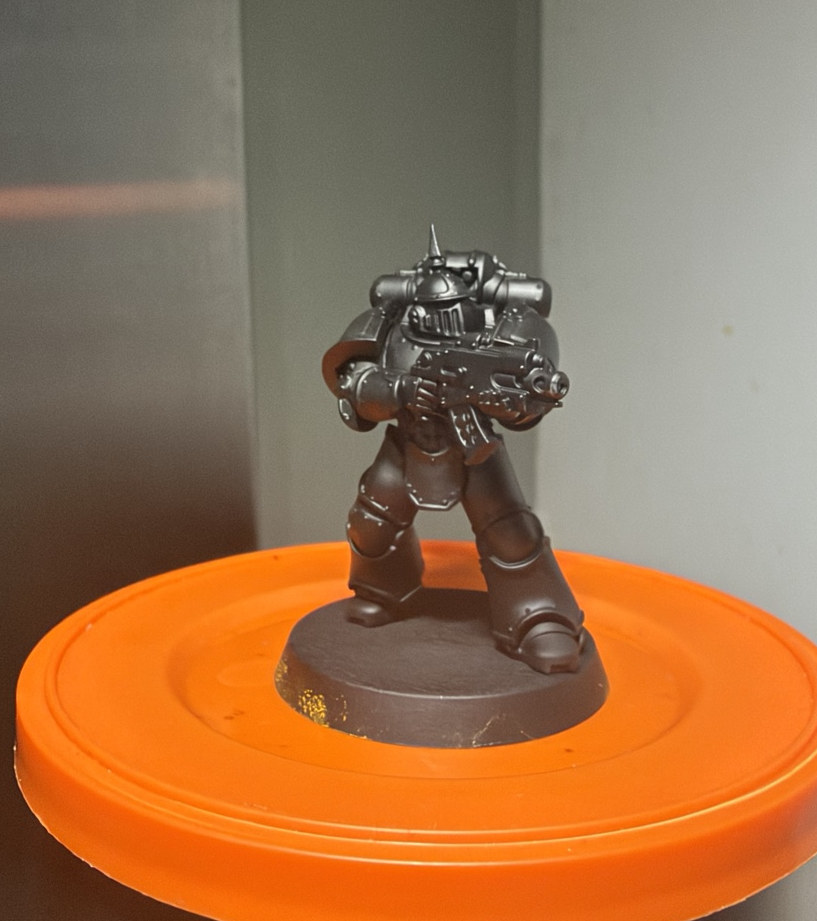
Lewis’s tip: This stage is not a brown primer. The dark warmth visible in some photos is from lighting and subsequent paintwork.
Step 3: Build the cold steel
Drybrush or sponge metallic volume over the black foundation.
Paints and materials
- Vallejo True Metallic Metal Sterling Silver
- Small torn sponge or soft drybrush
Method
Brush or sponge Vallejo Sterling Silver across the exposed armour: helmet, shoulders, breastplate, backpack, upper legs and greaves. Work gently and build the brightness in stages. Do not force silver into every join - the black between plates gives the metal its weight.
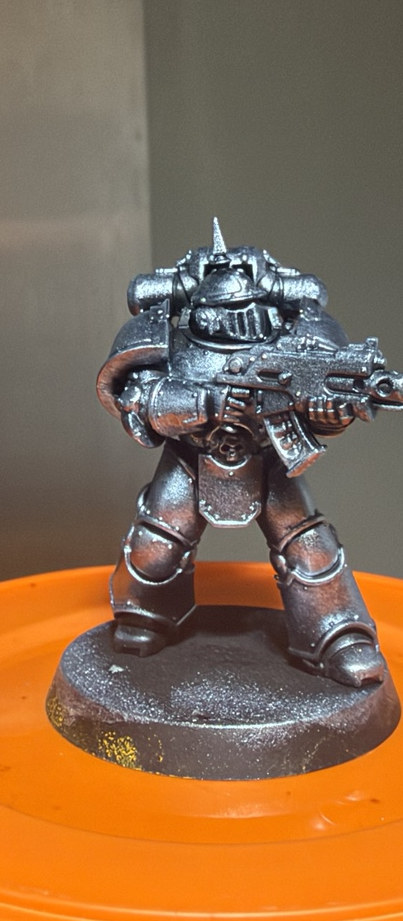
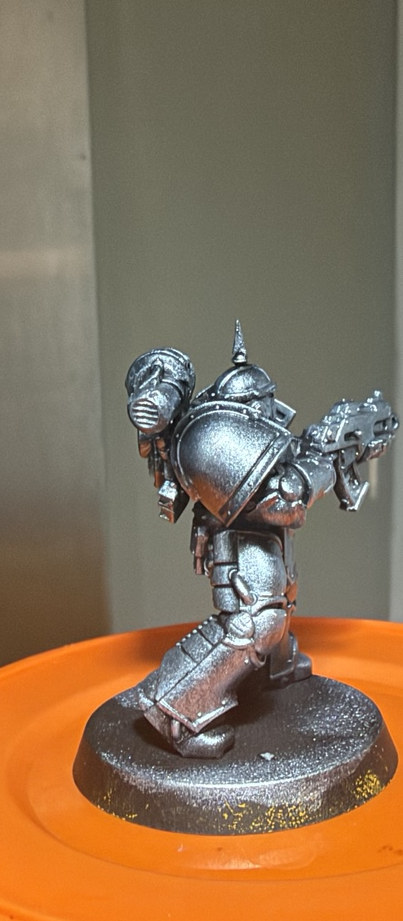
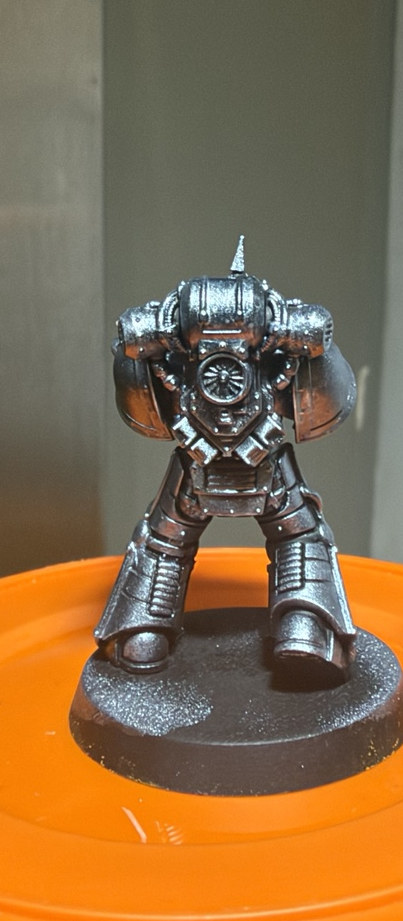
Lewis’s tip: Leave the underarms and back of the knee darker. The early metal can appear bright; the later shade will knock it back.
Step 4: Rebuild black structure
Make the weapon and shoulder fields distinct from the steel.
Paints and materials
- Army Painter Warpaints Fanatic Matt Black
- Fine brush for borders
Method
Paint the bolter casing, shoulder-pad fields and selected flexible joints with Army Painter Matt Black. Tidy silver overspill beside the shoulder rims and around the weapon. Maintain the difference between the soft, flat black surfaces and rougher metallic armour.
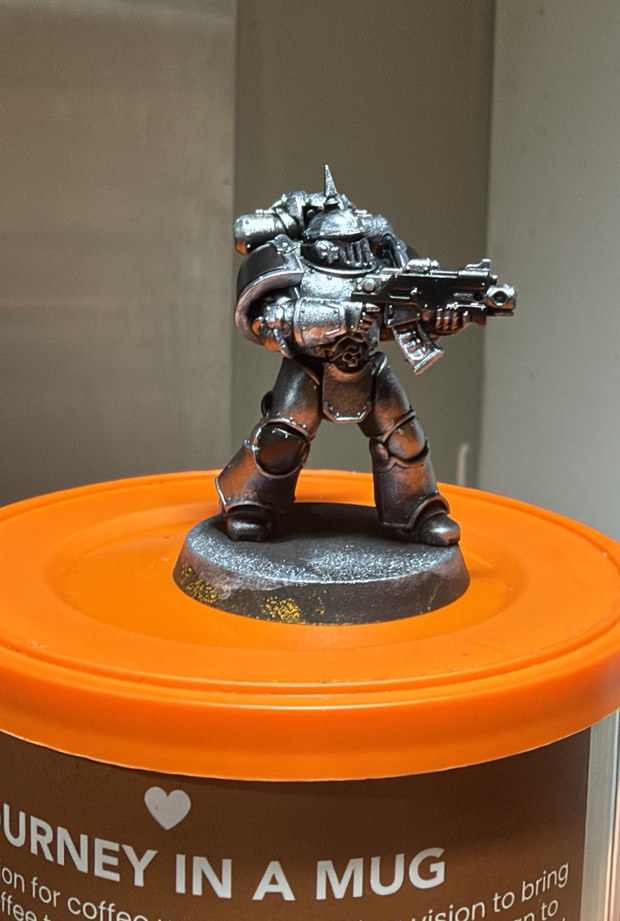
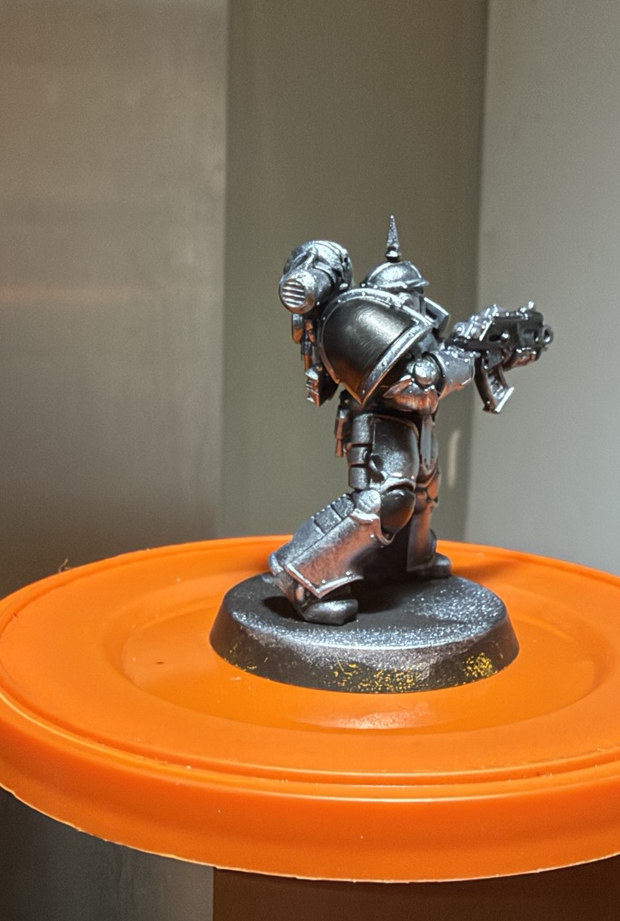
Lewis’s tip: Do not silver-edge every black panel. The matte sections are meant to be a visual rest from the metal.
Step 5: Brush-paint gold trim
Warm Imperial Gold defines the IV Legion silhouette.
Paints and materials
- Vallejo True Metallic Metal Imperial Gold
- Vallejo TMM Red Copper - optional
- Fine detail brush
Method
Use a pointed brush to place Imperial Gold on shoulder rims, helmet fittings, armour borders, rivet surrounds and selected equipment. Keep lines narrow against the iron. A few small warm red-copper touches on mechanisms can be added without turning the entire suit gold.
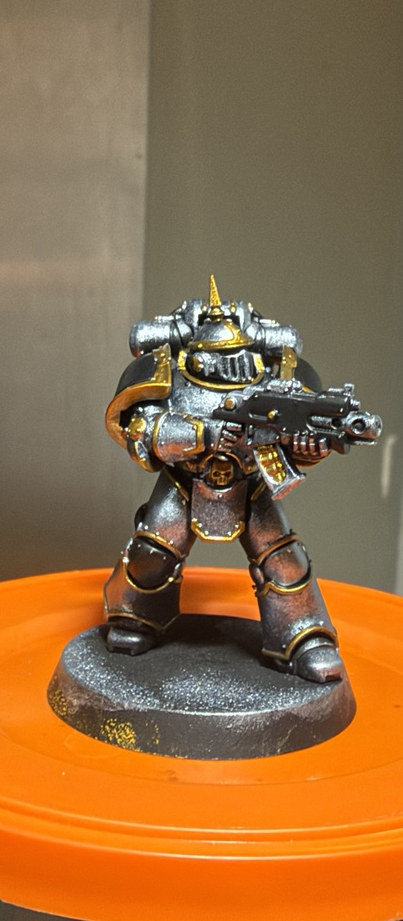
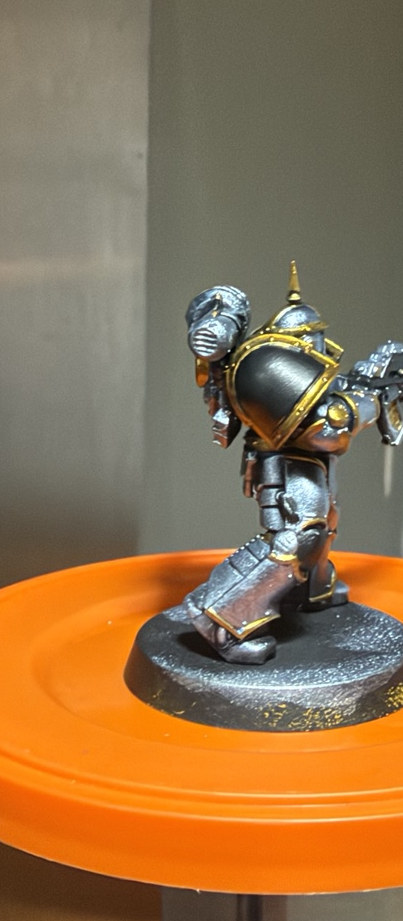
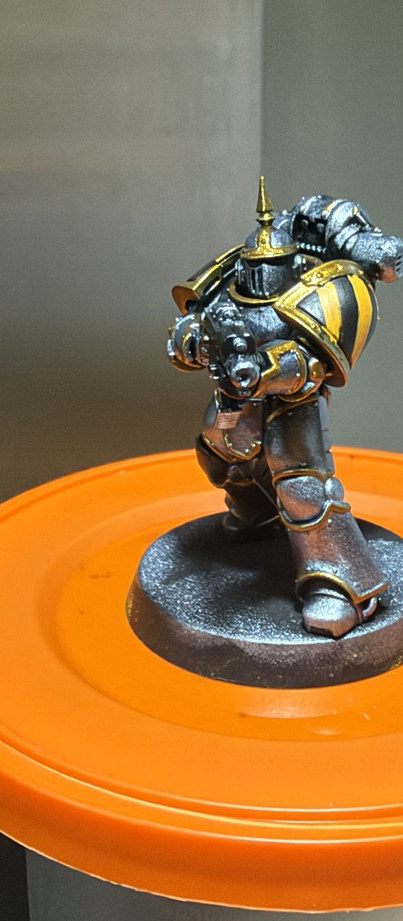
Lewis’s tip: These Vallejo metallics are BRUSH-PAINTED, even where the bottle range includes the word Airbrush.
Step 6: Hand-paint hazard stripes
The signature black-and-yellow shoulder earns its place.
Paints and materials
- Yellow paint for hazard field
- Army Painter Fanatic Matt Black
- Small pointed brush
Method
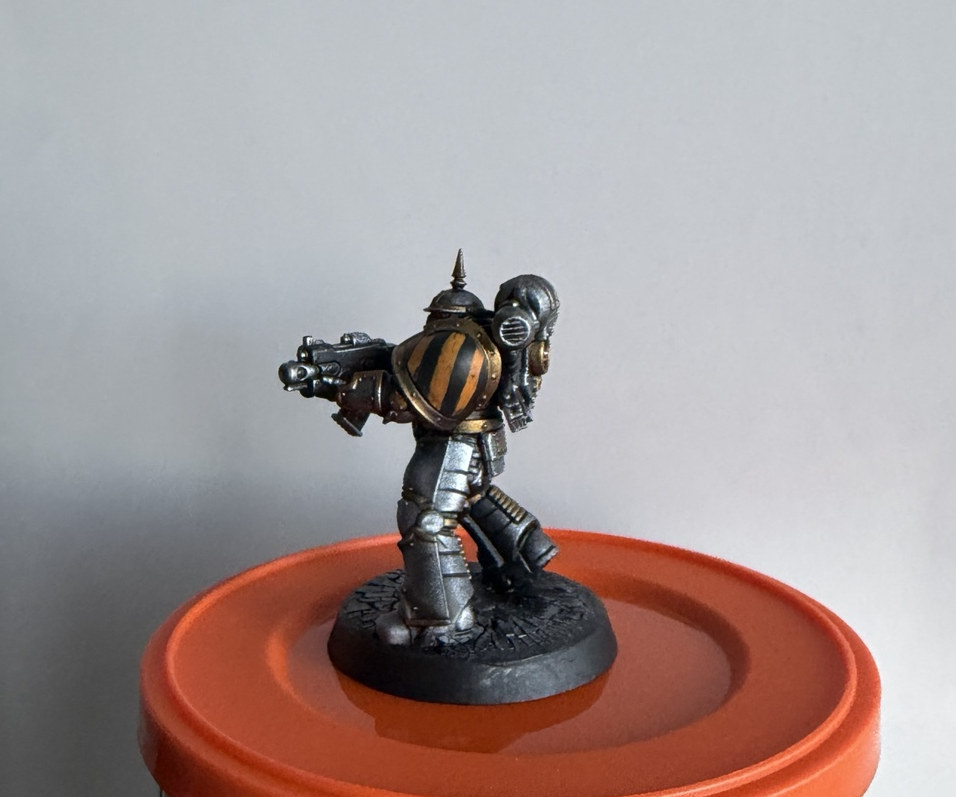
Block in the yellow hazard field on the selected shoulder. With Matt Black, place the central diagonal stripe first, then add evenly spaced stripes outward. Follow the curve of the armour, not a flat ruler line. Clean up alternating yellow and black until the pattern reads clearly.
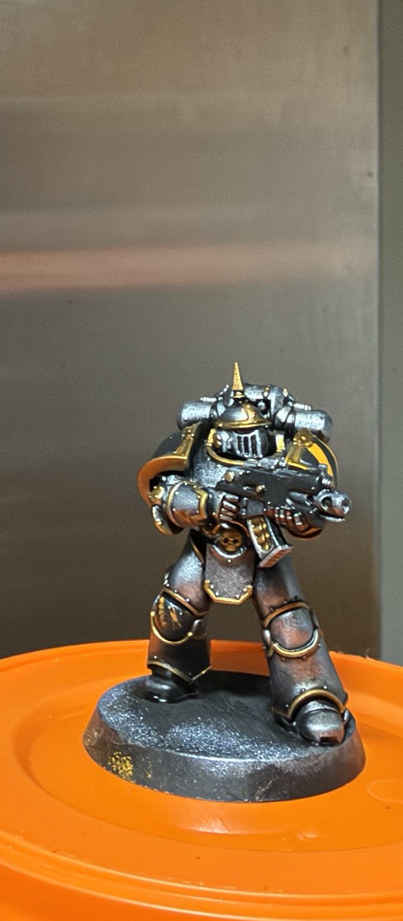
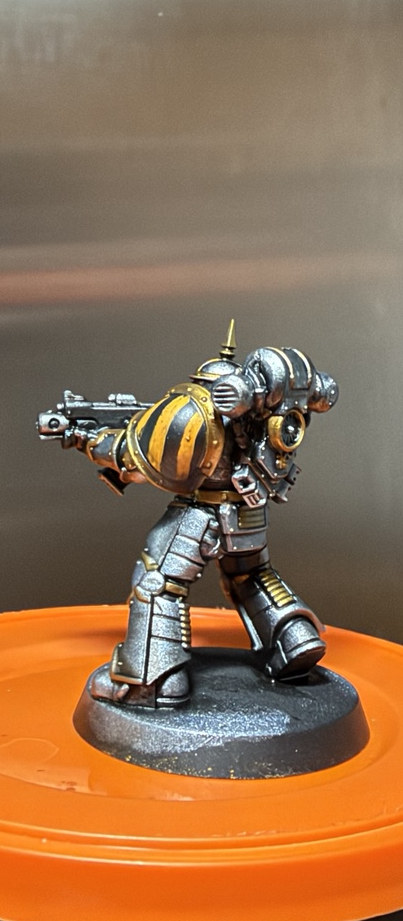
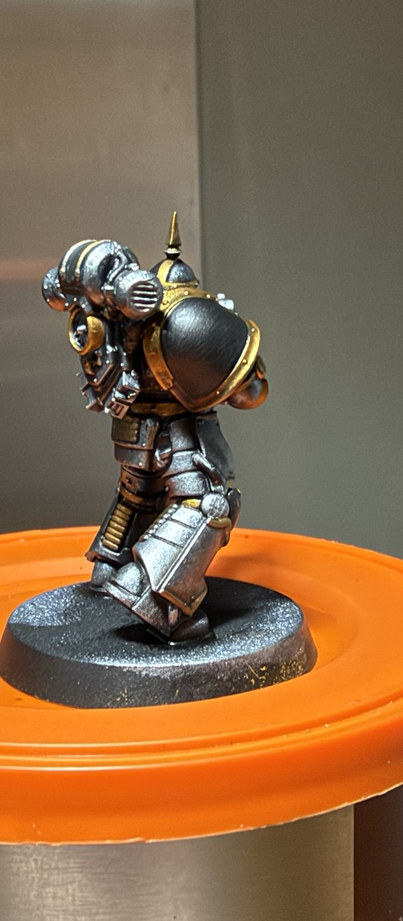
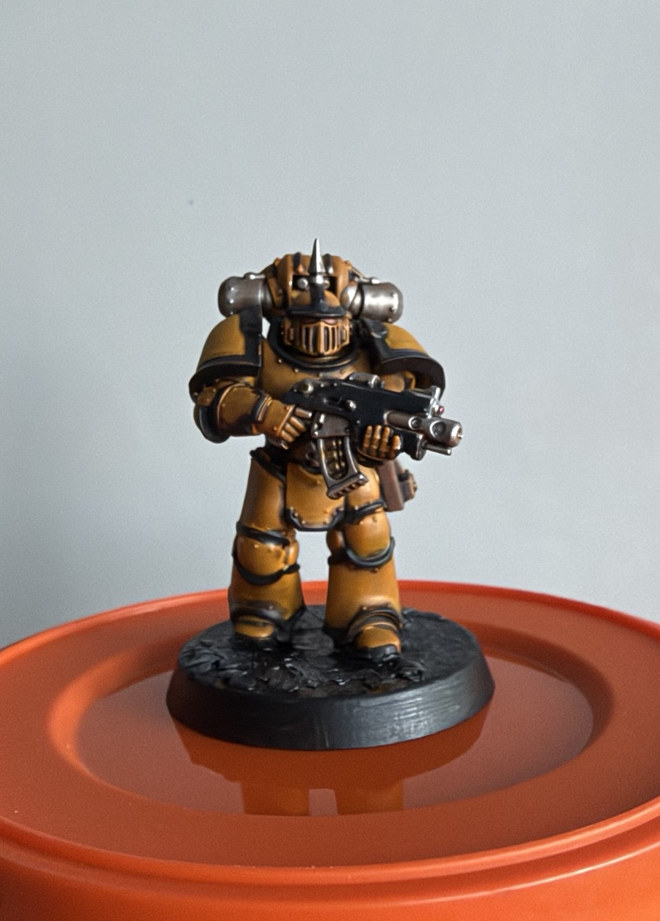
Lewis’s tip: The exact hazard-yellow pot was not recorded with the photos. Match your yellow to the warm tone seen here rather than inventing a bottle name.
Step 7: Leather + small hardware
Finish the equipment colours before any shared shade.
Paints and materials
- Army Painter Fanatic Leather Brown
- Army Painter Fanatic Matt Black
- Vallejo TMM silver / Imperial Gold
Method
Block pouches and straps in Leather Brown. Check the bolter muzzle, ammunition, vents and connection points: bring metal back where needed and keep the moving parts dark. Complete all black, gold, iron and leather blocks before moving to the shading stage.
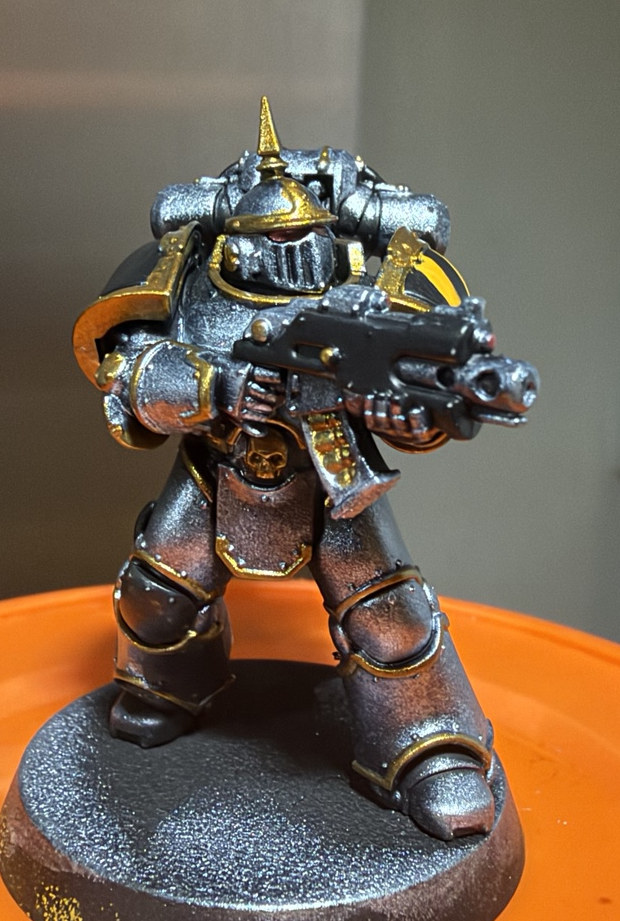
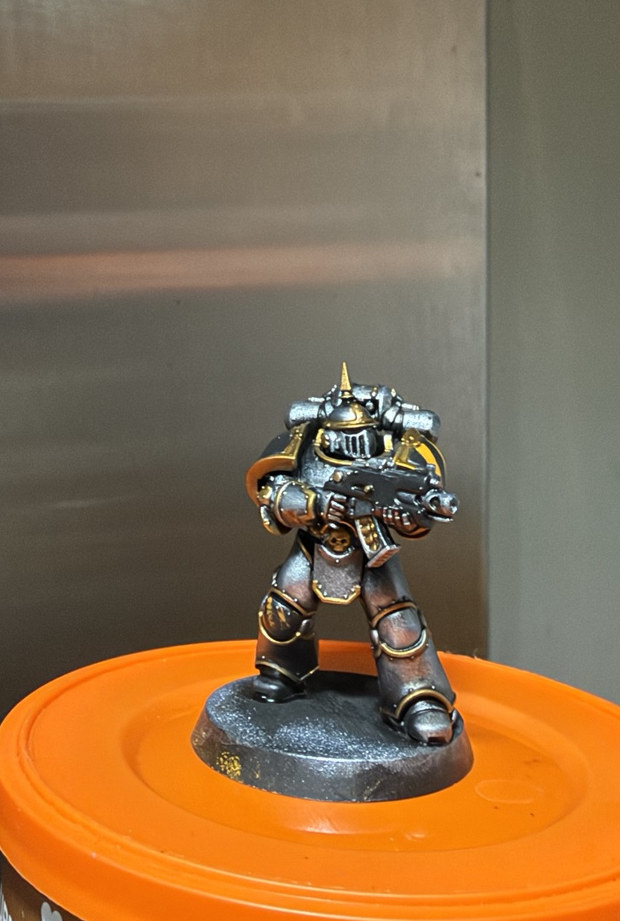
Lewis’s tip: No need to paint artificial scratches everywhere. The metallic sponge texture is already giving this scheme character.
Step 8: Full block-in check
A deliberate checkpoint before Marine Juice.
Paints and materials
- All preceding colours
- Detail brush for corrections
Method
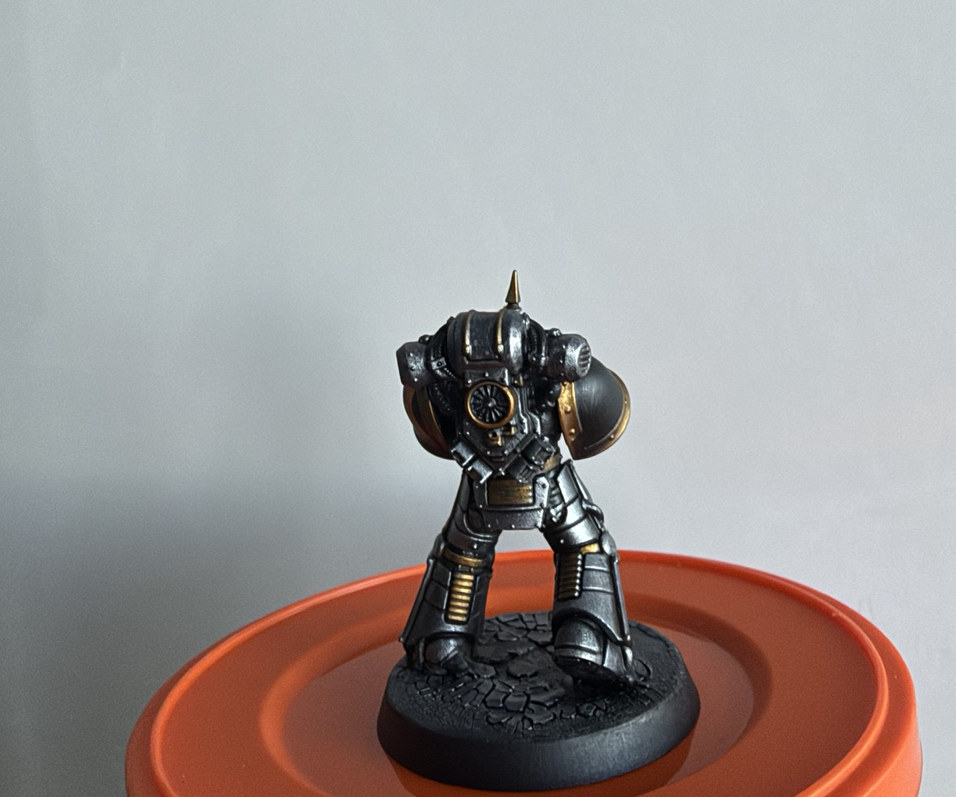
Inspect front, side and rear. You want visible iron armour, dark matte shoulder fields, cleaned-up hazards, gold trim, a black bolter and leather details. Correct bare spots and irregular edges now. This prevents the wash becoming a substitute for unfinished paintwork.
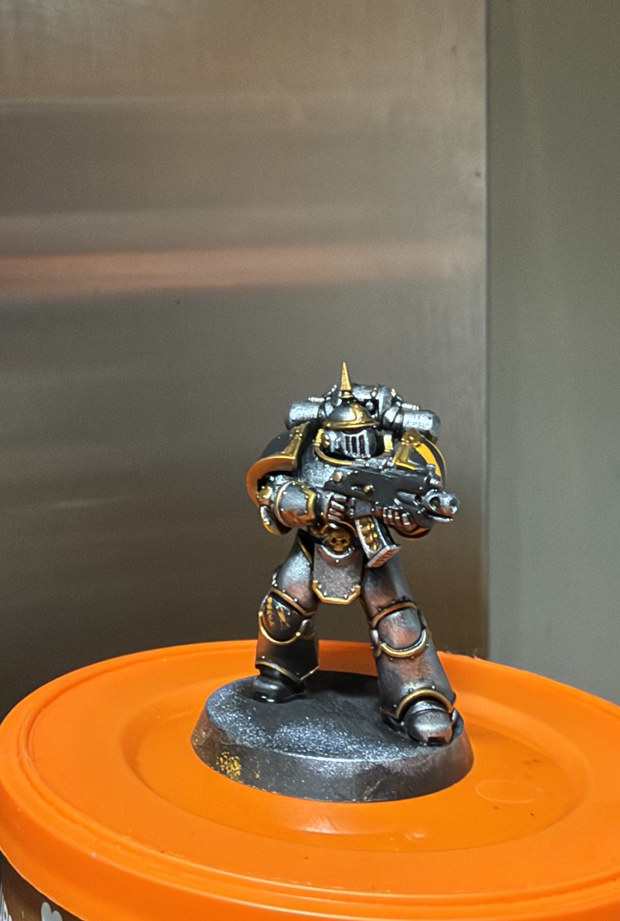
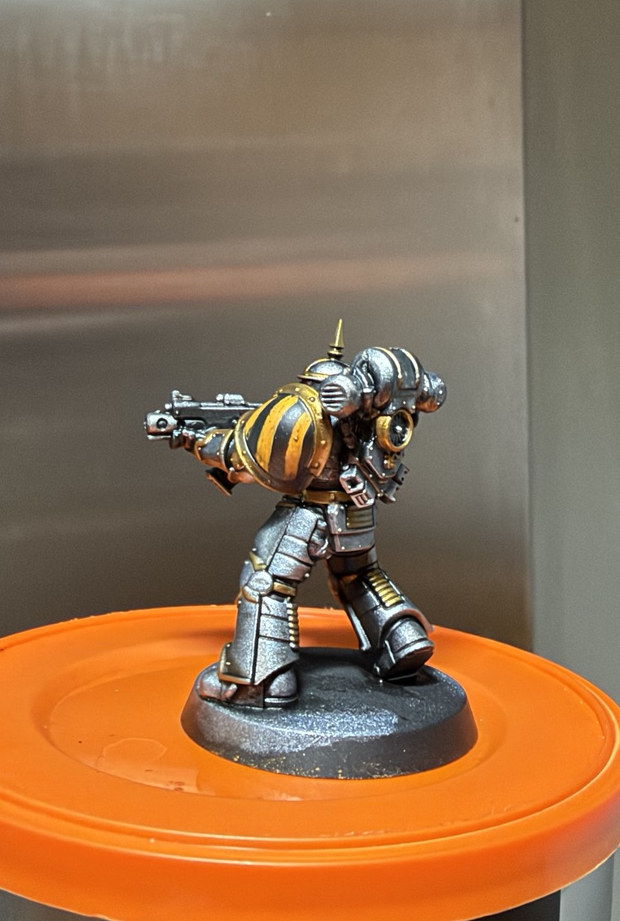
Lewis’s tip: The miniature should already read unmistakably as an Iron Warrior before its wash.
Step 9: Marine Juice
Shade only after the colour block-in is complete.
Paints and materials
- Army Painter Dark Tone - 1 part
- Citadel Reikland Fleshshade - 1 part
- Citadel Lahmian Medium - 1 part
Method
Mix equal parts Dark Tone, Reikland Fleshshade and Lahmian Medium. Work it over the metallic surfaces and into joins and rivets, avoiding heavy tide marks on broad plates. Let it dry fully before refining the steel. These are post-shade reference photos, not photographs of a wet wash.
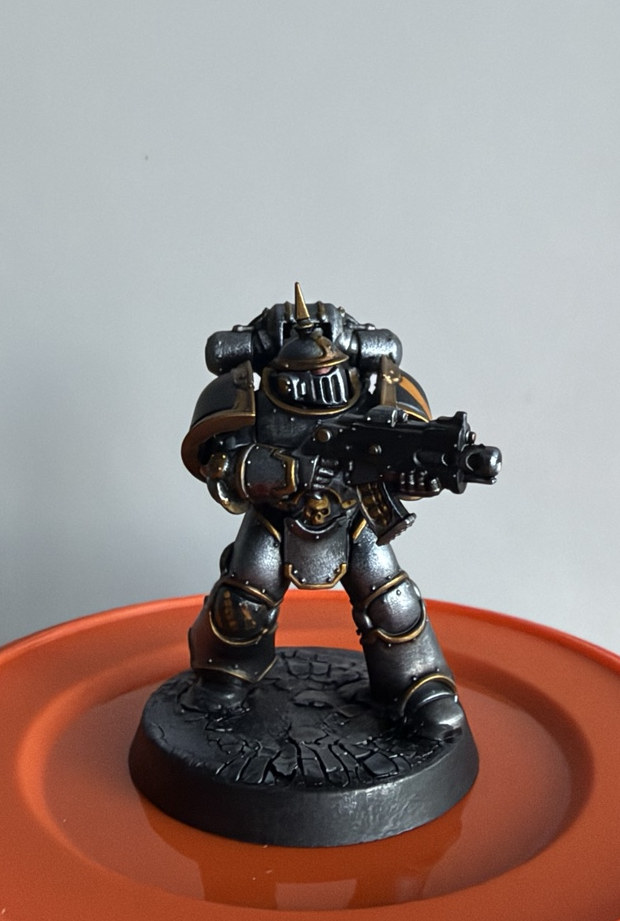
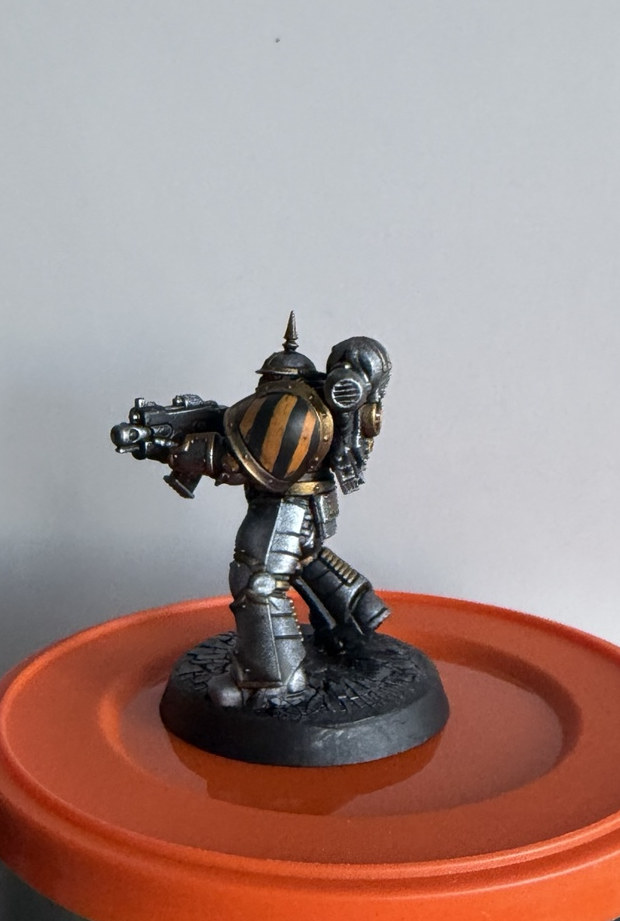
Lewis’s tip: The silver should become dark iron with reflected points, not an even grey wash.
Step 10: Re-establish the metals
Bring back a few bright reflections, not uniform edge-highlights.
Paints and materials
- Vallejo TMM Sterling Silver
- Vallejo TMM Imperial Gold
- Army Painter Matt Black / yellow as needed
Method
Use Sterling Silver on the highest exposed metal planes and a few battered corners. Re-pick Imperial Gold only where a highlight would catch. If the hazard stripes lost clarity, restore their edges with black and yellow. Leave shaded texture intact over most of the armour.
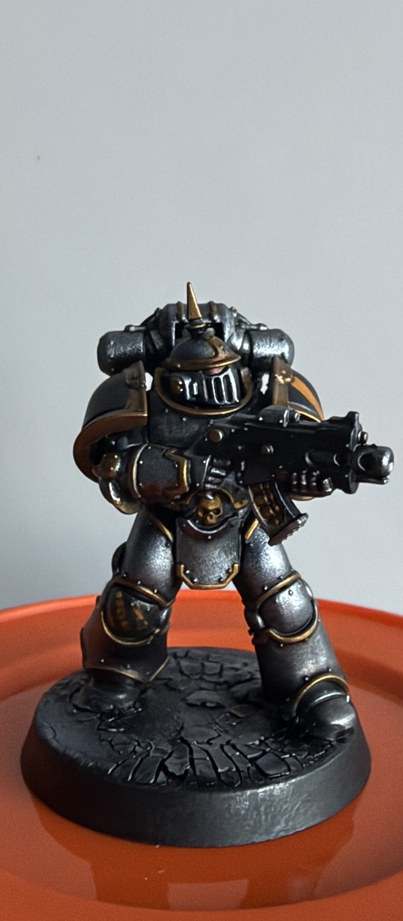
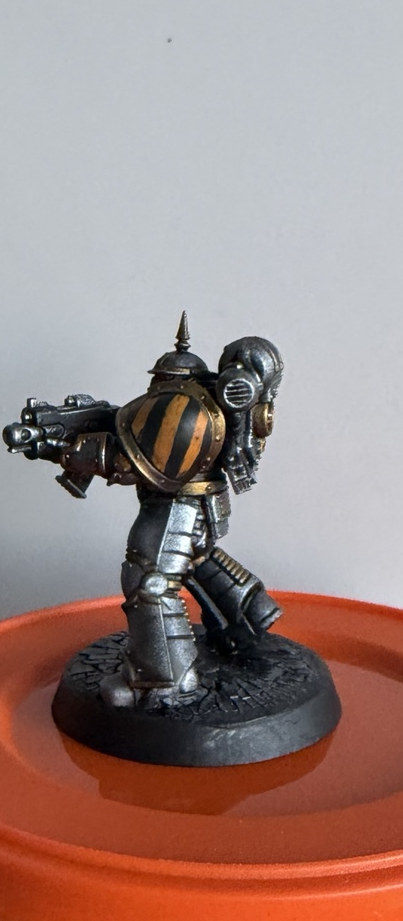
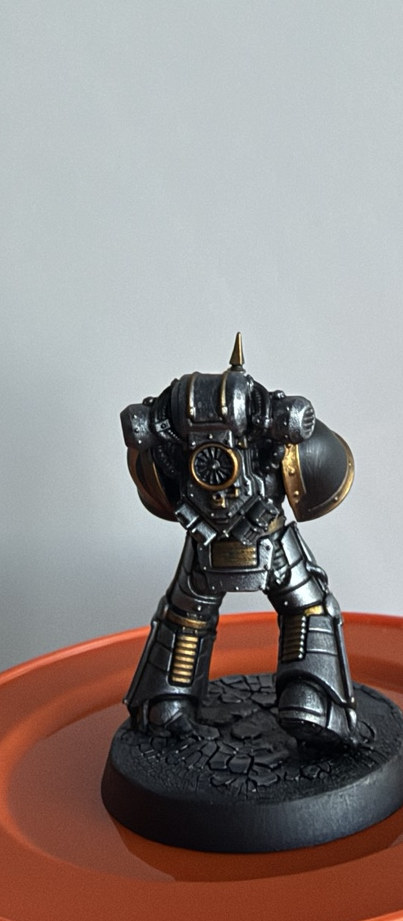
Lewis’s tip: The contrast between tiny bright metal points and deep shade makes this finish convincing.
Step 11: Crackle base + final rim
Keep the ground low-contrast so steel and hazards stay focal.
Paints and materials
- Dark crackle / textured basing medium
- Army Painter Fanatic Matt Black for rim
- Muted grey drybrush - optional
Method
Apply a dark crackle or rubble texture around the boots. Let it form and cure without disturbing it, then drybrush the raised texture with a muted grey if desired. Clean the outer rim to Matt Black. The pictures show the finished dark cracked-ground result.
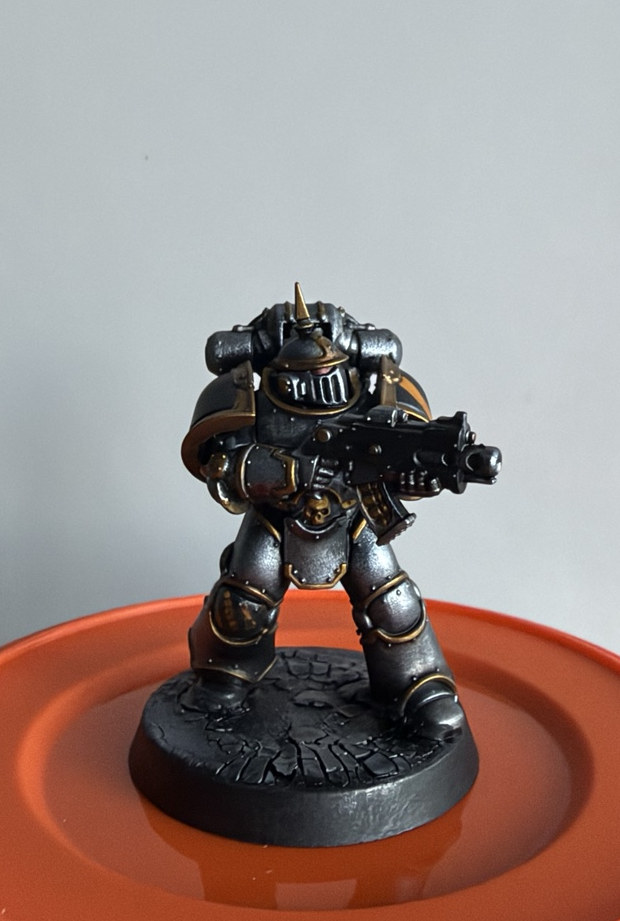
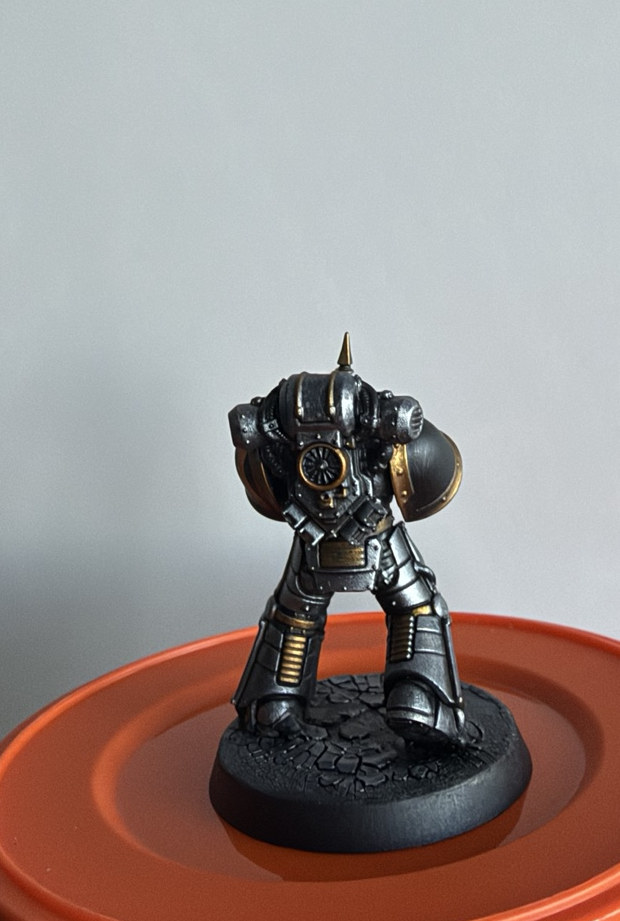
Lewis’s tip: Avoid a bright scenic base. Cold metal and the hazard shoulder should remain the first things you notice.
Finished model and recipe recap
- Colour Forge Matt Black spray primer.
- Sponge or drybrush Sterling Silver, saving black recesses.
- Matt Black weapon and shoulder fields; brush Imperial Gold trim.
- Paint yellow-and-black hazards; finish leather and hardware.
- Marine Juice 1:1:1 after full block-in; selectively restore metals.
- Finish on dark cracked ground with a black rim.
No airbrush required: Rugged IV Legion iron, not parade-ground polish.