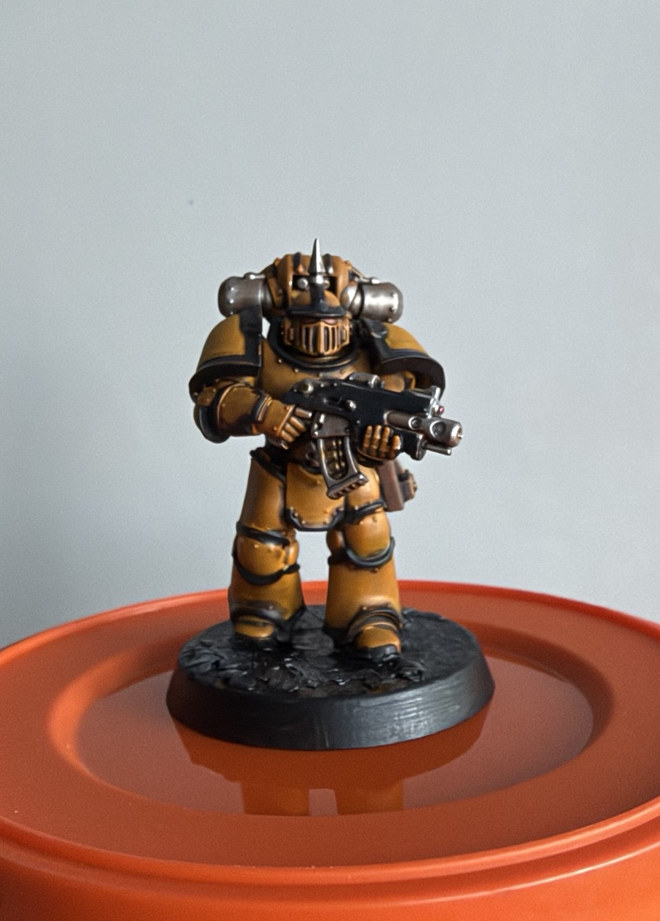
White Scars Horus Heresy : Step-by-Step Painting Guide
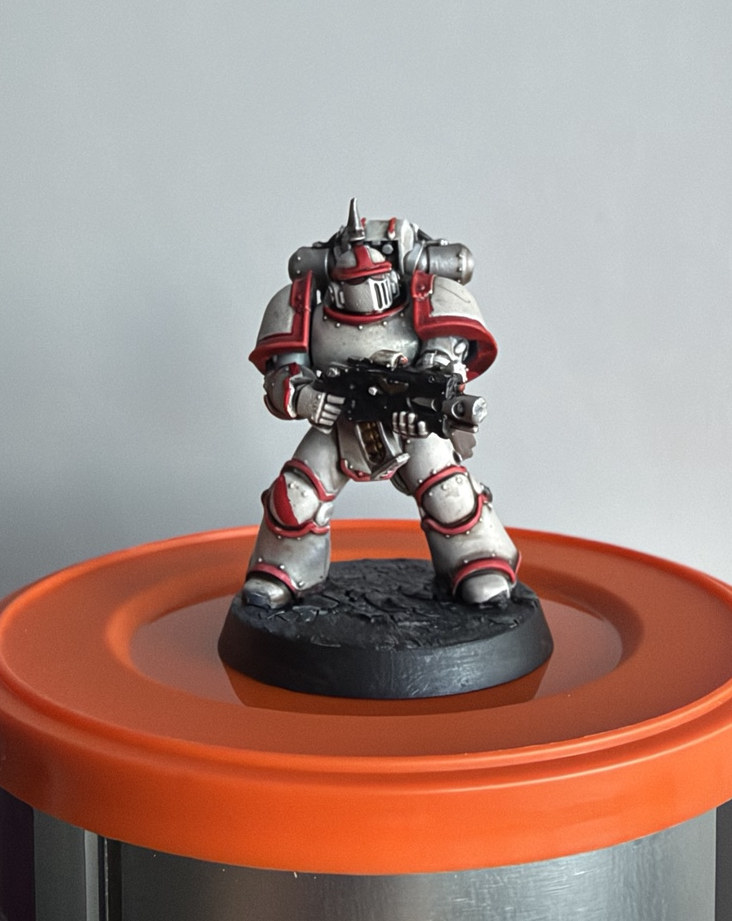
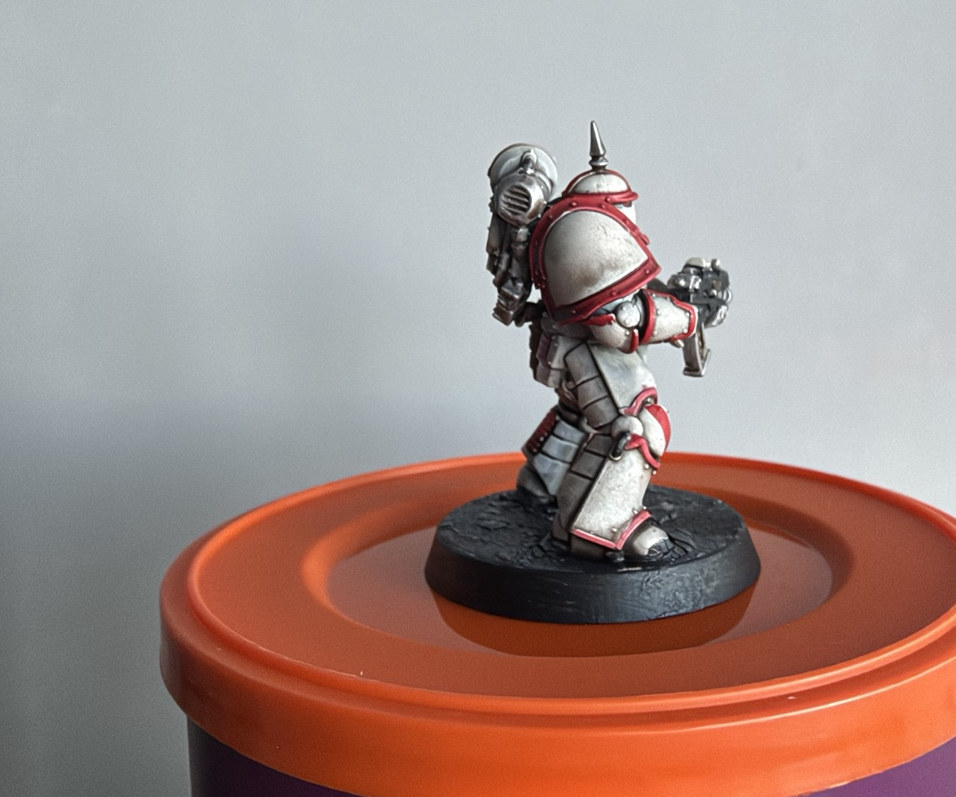
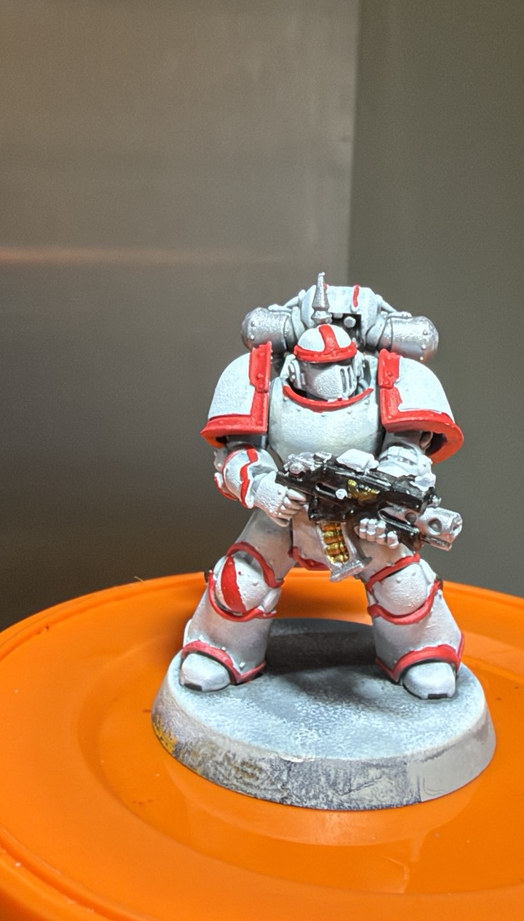
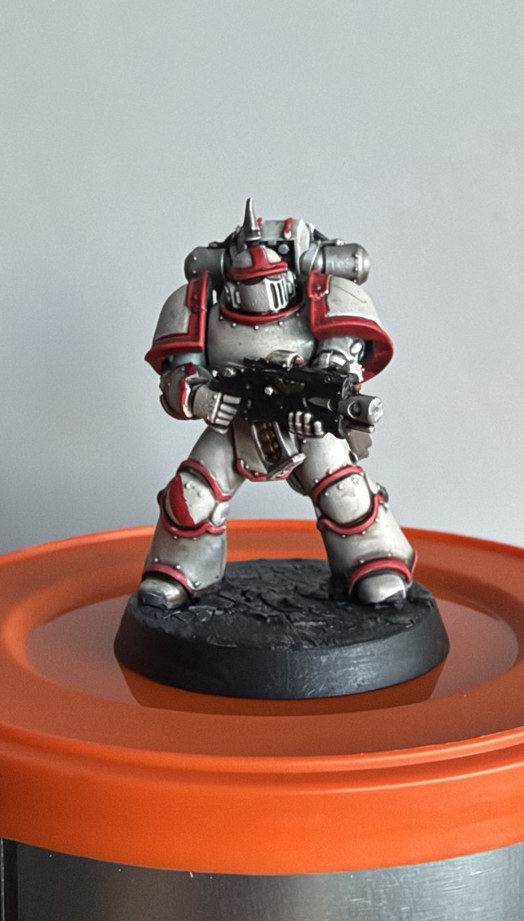
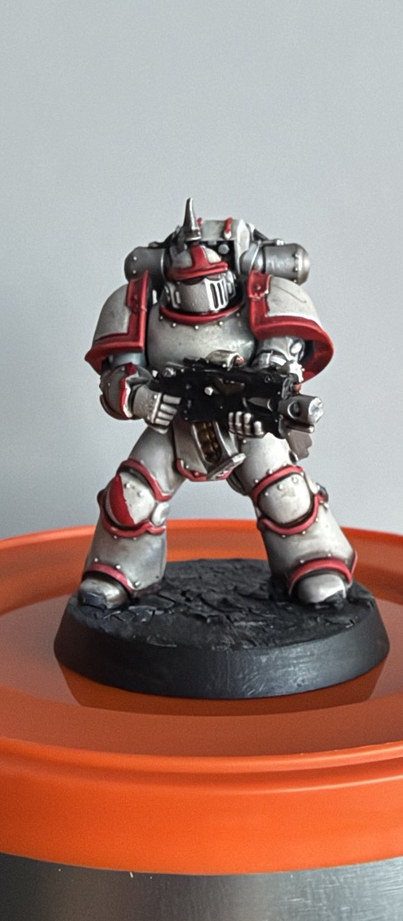
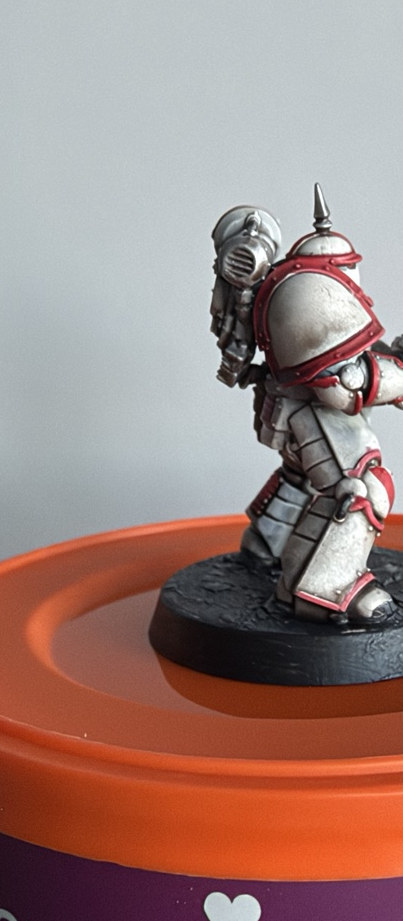
A cold V Legion white with crisp red trim and dark equipment. Citadel Grey Seer provides the foundation; the Warhammer Tone Pro Blackstone Void family creates cool depth without losing the white.

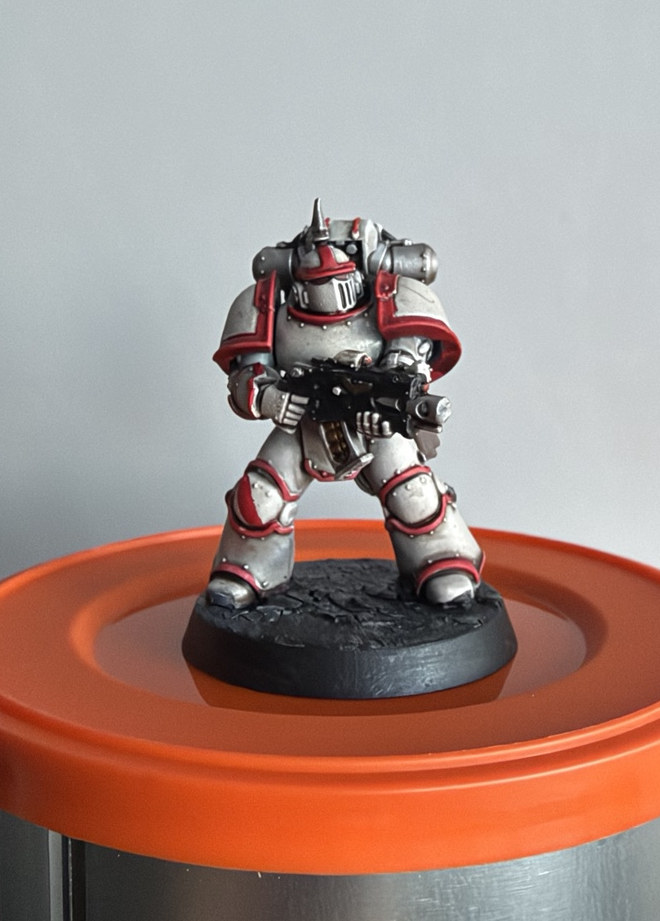
Keep the broad white plates light. Grey belongs in the joins; red and black define the Heresy shapes.
Before you start
Accurate primers, brush paints and documented photographic stages.
Step 1: Clean build
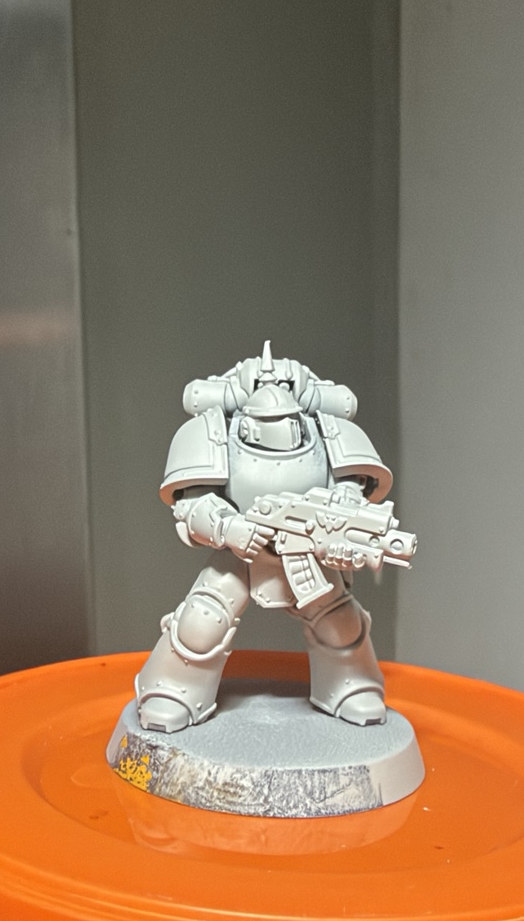
One Horus Heresy Mk III miniature, prepared before any primer.
Paints and materials
- Assembled Horus Heresy Mk III marine
- Hobby knife and fine file, as required
Method
Remove visible mould lines and check the helmet, shoulder rims, bolter and backpack joins. Make sure the underarms and inside of the greaves can be reached with a brush. The later paint effects work best over crisp plate edges.
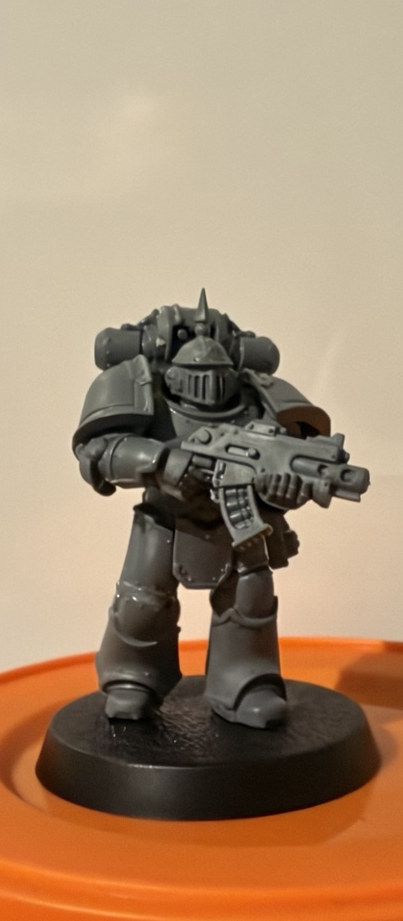
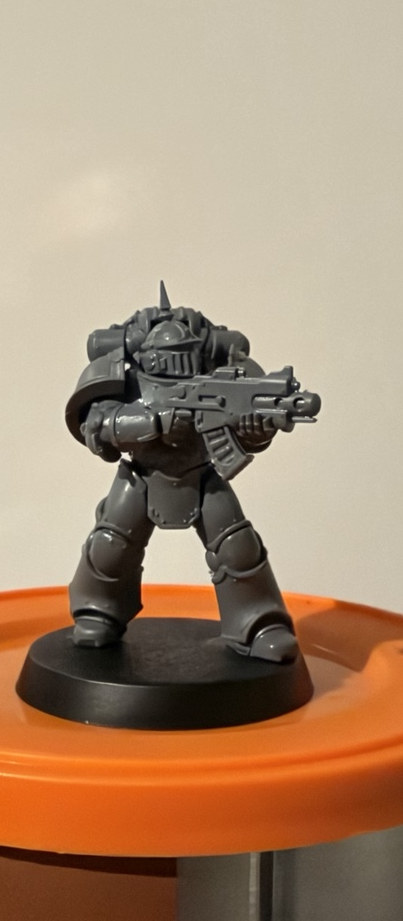
Lewis’s tip: Keep a clean starting photo from each side. It helps show exactly what each layer adds.
Step 2: Grey Seer primer
Citadel Grey Seer - the confirmed pale foundation.
Paints and materials
- Citadel Grey Seer spray primer
Method
Prime evenly with Citadel Grey Seer. Check the backpack, lower thighs and shoulder undersides for bare plastic. This pale neutral ground keeps the white bright while showing the sculpted armour lines. Allow the spray to dry fully before the grey and white work.
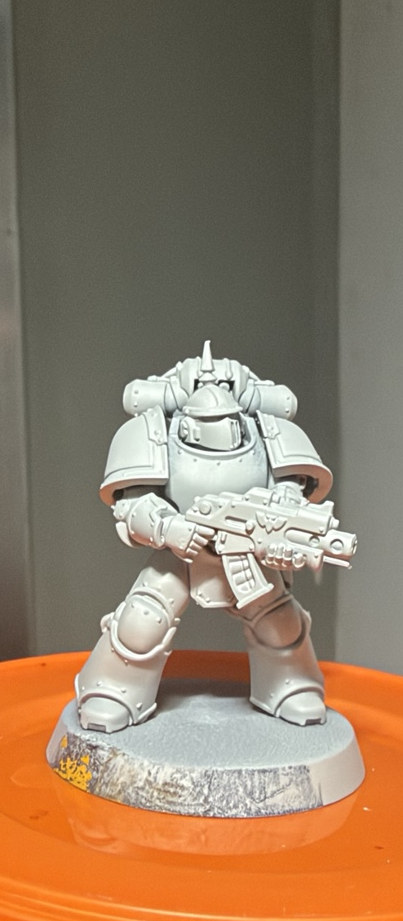
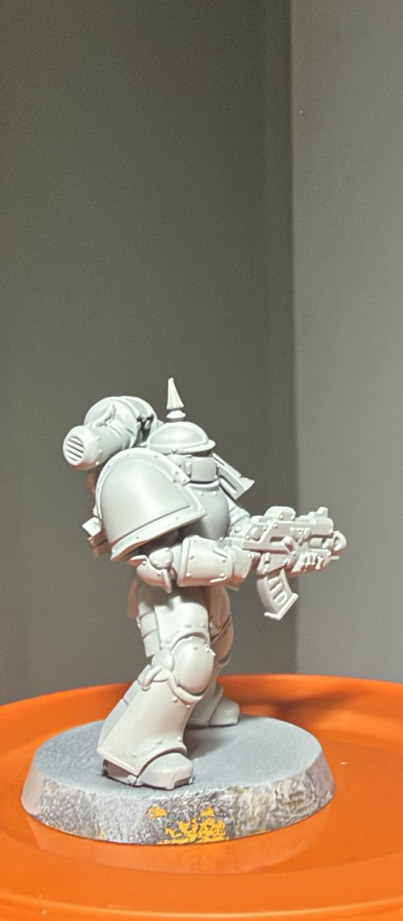
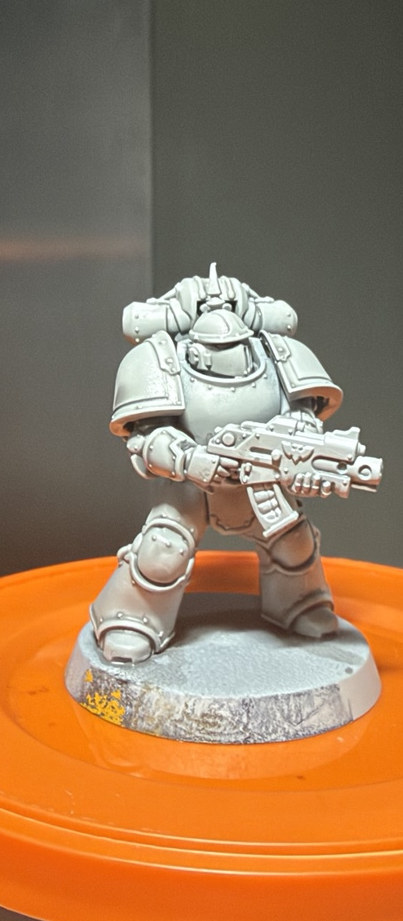
Lewis’s tip: Do not substitute a generic white spray in this recipe. Grey Seer is the actual starting colour.
Step 3: Cold white + Blackstone depth
Use Tone Pro greys for shape, while keeping the model recognisably white.
Paints and materials
- Warhammer Tone Pro Blackstone Void greys
- Soft sponge / controlled brush
- Blackstone Void light tone for recovery
Method
Use cooler mid- and lighter tones from the Blackstone Void family to add shadow at the base of armour curves and in joins. Sponge or layer gently across upper plates to recover a pale finish, keeping dark notes beneath the shoulders, knees and armour overlap. These are the pale-stage photo references; exact tone numbers were not recorded.
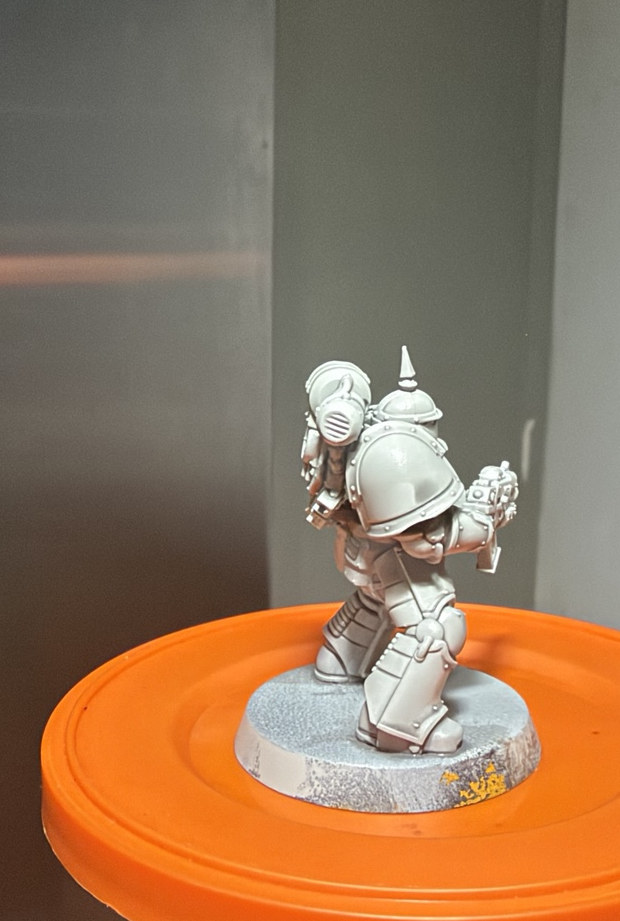
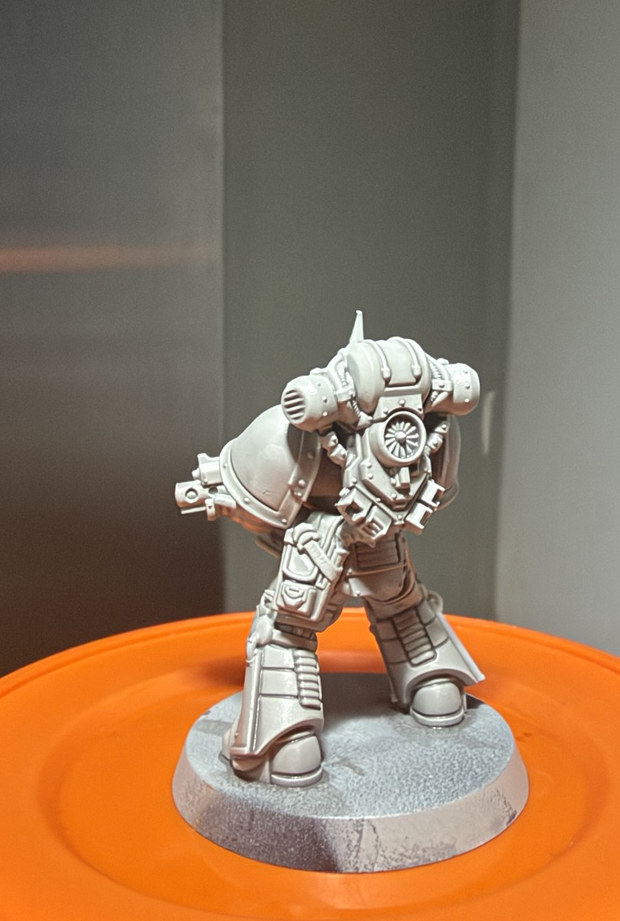
Lewis’s tip: White armour must remain the dominant impression. If the grey map takes over a plate, rebuild the exposed centre.
Step 4: Crisp V Legion red
Red shoulder rims, knee details, helmet markings and trim.
Paints and materials
- Army Painter Warpaints Fanatic red
- Fine detail brush
- Light Blackstone Void tone for corrections
Method
Paint the red border details carefully along the curved shoulder guards, collar and lower legs. Build each line from a steady narrow stroke, then correct mistakes with your light armour tone. The red must read strongly without making every single armour edge red.
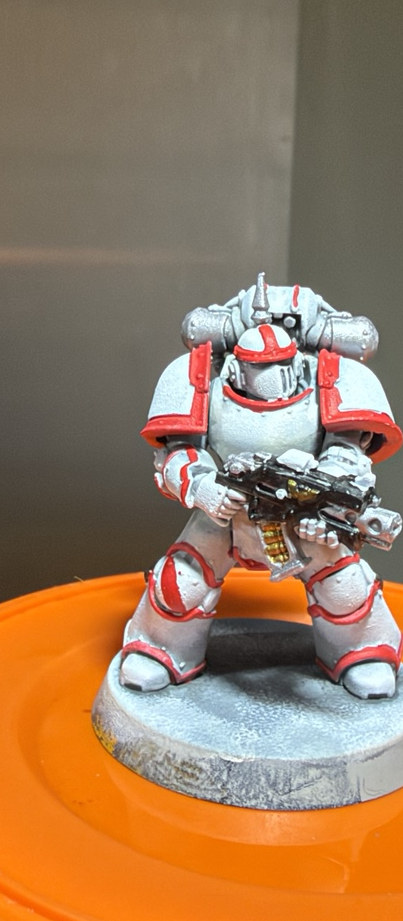
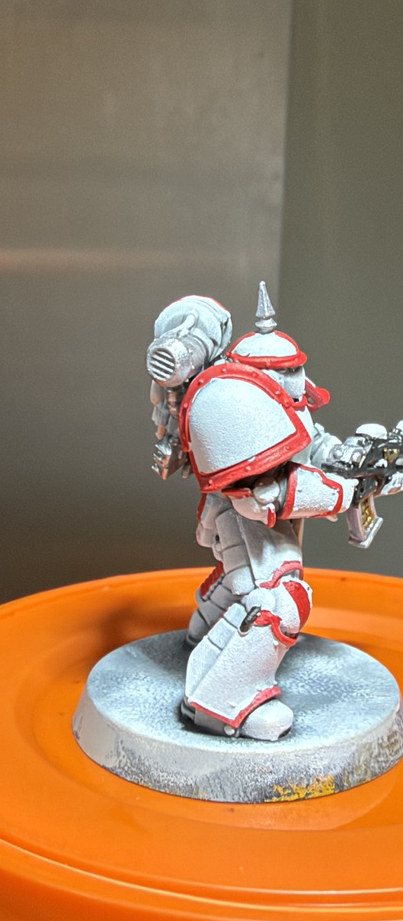
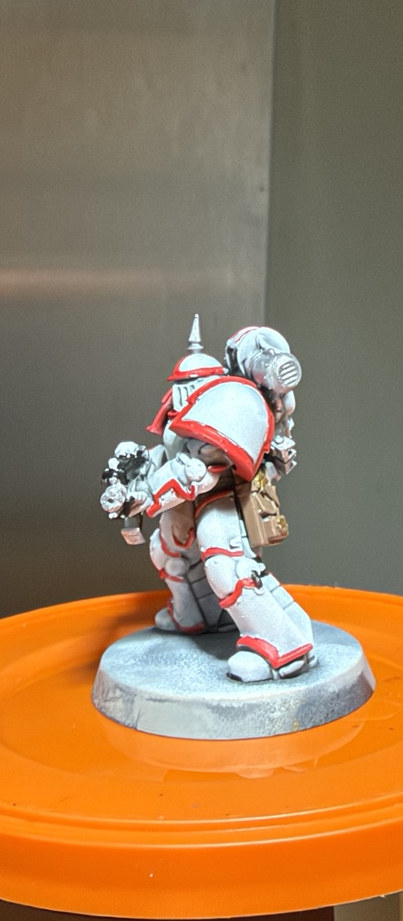
Lewis’s tip: Keep the same rim width all the way around the shoulder. This matters more than adding extra red decorations.
Step 5: Black bolter + joints
Dark mechanical structure anchors the bright white.
Paints and materials
- Army Painter Fanatic Matt Black
- Fine detail brush
Method
Block the bolter casing, flexible joints, visor grille and key deep gaps with Army Painter Matt Black. The solid black gun gives the white suit a strong focal area. Leave the metal barrel and equipment fittings for the next pass.
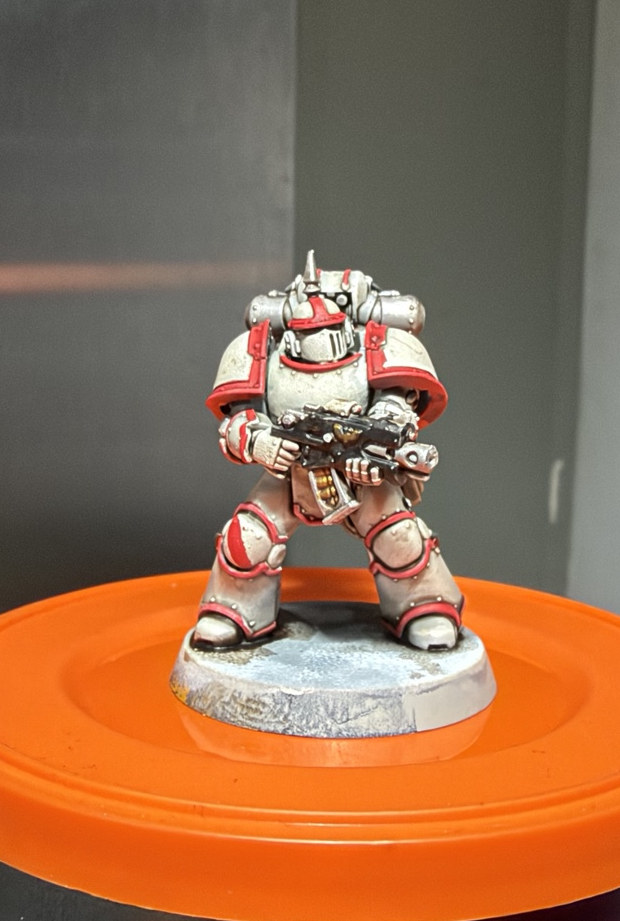
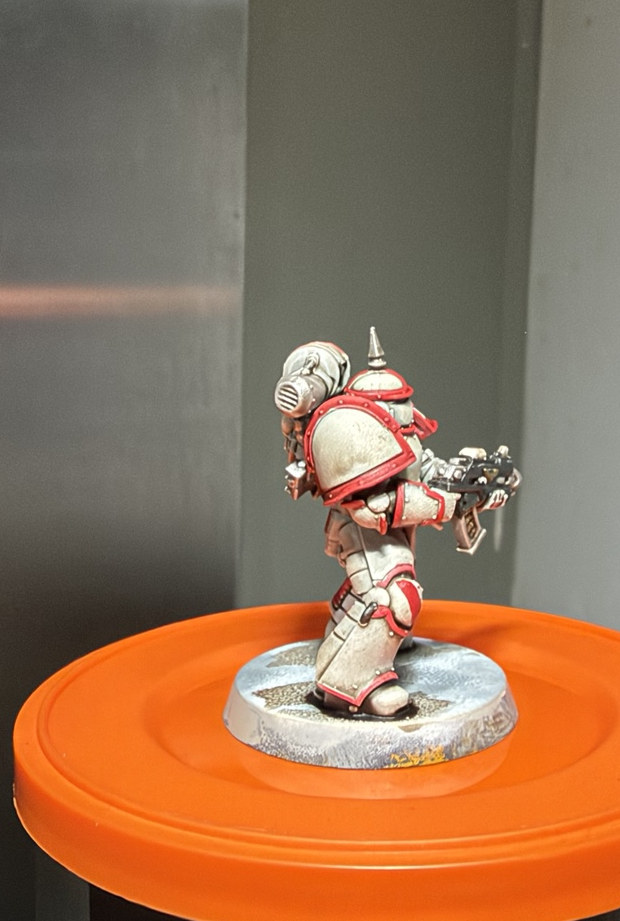
Lewis’s tip: An unbroken dark casing across the chest gives better contrast than silver tracing every edge.
Step 6: Silver + leather equipment
Finish the backpack, bolter fittings and pouches.
Paints and materials
- Vallejo TMM Sterling Silver
- Army Painter Fanatic Leather Brown
- Vallejo TMM Imperial Gold - limited
Method
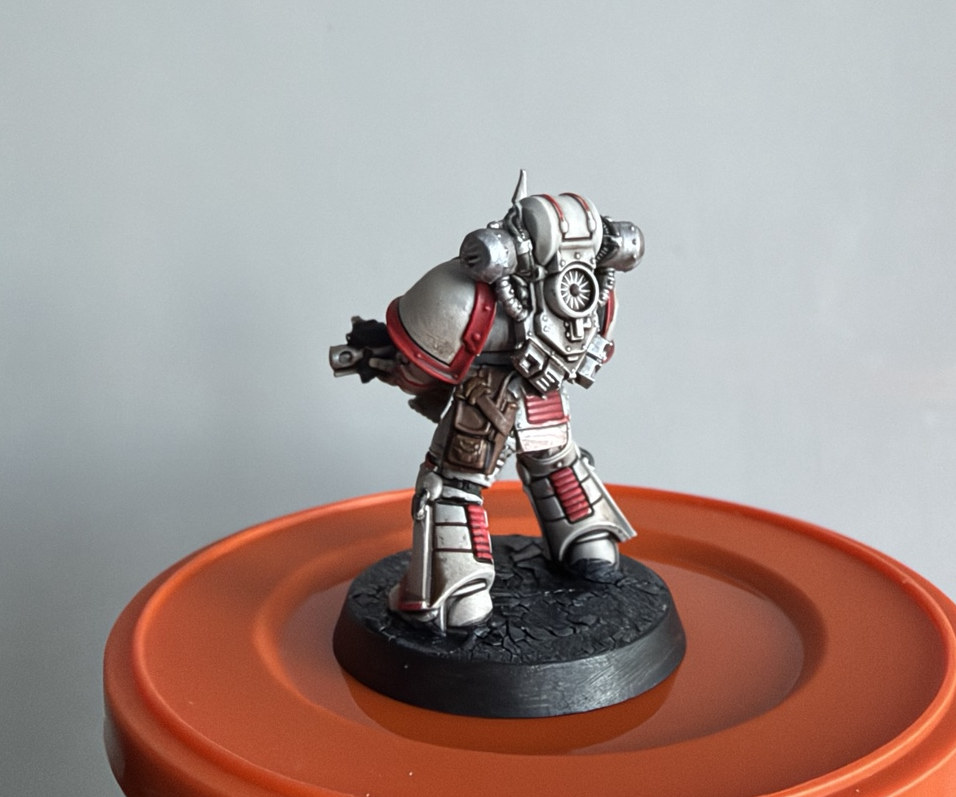
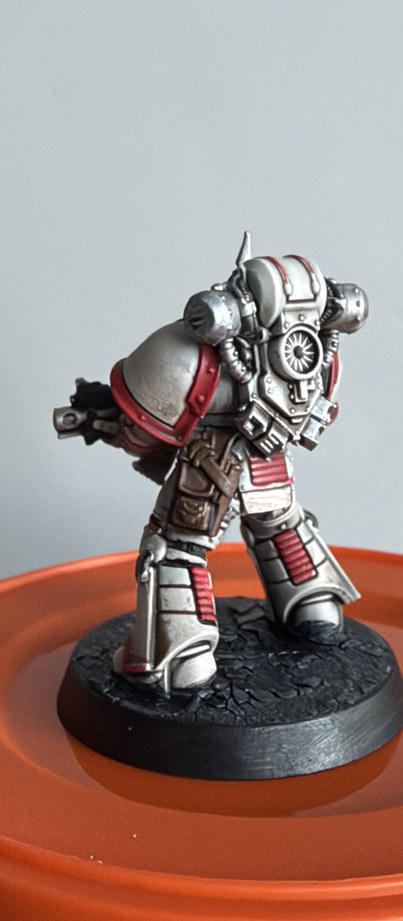
Brush Sterling Silver into the gun barrel, vents and selected backpack hardware. Use Leather Brown for pouches and belts. Small Imperial Gold points can be added where appropriate but should remain secondary to white armour and red trim.
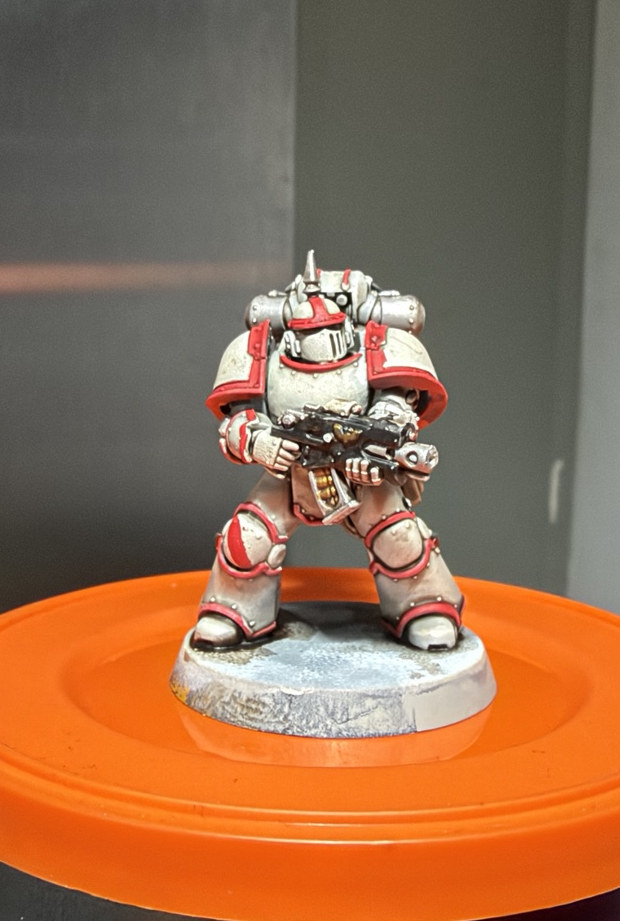
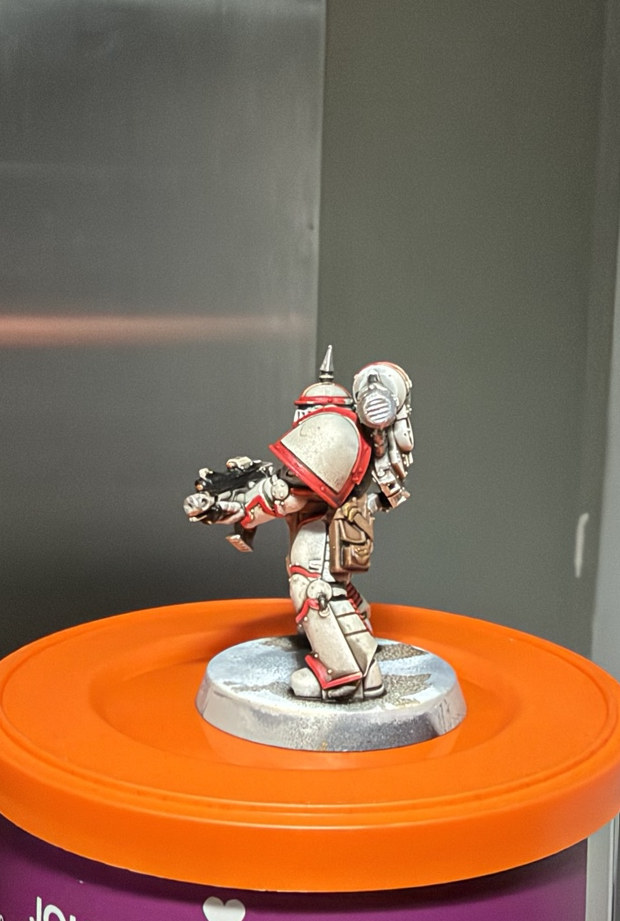
Lewis’s tip: Keep the metal mostly at functional fittings, not across the broad white armour panels.
Step 7: Block-in check
Check the model from all angles before final weathering.
Paints and materials
- All previously applied paint colours
- Fine correction brush
Method
Inspect shoulder rims, knees, backpack, visor, bolter and leather pouches. Clean the red against the white, fix black paint around the hands and check the silver barrel. All major colours should be complete before the final recess and grime work.
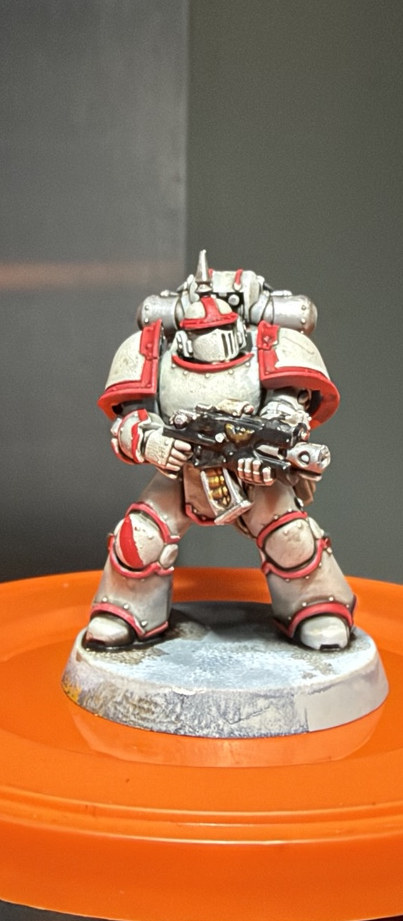
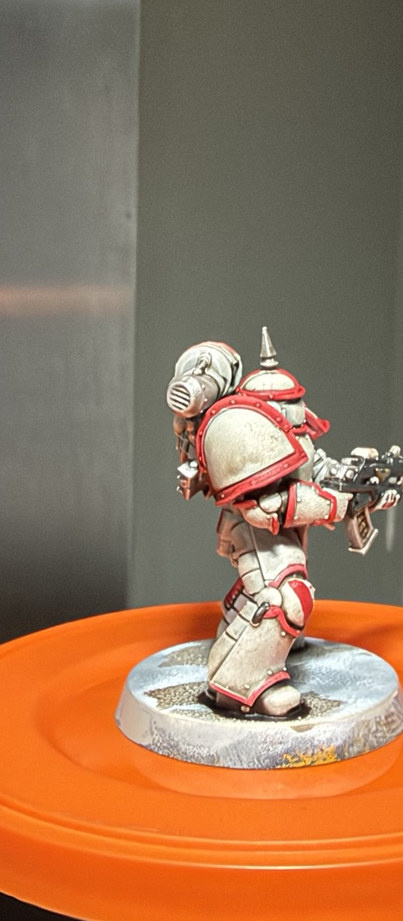
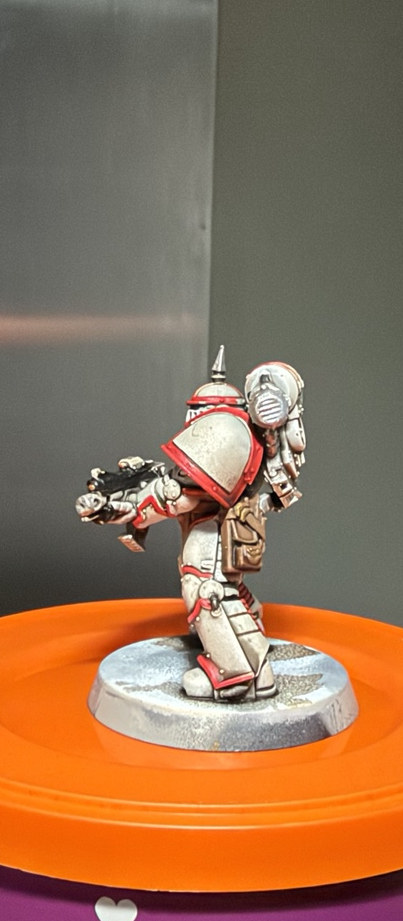
Lewis’s tip: If the white is already looking dull, do not add more wash - bring the light armour back first.
Step 8: Controlled recess shading
Keep white armour bright while making the joins look worn.
Paints and materials
- Tone Pro Blackstone Void darker grey
- Marine Juice 1:1:1 for dark fittings only
- Clean damp brush for excess
Method
Shade joins, below the shoulder rims and the greave separations, but preserve the main white surfaces. The usual Marine Juice mix can shade metal and dark fittings in small amounts; for white areas work with narrow, controlled dark-grey recesses rather than a heavy all-over brown wash. Photographs record the outcome, not the precise wash application.
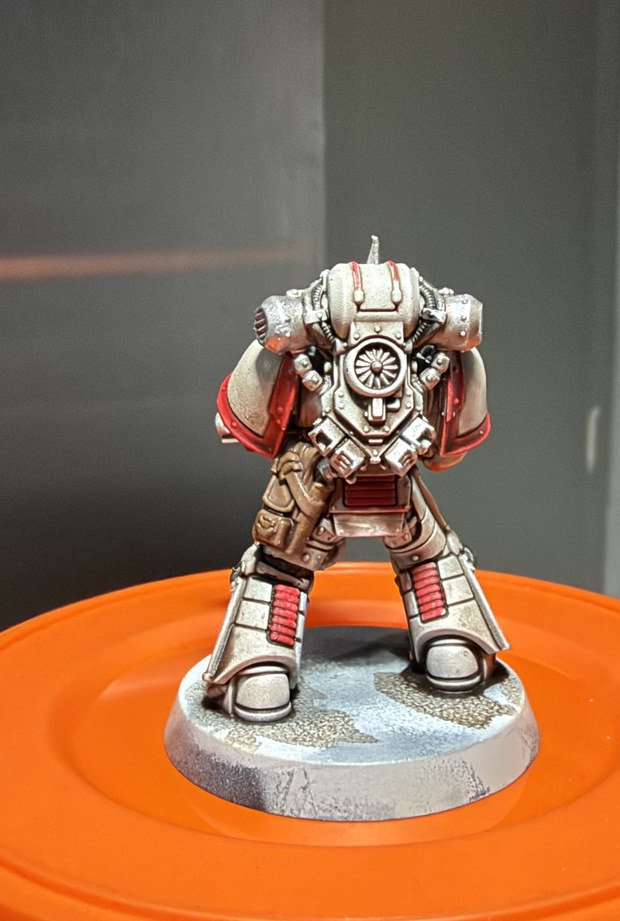
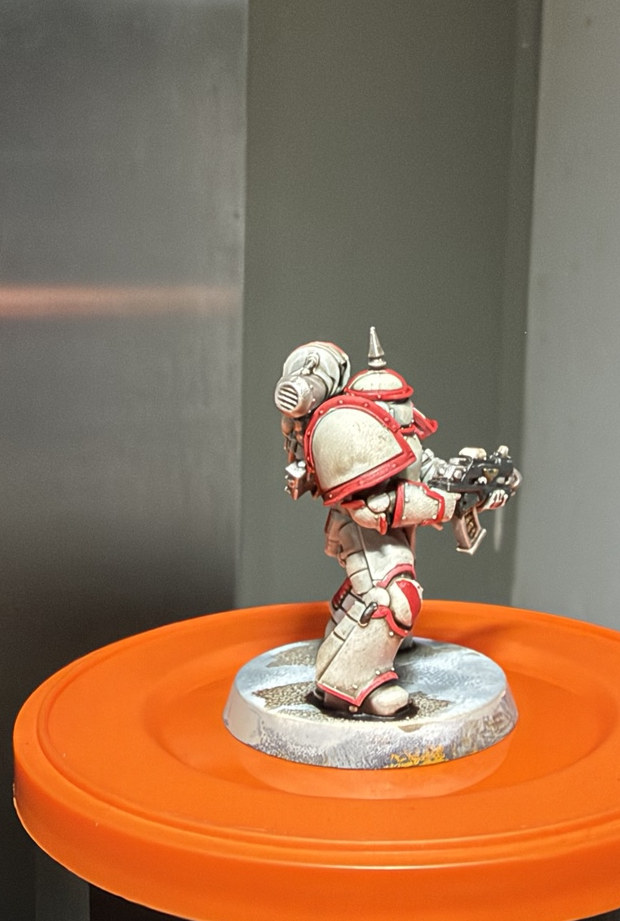
Lewis’s tip: Battle-worn white is a light model with selective grime, not a grey model with a few white edges.
Step 9: Restore light + red
Selective corrections restore the clean V Legion profile.
Paints and materials
- Warhammer Tone Pro Blackstone Void light tones
- Army Painter Fanatic red
- Vallejo TMM Sterling Silver
Method
Use a pale Blackstone Void tone to restore the shoulder centres, top edges of greaves and upper helmet. Correct dulled red borders with the same red as before. Re-pick tiny silver highlights without outlining the whole weapon. Maintain just enough texture for the battle-worn feel.
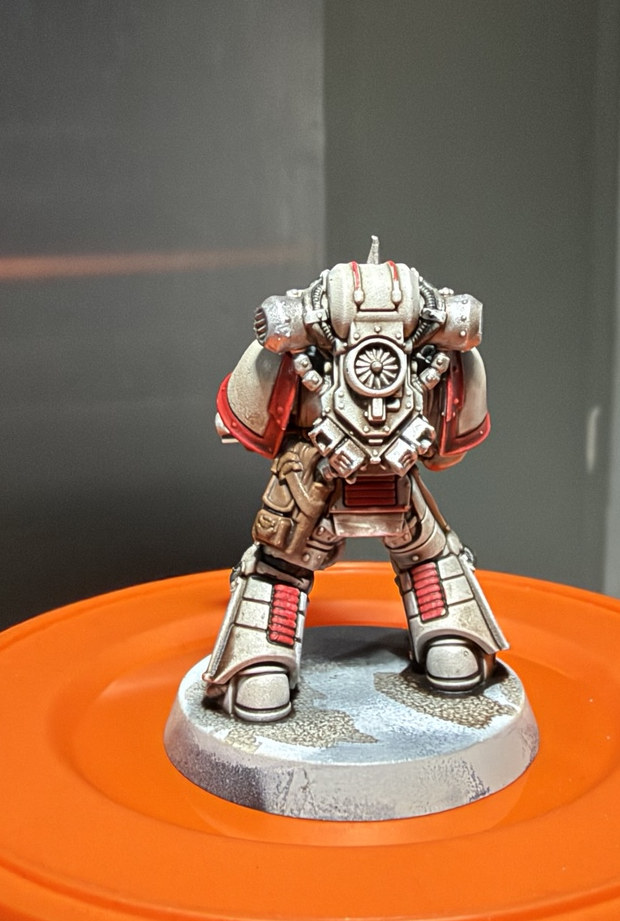
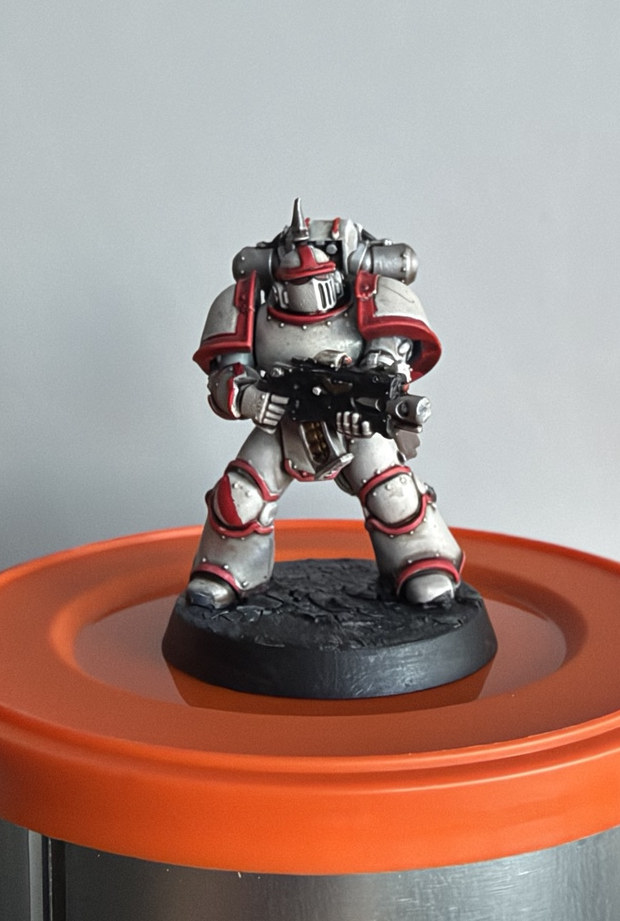
Lewis’s tip: Use your few sharp white marks where light naturally hits, not around every panel.
Step 10: Dark crackle base
The ground adds contrast to pale armour.
Paints and materials
- Dark crackle / cracked-earth texture
- Army Painter Fanatic Matt Black
- Muted grey for an optional drybrush
Method
Apply dark crackle or cracked-earth texture around the feet and let it fully cure. Keep the cracked surface near black; give the raised ridges a restrained grey drybrush if needed. Finish the base rim in Matt Black. These are completed-base photos.
Lewis’s tip: A dark base makes the White Scars silhouette read immediately on a display shelf.
Finished model and recipe recap
- Citadel Grey Seer primer - a pale, even foundation.
- Warhammer Tone Pro Blackstone Void greys for cold depth.
- Strong red Heresy trim; Matt Black bolter and joints.
- Brush silver and leather details before final shading.
- Keep grime selective; recover bright white and red where needed.
- Dark cracked earth with a clean black rim.
White should stay white: Cold greys and crisp red do the heavy lifting.